
- How to Diagnose an Alternator Problem
- What Tools Are Needed to Change Alternator
- Step-by-Step Guide to Replacing an Alternator
- How to Test the Output of a New Alternator
- Common Causes of Alternator Failure
- Choosing the Right Replacement Alternator
- Benefits of Upgrading Your Vehicle’s Alternator
- Common Problems with Aftermarket Alternators
- Q&A
How to Diagnose an Alternator Problem
Diagnosing an alternator problem can be a difficult task (as is when you’re trying to learn how to change an alternator), as there are many potential causes. However, with the right knowledge and tools, it is possible to identify the issue and take steps to resolve it.
The first step in diagnosing an alternator problem is to check the battery voltage. If the voltage is low or if there are signs of battery terminal corrosion, then this could indicate a faulty alternator. It is also important to check for any loose connections or broken wires that may be causing problems with power delivery from the alternator.
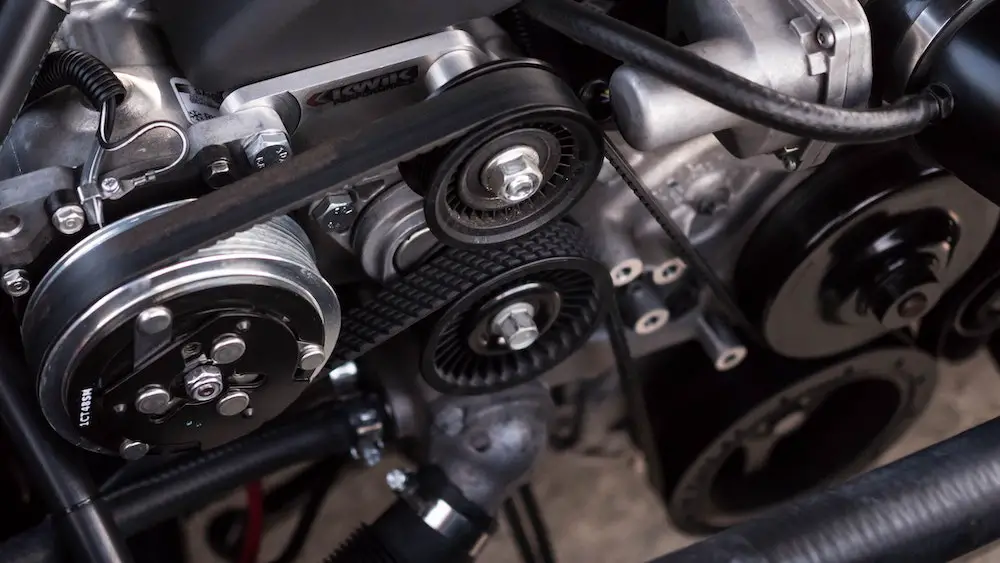
Next, you should inspect all of the belts connected to your vehicle’s engine for signs of wear or damage. If any of these belts appear worn out or damaged, they should be replaced immediately as they could be causing issues with your alternator’s performance.
If all else fails, you may need to take your vehicle to a mechanic for further diagnosis and repair work on your alternator system. The mechanic will likely use specialized diagnostic equipment such as an oscilloscope or multimeter to determine what exactly is wrong with your vehicle’s electrical system and how best to fix it.
By following these steps and taking appropriate action when necessary to figure out how to tell if your alternator is bad and how to know if your alternator is bad, you can diagnose an alternator problem quickly and effectively so that you can get back on the road safely again soon.
What Tools Are Needed to Change an Alternator
Changing an alternator requires a few basic tools (before you proceed with figuring out how to change an alternator). These include a socket set, adjustable wrench, screwdriver, and pliers. Additionally, it is helpful to have a jack and jack stands for safely raising the vehicle off the ground.
To begin the process of changing an alternator, first, use the jack to raise the vehicle off of the ground and secure it with jack stands. Then disconnect both battery cables from their terminals on the battery. Next, remove any components that may be blocking access to the alternator such as air intake hoses or other engine parts.
Once these steps are complete, use a socket set to remove all bolts holding in place any brackets that may be securing the alternator in place. After this is done you can then unplug any electrical connections connected to your old alternator and remove it from its mounting bracket.
Finally, install your new alternator by reversing these steps: plugging in all electrical connections; bolting down any brackets; replacing air intake hoses or other engine parts; reconnecting both battery cables; and lowering your vehicle back onto its wheels using your jack stand before removing them from underneath your car.
Step-by-Step Guide to Replacing an Alternator
So, here’s a quick and simple guide on how to change an alternator (once you’ve figured out how to check if the alternator is bad):
Step 1: Disconnect the Battery
Before you begin replacing an alternator, it is important to disconnect the battery. This will prevent any electrical shocks or damage to your vehicle. To do this, locate the negative terminal of the battery (in addition to learning where is an alternator located) and use a wrench to loosen and remove it.
Step 2: Remove the Old Alternator
Once you have disconnected the battery, you can begin removing your old alternator. Start by loosening and removing all of its mounting bolts with a wrench or socket set. Then, carefully pull out the alternator from its housing and disconnect any wiring harnesses that are connected to it.
Step 3: Install a New Alternator
Now that your old alternator has been removed, you can install your new one in its place. Begin by connecting all of its wiring harnesses before inserting it into its housing and securing it with mounting bolts using a wrench or socket set. For more insight, check out our guide on how long does an alternator last.
Step 4: Reconnect Battery
Once your new alternator has been installed and you’ve completed replacing your alternator, reconnect the negative terminal of your car’s battery using a wrench or socket set. Make sure that all connections are secure before moving on to step 5.
Step 5: Test the New Alternator
Finally, start up your engine and test out how well your new alternator (for more insight, check out our guide on how to test a car battery) is working by turning on various electrical components such as headlights or air conditioning systems to ensure they are functioning properly with no issues arising from their connection with the new part.
How to Test the Output of a New Alternator
Testing the output of a new alternator is an important step in ensuring that your vehicle’s electrical system is functioning properly. To ensure accurate results, it is important to follow the steps outlined below.
1. Begin by connecting a voltmeter to the battery terminals and noting the voltage reading. This will provide a baseline for comparison when testing the alternator output. This also helps you to figure out whether you have a bad battery vs a bad alternator.
2. Start up your engine and allow it to idle for several minutes before taking another voltage reading with the voltmeter connected to the battery terminals. The reading should be higher than when you first tested it, indicating that your alternator is working correctly and charging your battery as expected.
3. Next, increase engine speed by revving it up slightly and take another voltage reading with the voltmeter connected to the battery terminals again; this time, you should see an even higher voltage than before, indicating that your alternator is producing more power as engine speed increases.
4. Finally, turn off all electrical accessories such as headlights or air conditioning while keeping engine speed constant; this will reduce demand on your alternator so you can measure its maximum output capacity without any additional load on its system from other components in use at once (such as lights or AC). Take one last voltage reading with the voltmeter connected to battery terminals; if this number matches or exceeds what was measured during step 2 then you know that your new alternator has passed its test successfully.
Common Causes of Alternator Failure and How To Avoid Them
Alternator failure is a common problem that can cause a variety of issues with your vehicle. It is important to understand the causes of alternator failure and how to avoid them to keep your car running smoothly.
- The most common cause of alternator failure is due to wear and tear on the internal components over time. This can be caused by age, heat, vibration, or other environmental factors. As the alternator ages, its internal parts become less efficient at producing electricity which can lead to decreased performance or complete failure. To avoid this type of issue it is important to have regular maintenance done on your vehicle’s electrical system including replacing worn-out parts as needed.
- Another common cause of alternator failure is due to improper installation or wiring problems. If an alternator has been installed incorrectly it may not be able to produce enough power for the vehicle’s needs leading to decreased performance or complete breakdowns. To prevent this from happening it is important that any electrical work done on your car should be performed by a qualified technician who knows how to properly install and wire an alternator correctly.
- Finally, another potential cause of alternator failure could be due to faulty components such as bearings or brushes inside the unit itself which can lead to overheating and eventual breakdowns if not addressed quickly enough. To prevent this from happening it is important that you check all components regularly for signs of wear and tear and replace them as needed before they become too damaged for an alternator repair or an alternator replacement altogether.
By understanding these common causes of alternator failures you will be better equipped with knowledge on how best to maintain your vehicle’s electrical system so that you can avoid costly repairs (not to mention the cost of a new alternator) down the line due to these types of issues arising in future years ahead.
Tips for Choosing the Right Replacement Alternator
1. Determine the type of alternator you need. Alternators come in a variety of sizes and types, so it is important to know what type your vehicle requires before making a purchase. Check your owner’s manual or contact an automotive parts store for assistance in determining the correct alternator for your vehicle.
2. Consider the amperage rating of the alternator you need. The amperage rating should be equal to or greater than that of the original alternator installed on your vehicle when it was manufactured. If you are unsure, consult with an automotive parts specialist who can help you determine which size is best for your needs.
3. Look at brand name options (such as the best brand of alternator systems) when selecting an alternator replacement part. Many brands offer quality products that are designed to last longer and provide better performance than generic alternatives, so consider investing in a name-brand product if possible to ensure optimal performance from your new part over time.
4. Compare prices between different retailers before making a purchase decision on an alternator replacement part for your vehicle. Prices can vary significantly between different stores and online retailers, so take some time to shop around and compare prices before settling on one particular option.
5. Read customer reviews about any potential purchases prior to committing to buy them. Customer reviews can provide valuable insight into how well certain products perform over time, as well as any potential issues they may have experienced with their own installations. This information can help guide you toward making an informed decision about which product is right for you and your car’s needs.
The Benefits of Upgrading Your Vehicle’s Alternator
The alternator is an essential component of any vehicle, as it helps to keep the battery charged and powers all of the electrical components. Upgrading your vehicle’s alternator can provide a number of benefits, including improved performance, increased reliability, and better fuel economy.
- One of the primary advantages of upgrading your vehicle’s alternator is improved performance. A higher-output alternator will be able to provide more power for all of your electrical components, such as headlights and audio systems. This can help ensure that these components are running at their peak efficiency and will not be affected by voltage drops or other issues caused by a weak or failing alternator.
- Another benefit to upgrading your vehicle’s alternator is increased reliability. A higher-output model will be able to handle more load without becoming overworked or failing prematurely due to excessive strain on its internal components. This can help reduce the risk of unexpected breakdowns due to an underpowered or faulty part in your car’s electrical system.
- Finally, upgrading your vehicle’s alternator can also lead to better fuel economy. By providing more power for all of the electrical components in your car, you may find that you are using less fuel overall since those parts are not having to work harder than necessary in order for them to function properly.
In conclusion, there are many benefits associated with upgrading your vehicle’s alternator including improved performance, increased reliability, and better fuel economy. If you have been considering replacing or upgrading this important component in your car’s engine system then it may be worth looking into further so that you can take advantage of these potential benefits while also ensuring that all parts within the system remain functioning optimally at all times.
Troubleshooting Common Problems with Aftermarket Alternators
Aftermarket alternators are a popular choice for many vehicle owners, as they offer a cost-effective way to replace an aging or malfunctioning alternator. However, aftermarket alternators can sometimes be prone to problems that require troubleshooting. Here are some of the most common issues and how to address them:
1. Alternator Not Charging: If your aftermarket alternator is not charging the battery, it could be due to a faulty connection between the battery and the alternator itself. Check all connections and make sure they are secure and free from corrosion or damage. Additionally, check that all fuses (including the alternator fuse) related to the charging system are in good condition.
2. Alternator Overheating: An overheating aftermarket alternator can cause serious damage if left unchecked. Make sure that there is adequate airflow around the unit by checking for any obstructions such as dirt or debris buildup in front of it or around its cooling fins on its sides and backside. Additionally, check for any loose wiring connections which may be causing an electrical short circuit leading to excessive heat generation within the unit itself.
3. Alternator Making Unusual Noises: If your aftermarket alternator is making unusual noises such as grinding or squealing sounds then this could indicate a problem with one of its internal components such as bearings or brushes wearing out prematurely due to age or lack of maintenance over time. To fix this issue you will need to have it inspected by a qualified technician who can diagnose what needs replacing before attempting any repairs yourself.
4. Alternator Not Working at All: In some cases, an aftermarket alternator may simply stop working altogether without warning (not even an alternator warning light). This could be caused by either an electrical fault within its circuitry, worn-out internal components, incorrect installation, poor quality parts used during manufacture, etc. To diagnose this issue you will need professional help from someone who has experience with these types of units so they can identify what needs replacing before attempting any repairs yourself.
How To Change An Alternator: Q&A
1. What tools do I need to change an alternator?
You will need a socket set, a wrench set, and a screwdriver. You may also need an adjustable wrench or pliers depending on the type of alternator you are replacing. Additionally, you may need some electrical tape and wire cutters if you are wiring in the new alternator.
2. How do I remove the old alternator?
First, disconnect the negative battery cable from your car’s battery and then locate the alternator belt tensioner pulley. Loosen it with your wrench or socket set until it is loose enough to slip off of the pulley wheel on your old alternator. Then remove any bolts that hold it in place and carefully pull out the old unit from its mounting bracket.
3. How do I install a new alternator?
First, make sure that all connections are properly connected before installing your new unit into its mounting bracket (if applicable). Then slide in your new unit into place and secure it with any necessary bolts or screws that were removed when taking out the old one. Finally, reconnect all electrical connections as needed before re-installing your belt tensioner pulley wheel onto its shaft on top of your new unit and tightening it down with either a wrench or socket set until snug but not overly tight so as not to damage anything else in the process.
4. What should I check after installing my new alternator?
After installation is complete, make sure to check for proper voltage output by connecting an appropriate voltmeter across both terminals of your battery while running at idle speed for several minutes; this will ensure that everything is working correctly before putting strain on other components such as lights or accessories which could be damaged if too much current is drawn from them due to incorrect voltage output from an improperly installed/wired-in replacement part.
5. Are there any safety precautions I should take when changing my car’s alternator?
Yes. Always wear protective eyewear when working around electricity as sparks can fly off during installation/removal processes which could cause serious injury if they come into contact with skin or eyes directly; additionally, always disconnect both positive & negative cables from their respective terminals prior to beginning work so as not to create short circuits which could cause further damage than just replacing parts alone would have done otherwise.
6. What type of maintenance should be done after changing my car’s Alternator?
Once you have successfully changed out your car’s alternator, make sure to check all connections for tightness & corrosion resistance periodically (at least once every 6 months) so as not to create any potential problems down the line due to loose wires/connections causing intermittent power issues over time; additionally keep up regular oil changes & tune-ups according to manufacturer’s recommendations so that everything runs smoothly & efficiently without having unexpected breakdowns due lack of proper maintenance being performed regularly.
7. What signs indicate that my Alternators need replacing?
If you notice dimming headlights while driving at night time along with other electrical components such as interior lights flickering intermittently then these are signs indicating possible alternators failure; additionally, if there is a grinding noise coming from under the hood area then this could also mean something has gone wrong internally within the component itself requiring immediate attention before further damage occurs elsewhere within the vehicle itself.
8. How often should I replace my Alternators?
It depends on how often you use them but generally speaking most vehicles require their alternators replaced every 3-5 years depending upon usage patterns & environmental conditions they operate under – however always consult the manufacturer’s guidelines first prior to making a decision about whether replacement needs doing sooner rather than later just case something else might be causing issue instead (such faulty wiring etc).