")
How to Identify When It’s Time to Change Your Cabin Air Filter
It is important to regularly check and replace your cabin air filter in order to ensure the quality of the air you breathe inside your vehicle. A clogged or dirty cabin air filter can reduce airflow, cause unpleasant odors, and even lead to health issues. Knowing when it’s time to change your cabin air filter can help you maintain a healthy environment in your car.
The most common sign that it’s time for a new cabin air filter is reduced airflow from the vents. If you notice that the amount of air coming out of the vents has decreased significantly, then it may be time for a new filter. Additionally, if there are strange odors coming from the vents or if you experience an increase in allergies or other respiratory issues while driving, then this could also indicate that it’s time for a new filter.
Another way to tell if it’s time for a new cabin air filter is by inspecting the existing one visually. If you can see dirt and debris on the surface of the old one, then this means that it needs replacing as soon as possible. It is recommended that you replace your cabin air filters every 12 months or 12000 miles (19000 km), whichever comes first.
If you are unsure about how often to change your cabin air filters or how to do so properly, consult with an experienced mechanic who will be able to provide advice and assistance with replacing them correctly and safely.
Step-by-Step Guide to Replacing Your Cabin Air Filter
1. Locate the cabin air filter. Depending on your vehicle, the cabin air filter may be located in different places. Common locations include behind the glove box, under the hood, or near the firewall of your vehicle.
2. Remove and inspect the old filter. Carefully remove the old filter from its housing and inspect it for any signs of damage or debris buildup that could indicate a need for replacement sooner than recommended by your manufacturer’s guidelines.
3. Purchase a new cabin air filter that is compatible with your vehicle’s make and model year. Make sure to check with your local auto parts store to ensure you are purchasing an appropriate replacement part for your car or truck’s specific needs.
4. Install the new cabin air filter into its housing in place of the old one you removed earlier, making sure it is properly seated and secured in place before closing up any panels or compartments you opened during this process..
5 . Test out your newly installed cabin air filter by turning on all climate control settings inside of your car to ensure proper airflow throughout all vents within your vehicle’s interior space
Benefits of Regularly Changing Your Cabin Air Filter
Regularly changing your cabin air filter is an important part of vehicle maintenance. This simple task can have a significant impact on the quality of air inside your car, as well as the performance and longevity of your vehicle. Here are some of the benefits associated with regularly changing your cabin air filter:
1. Improved Air Quality: A clogged or dirty cabin air filter can reduce airflow and cause unpleasant odors to enter the interior of your car. By replacing it regularly, you can ensure that only clean, fresh air is entering the cabin.
2. Enhanced Performance: A clogged or dirty cabin air filter can reduce engine performance by restricting airflow to vital components such as spark plugs and fuel injectors. Replacing it regularly will help keep these components running at peak efficiency for better overall performance from your vehicle.
3. Reduced Maintenance Costs: Regularly replacing a dirty or clogged cabin air filter will help prevent dirt and debris from entering other parts of the engine, which could lead to costly repairs down the line if left unchecked for too long.
4. Extended Vehicle Life: Keeping up with regular maintenance tasks such as changing out a dirty or clogged cabin air filter helps ensure that all parts are working properly and efficiently, which in turn helps extend the life expectancy of your vehicle overall
What You Need to Know About Different Types of Cabin Air Filters
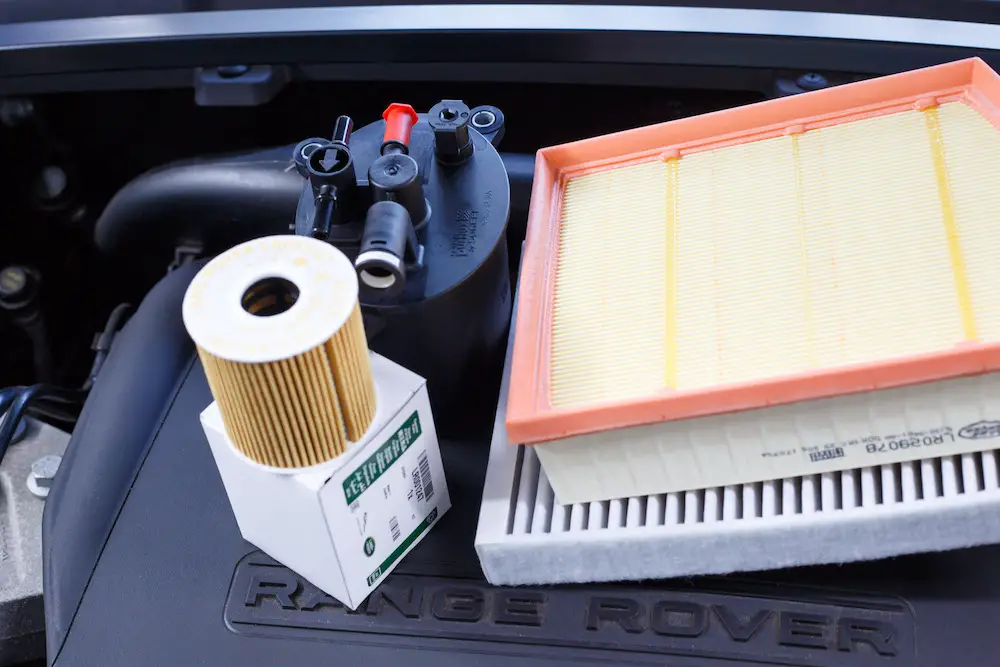
Cabin air filters are an important part of any vehicle’s ventilation system. They help to keep the air inside the cabin clean and free from pollutants, allergens, and other contaminants. Different types of cabin air filters are available on the market today, each with its own unique features and benefits. It is important to understand the differences between these types in order to make an informed decision when selecting a filter for your vehicle.
The most common type of cabin air filter is a pleated paper filter. This type of filter is made from layers of paper that trap particles as small as 0.3 microns in size, making it effective at removing dust, pollen, mold spores, and other airborne contaminants from the air inside your car or truck’s cabin. Pleated paper filters are relatively inexpensive and easy to replace when needed; however they do not last as long as some other types of filters due to their construction materials being prone to clogging over time.
Synthetic media filters are another popular option for filtering out pollutants from your vehicle’s interior environment. These filters use synthetic fibers such as polyester or nylon that can capture particles down to 0.3 microns in size while also allowing more airflow than pleated paper filters do; this makes them more efficient at filtering out pollutants while still providing adequate ventilation within the cabin space. Synthetic media filters tend to be more expensive than pleated paper ones but they also last longer before needing replacement due to their construction materials being less prone to clogging over time than those used in pleated paper models.
Activated carbon-based cabin air filters are another option available on the market today that offer superior filtration capabilities compared with both pleated paper and synthetic media models. These types of filters use activated carbon granules which have been treated with oxygen so that they can absorb odors, gases, smoke, fumes, and other volatile organic compounds (VOCs) from the interior environment. Activated carbon-based models tend to be more expensive than both pleated paper and synthetic media options but they provide superior filtration capabilities which make them well worth considering if you want maximum protection against airborne pollutants within your vehicle’s interior space.
When selecting a new cabin air filter for your car or truck it is important that you consider all factors including cost, efficiency, longevity, ease-of-replacement, and overall performance before making a final decision. By understanding what each type has to offer you will be able to ensure you select one that meets all your needs while still staying within budget constraints.
Tips for Choosing the Right Replacement Cabin Air Filter for Your Vehicle
1. Check your vehicle’s owner’s manual to determine the size and type of cabin air filter that is recommended for your vehicle.
2. Choose a cabin air filter that meets or exceeds the specifications outlined in your owner’s manual. This will ensure that it fits properly and provides optimal performance.
3. Consider purchasing a cabin air filter with an activated carbon layer, which can help reduce odors and pollutants from entering the interior of your vehicle.
4. Look for a cabin air filter with pleated media, which helps increase surface area to capture more airborne particles than traditional flat filters can provide.
5. Select a cabin air filter with an electrostatic charge, which helps attract and trap even more airborne particles than non-electrostatic filters can provide for improved filtration efficiency and performance over time.
6. Make sure you purchase the correct replacement interval for your specific make and model of vehicle; some vehicles require more frequent replacements than others do due to their design or operating conditions they are exposed to on a regular basis (e..g., dusty roads).
How Often Should You Change Your Cabin Air Filter?
It is recommended that you change your cabin air filter every 12,000 to 15,000 miles or at least once a year. This will ensure that the air quality in your vehicle remains clean and free of pollutants. The cabin air filter helps to remove dust, pollen, and other airborne particles from the air inside your vehicle. It also helps reduce odors from entering the interior of your car. If you live in an area with high levels of pollution or if you drive frequently on dirt roads, it is recommended that you change your cabin air filter more often than once a year.
Common Mistakes People Make When Changing Their Cabin Air Filters
1. Not Checking the Size: It is important to check the size of your cabin air filter before purchasing a new one. If you purchase a filter that is too large or too small, it will not fit properly and may cause damage to your vehicle.
2. Not Replacing the Filter Regularly: Cabin air filters should be replaced every 12,000 to 15,000 miles or once a year, whichever comes first. Neglecting to replace your cabin air filter can lead to poor air quality in your vehicle and can also cause damage to other components of the ventilation system.
3. Installing the Filter Incorrectly: When installing a new cabin air filter, it is important that you follow all instructions carefully and make sure that it is installed correctly in order for it to work properly and provide optimal filtration performance.
4. Not Cleaning Out Debris Before Installation: Before installing a new cabin air filter, make sure that any debris or dirt from the old one has been removed from inside of the housing unit so as not to contaminate or clog up the new filter when installed.
DIY Guide: How To Change a Car’s Cabin Air Filter
Changing a car’s cabin air filter is an important part of regular vehicle maintenance. A cabin air filter helps to keep the air inside your car clean and free from dust, pollen, and other airborne particles. Replacing the filter regularly will help to ensure that you and your passengers are breathing in clean, healthy air while driving. This guide will provide step-by-step instructions on how to change a car’s cabin air filter.
Step 1: Locate the Cabin Air Filter
The first step is to locate the cabin air filter in your vehicle. The location of this component can vary depending on make and model, but it is usually located behind the glove box or under the dashboard near the passenger side footwell area. If you are having trouble locating it, consult your owner’s manual for more information.
Step 2: Remove Old Filter
Once you have located the cabin air filter housing, open it up by removing any screws or clips that may be holding it closed. Once opened, remove any old filters that may be present in order to make room for a new one. Be sure not to touch any of the exposed surfaces as this could cause damage or contamination of new filters when they are installed later on down the line.
Step 3: Install New Filter
Now that all old filters have been removed from their housing unit, take out a new replacement filter from its packaging and insert it into place within its housing unit until secure and snugly fit into place without leaving any gaps or spaces between itself and its surrounding walls/edges/corners etc.. Make sure all edges are properly sealed so no dirt or debris can enter through them when driving around town!
Step 4: Close Up Housing Unit
Once everything has been securely placed back into position within its housing unit (including all screws/clips etc.), close up everything tightly so no dirt or debris can enter through them when driving around town! Finally, check if there’s an indicator light (usually found near where you inserted your new replacement) which should turn off once everything has been properly secured – if not then double-check everything again before continuing with further steps!
Step 5: Test Out Your New Cabin Air Filter
Now that you have successfully changed out your old cabin air filter with a brand new one – start up your engine and test out how well it works by taking some short drives around town! You should notice improved airflow throughout interior cabins as well as reduced levels of dust & pollen entering through vents while driving – both signs indicating successful installation & replacement job done right!
Q&A
1. What is a cabin air filter?
A cabin air filter is an air filter that cleans the air entering the interior of a vehicle through the heating, ventilation, and air conditioning (HVAC) system. It helps to reduce dust, pollen, and other airborne contaminants from entering the vehicle’s interior.
2. Why should I change my cabin air filter?
Changing your cabin air filter regularly can help improve your car’s performance by allowing more clean and fresh air into the engine compartment as well as reducing odors inside your car’s interior. Additionally, it can help reduce allergens in the car which can be beneficial for those with allergies or asthma.
3. How often should I change my cabin air filter?
It is recommended to replace your cabin air filter every 12 months or 12,000 miles (whichever comes first). However, this may vary depending on how often you drive in dusty or polluted areas so it’s best to check with your owner’s manual for specific recommendations for your make and model of vehicle.
4. Where is my cabin air filter located?
The location of a vehicle’s cabin air filters will vary depending on make and model but they are typically located behind either the glove box or dashboard area near where fresh outside airflow enters into the HVAC system of a vehicle’s interior space.
5. What tools do I need to change my cabin Air Filter?
In order to change out a vehicle’s Cabin Air Filter you will need some basic tools such as pliers or screwdrivers depending on what type of fasteners are used to secure it in place as well as gloves if desired when handling dirty filters during removal/installation process. You may also need an automotive vacuum cleaner if there is any debris present within the housing unit prior to installation of new Cabin Air Filter element itself.
6. How do I know when it’s time to replace my Cabin Air Filter?
You may notice decreased airflow from vents inside the passenger compartment when running A/C system, increased dust accumulation within the passenger compartment, musty odors coming from vents, or visible dirt buildup on the surface area around the intake vent . All these signs indicate that it might be time for a replacement.
7 Can I install a Cabin Air Filter myself? Yes, most vehicles have relatively easy access points for replacing their own Cabin Air Filters without having professional assistance. However, if you feel uncomfortable doing so then please consult with a certified mechanic who can provide guidance & assistance during the installation process.
8 Are there any special instructions that should be followed when installing new Cabin Air Filters? Yes, always refer back to the manufacturer instructions provided with the new parts before attempting the installation process & ensure all steps are followed correctly in order to avoid damaging existing components within HVAC system while performing the maintenance task at hand.