
- Guide to Changing a Headlight Bulb
- Choose the Right Headlight Bulb
- Upgrading Your Headlight Bulbs
- Mistakes to Avoid When Replacing
- Installing LED Headlights in Your Car
- Halogen vs Xenon Headlights
- Test If Your Bulb Is Working Properly
- Aftermarket vs OEM Replacement Bulbs
- Q&A
Step-by-Step Guide to Changing a Headlight Bulb
Changing a headlight bulb is an easy task that can be completed in a few simple steps. This guide will provide step-by-step instructions on how to change a headlight bulb.
Step 1: Locate the Headlight Bulb.
The first step is to locate the headlight bulb, which can usually be found behind the headlight assembly. Depending on your vehicle, you may need to remove some components such as screws or clips to access the bulb.
Step 2: Disconnect Power Source and Remove Old Bulb.
Once you have located the headlight bulb, it’s important to disconnect any power sources before attempting to remove it. This will help prevent any electrical shocks or damage from occurring during the removal of the old bulb.
After disconnecting power sources, carefully remove the old bulb by twisting it counterclockwise until it comes loose from its socket and then pulling it out of its housing. Otherwise, if the issue lies elsewhere, check out our explainers on the best headlight restoration kit, if you need to clear any fog in the headlights.
Step 3: Install New Bulb and Reconnect Power Source(s).
Now that you have removed the old headlight bulb, take your new one and insert it into its socket by twisting clockwise until secure. Once inserted correctly, reconnect any power sources that were disconnected earlier for your new lightbulb to work properly when turned on again later on down the road.
Step 4: Test New Headlight Bulb for Proper Operation.
Finally, turn on your headlights and make sure they are working properly with no flickering or dimming of light output before driving away with them. If everything looks good then congratulations – you’ve successfully changed out your own car’s headlights.
Also, if the underlying issue isn’t the bulb, but rather a foggy headlight lens cover, you could also check out our guide on how to defog your headlights, as well as using lemon and baking soda for your headlights.
How to Choose the Right Headlight Bulb for Your Vehicle
When it comes to replacing the headlight bulbs in your vehicle, it is important to choose the right bulb for your specific make and model. The wrong bulb can cause damage to your vehicle or even be illegal in some states. Here are a few tips on how to choose the right headlight bulb for your vehicle.
- First, you will need to determine what type of headlight bulbs are currently installed in your vehicle. Most vehicles use either halogen or xenon headlights (previously, we’ve also discussed halogen vs LED headlights), but there are other types available as well. Once you know what type of bulbs you have, you can then look up the correct replacement bulb size and wattage for that particular make and model of car.
- Next, consider any additional features that may be necessary when selecting a new headlight bulb such as color temperature or beam pattern. Color temperature refers to how “warm” or “cool” a light appears when illuminated; higher temperatures appear bluer while lower temperatures appear more yellowish-white. Beam pattern refers to how wide or narrow the light beam is; wider beams provide better visibility at night while narrower beams reduce glare from oncoming traffic.
- Finally, check with local laws regarding any restrictions on aftermarket lighting products before making a purchase decision as some states have regulations regarding certain types of headlights and their wattage levels. Additionally, if you plan on installing LED headlights instead of traditional halogen bulbs, make sure they are approved by the Department of Transportation (DOT) before purchasing them as non-approved LED lights may not meet safety standards and could result in fines if used on public roads.
By following these steps when selecting a new headlight bulb for your vehicle, you can ensure that it meets all legal requirements while providing optimal performance and visibility in night-time driving conditions. This underscores the importance of figuring out how to replace a headlight bulb.
The Benefits of Upgrading Your Headlight Bulbs
Upgrading your headlight bulbs is an easy and cost-effective way to improve the visibility of your vehicle. Not only will you be able to see better at night, but you will also be safer on the road. Here are some of the benefits of upgrading your headlight bulbs:
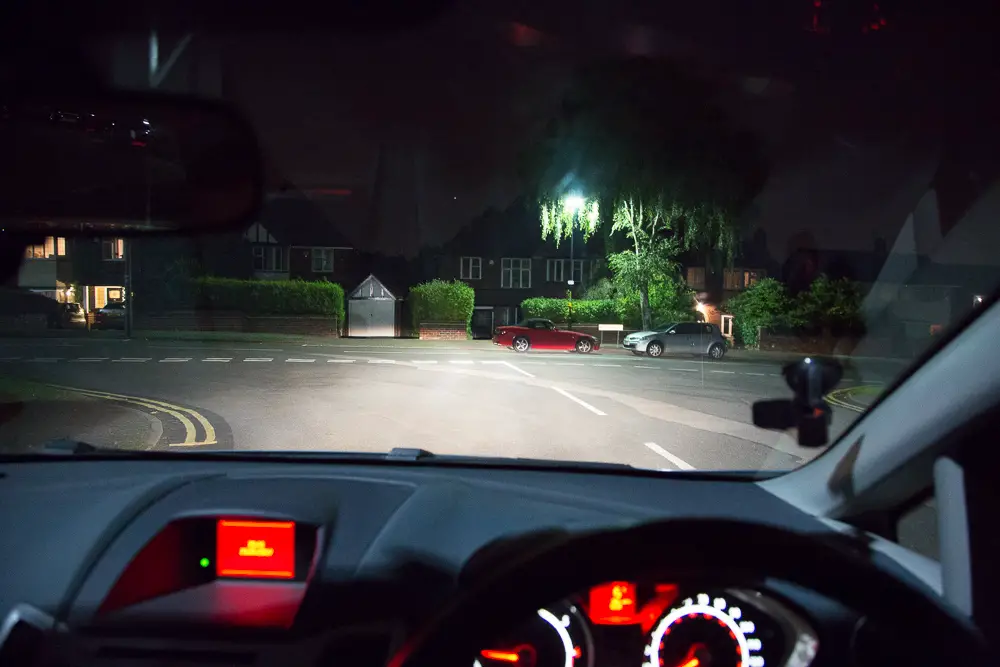
1. Improved Visibility: Upgrading to higher quality headlight bulbs can significantly improve visibility while driving at night or in low light conditions (aside from that, you could also improve visibility by clearing condensation in the headlight, as well as knowing how to clean the headlights at home). This can help reduce the risk of accidents due to poor visibility and make it easier for other drivers to see you on the road.
2. Increased Safety: Higher quality headlights provide a brighter, more focused beam that helps illuminate dark areas and improves overall safety on the road. This can help reduce fatigue from straining your eyes while driving in low light conditions, as well as increase reaction time if something unexpected happens on the road ahead of you.
3. Cost Savings: Upgrading your headlights is a relatively inexpensive way to improve safety and visibility without having to replace entire lighting systems or buy expensive aftermarket parts for your vehicle. In addition, many modern LED headlights have longer lifespans than traditional halogen bulbs, which means they require less frequent replacement over time and save money in the long run as well as provide improved performance compared with standard halogen bulbs.
Overall, upgrading your headlight bulbs is an easy way to improve both safety and visibility while driving at night or in low light conditions without breaking the bank or having extensive knowledge about car maintenance. With improved performance comes increased peace of mind knowing that you are better prepared for whatever may come up during nighttime drives.
Common Mistakes to Avoid When Replacing a Headlight Bulb
1. Not Checking the Vehicle Manual: Before attempting to replace a headlight bulb, it is important to consult the vehicle manual for specific instructions on how to do so. Different vehicles may require different steps and tools for replacing a headlight bulb, so it is essential to check the manual first.
2. Not Disconnecting the Battery: When replacing a headlight bulb, it is important to disconnect the battery before beginning work to avoid any potential electrical shocks or damage.
3. Not Wearing Protective Gear: It is also important to wear protective gear such as gloves and safety glasses when replacing a headlight bulb to protect oneself from any potential hazards associated with working on an automobile’s electrical system.
4. Using Incorrect Bulbs: It is essential that one uses bulbs that are specifically designed for their vehicle model when replacing a headlight bulb; using incorrect bulbs can lead to poor performance or even damage to other components of the car’s electrical system.
5. Not Testing After Installation: After installing a new headlight bulb, it is important that one tests its functionality by turning on both headlights and checking if they are working properly before closing up the hood of their car again; this will ensure that no further adjustments need be made after the installation has been completed.
Tips for Installing LED Headlights in Your Car
1. Read the instructions that come with your LED headlights carefully before beginning installation. Make sure you understand all of the steps and have all of the necessary tools and materials on hand.
2. Disconnect the negative battery cable from your car’s battery before beginning installation to avoid any potential electrical shocks or damage to your vehicle’s electrical system.
3. Remove the old headlights from your car by unscrewing them from their mounting brackets and disconnecting any wiring harnesses connected to them.
4. Install the new LED headlights in place of the old ones, making sure they are securely mounted in their brackets and that all wiring is properly connected according to manufacturer instructions.
5. Test out your new LED headlights by turning on your car’s ignition switch and checking for proper operation before closing up any panels or covers around them for a final seal against moisture or dust intrusion into their housings or wiring connections.
6. If you experience any problems with operation, double-check all connections, including those between each headlight assembly and its power source, as well as between each headlight assembly itself if applicable (for dual-beam systems).
7. Reconnect the negative battery cable when finished installing LED headlights to restore power to other components in your vehicle’s electrical system such as interior lights, radio, etc.
What You Need to Know About Halogen vs Xenon Headlights
Headlights are an important safety feature of any vehicle, and there are two main types of headlights available: halogen and xenon. It is important to understand the differences between these two types of headlights to make an informed decision when purchasing a new car or replacing existing headlights.
- Halogen headlights are the most common type of headlight used in vehicles today. They use a combination of tungsten filament, gas, and halogen gas to produce light. Halogen bulbs have a longer lifespan than other types of bulbs, but they also produce less light output than other options such as xenon or LED lights. Additionally, halogen bulbs tend to be more susceptible to damage from road debris and can become dimmer over time due to wear and tear on the filament.
- Xenon headlights use high-intensity discharge (HID) technology instead of tungsten filaments like halogens do. This technology produces much brighter light output than traditional halogens while using less energy overall. Xenon lights also last longer than traditional halogens; however, they require more maintenance due to their higher intensity output which can cause them to burn out faster if not properly cared for. Additionally, xenon lights may be more expensive upfront compared with traditional halogens but will save money in the long run due to their increased lifespan and lower energy consumption costs over time.
When deciding between halogen vs xenon headlights for your vehicle it is important to consider both cost and performance factors before making a final decision.
Halogens offer good value for money with their long lifespans but lack in brightness compared with xenons which offer superior brightness at a higher cost upfront but will save you money over time due to their increased efficiency and longevity when properly maintained.
How To Test If Your New Headlight Bulb Is Working Properly
Testing a new headlight bulb is an important step to ensure that your vehicle is safe and roadworthy (the same applies to other tasks such as learning how to fix foggy headlights). To test if the new bulb is working properly, you will need to have access to the headlight assembly.
- First, make sure that the power switch for the headlights is in the “on” position. Then, open up the headlight assembly and locate the new bulb. Carefully remove any protective covers or plastic shields from around it before proceeding.
- Next, connect one end of a test light or multimeter to a good ground source on your vehicle such as an unpainted metal surface or negative battery terminal. Connect the other end of your testing device to one of two terminals on either side of your new bulb’s base plate.
- If you are using a test light, it should illuminate when connected correctly; if you are using a multimeter, it should read 12 volts when connected correctly.
- Finally, turn on your headlights and check that both bulbs are illuminated evenly and brightly with no flickering or dimming occurring in either one. If everything looks good then you can be confident that your new headlight bulb is working properly.
The Pros and Cons of Aftermarket vs OEM Replacement Lightbulbs
When it comes to replacing lightbulbs, there are two main options: aftermarket and OEM (Original Equipment Manufacturer) replacement bulbs. Each option has its own advantages and disadvantages, so it is important to consider both before making a decision.
- The primary advantage of aftermarket bulbs is cost (not to mention how much is a headlight bulb, as well as the headlight replacement cost). Aftermarket bulbs are typically much cheaper than OEM replacements, making them an attractive option for those on a budget. Additionally, aftermarket bulbs often come with longer warranties than their OEM counterparts, providing extra peace of mind if something goes wrong.
- On the other hand, there are some drawbacks associated with aftermarket lightbulbs as well. For one thing, they may not be as reliable or durable as OEM replacements; this means that they may need to be replaced more frequently than their more expensive counterparts. Furthermore, since these bulbs are not made by the original manufacturer of the product they’re replacing, there is no guarantee that they will fit properly or work correctly in all applications.
- OEM replacement lightbulbs have several advantages over their aftermarket counterparts as well. For starters, since these bulbs were designed specifically for use in a particular product or application by its original manufacturer, you can rest assured that they will fit properly and work correctly every time you use them – something which cannot always be said about aftermarket products. Additionally, because these products were designed specifically for use in certain applications by experienced engineers who understand how each component works together within a system – you can expect higher levels of reliability and durability from an OEM bulb compared to an aftermarket one; this means fewer trips back to the store for replacements.
Ultimately when deciding between an aftermarket vs OEM replacement bulb it is important to consider both options carefully before making your decision; while cost savings may be tempting with an aftermarket bulb – reliability and durability should also factor into your choice if you want your purchase to last longer without needing frequent replacements.
How To Change Headlight Bulb: Q&A
Here are some popular FAQs on how to change headlight bulb:
1. How do I change a headlight bulb?
To change a headlight bulb, you will need to locate the back of the headlight assembly and remove the retaining screws or clips that hold it in place. Once removed, you can access the back of the bulb and disconnect it from its wiring harness. Then, replace it with a new bulb and reattach all components before testing your new light.
2. What tools do I need to change a headlight bulb?
You will need a screwdriver or other tool to remove any retaining screws or clips that are holding the headlight assembly in place, as well as pliers or needle-nose pliers to disconnect and reconnect any wiring harnesses associated with your headlights.
3. Is there anything else I should consider when changing my headlights?
Some vehicles may require special tools for removing certain components of their headlights, so be sure to check your vehicle’s manual before attempting any repairs on your own. Additionally, always wear safety glasses when working on car parts like headlights as they can contain sharp edges that could cause injury if not handled properly.
4. Are there different types of bulbs for different vehicles?
Yes, there are different types of bulbs available for different makes and models of vehicles depending on their size and wattage requirements; be sure to consult your vehicle’s manual or an automotive parts store for more information about which type is best suited for your car’s needs before making any purchases.
5. Can I install LED bulbs instead of halogen ones?
Yes. LED bulbs are becoming increasingly popular due to their energy efficiency and long lifespan compared to traditional halogen bulbs; however, some vehicles may require special adapters for them to fit properly into existing housings so be sure to double-check compatibility before making any purchases.
6. How often should I replace my headlight bulbs?
It is recommended that you replace both driver-side and passenger-side headlight bulbs every two years to maintain optimal visibility while driving at night; however, this may vary depending on how often you use them so make sure you inspect them regularly for signs of wear such as dimming lights or flickering lights which could indicate they need replacing sooner than expected.
7. Are there other ways I can improve my visibility while driving at night besides replacing my headlights?
Yes. You can also upgrade other lighting components such as fog lights which help illuminate areas closer up ahead during inclement weather conditions; additionally installing reflective tape alongside mirrors helps increase visibility from behind by reflecting light from other cars onto yours – just make sure it meets local regulations first.
8. Is it difficult/expensive to replace my own headlights?
No – replacing your own headlights is relatively easy once you know what steps are involved (as outlined above) plus most replacement parts are fairly inexpensive too so overall this is an affordable way to keep yourself safe while driving at night without breaking the bank.