
How to Diagnose Common AC Problems in Your Car
If you are having trouble with your car’s air conditioning system, it is important to diagnose the problem as soon as possible. A malfunctioning AC system can be uncomfortable and can even lead to more serious issues if left unchecked. Hence, the importance of learning how to fix the AC in your car.
Here are some tips for diagnosing common AC problems in your car:
1. Check the Refrigerant Level: The first step in diagnosing an AC problem is to check the refrigerant level. If it is low, then there may be a leak somewhere in the system that needs to be repaired before adding more refrigerant. Otherwise, you’ll also need to learn how to put Freon in your car.
2. Inspect Hoses and Connections: Next, inspect all of the hoses and connections for any signs of wear or damage that could cause a leak or blockage in the system. Make sure all connections are tight and secure, and replace any worn or damaged parts as needed.
3. Test Compressor Clutch Operation: The compressor clutch should engage when you turn on the AC, so make sure it is working properly by listening for a clicking sound when you turn on the air conditioning switch inside your vehicle’s cabin. If there is no sound, then this could indicate an issue with either the compressor clutch itself or its electrical connection which will need to be addressed before a further diagnosis can take place.
4. Check Condenser Fan Operation: The condenser fan should also come on when you turn on your air conditioning switch inside your vehicle’s cabin; if not then this could indicate an issue with either its electrical connection or its motor which will need to be addressed before a further diagnosis can take place.
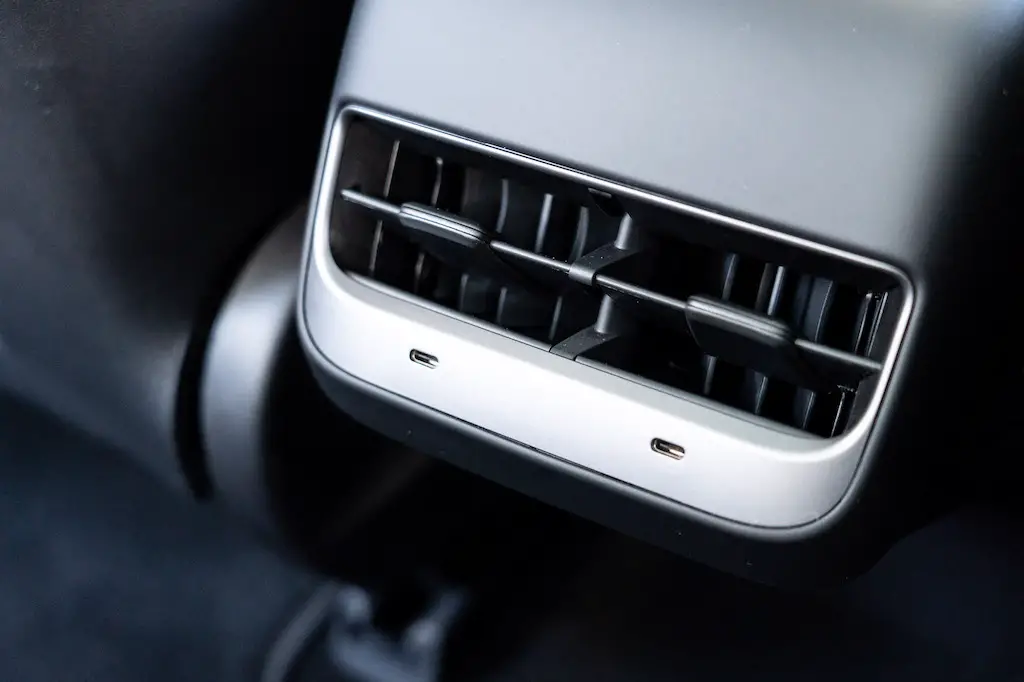
5. Test Expansion Valve Operation: Finally, test the expansion valve operation by checking whether cool air comes out of vents when set at maximum cooling. If not, then this could indicate an issue with either its electrical connection or its internal components which will need to be addressed before a further diagnosis can take place.
By following these steps on how to fix the AC in your car, you should have a better understanding of what might be causing problems with your car’s air conditioning system so that you can get it fixed quickly and efficiently before you move on to learning how to fix a car AC system.
How to Check the Refrigerant Level in Your Car’s AC System
Maintaining the proper refrigerant level in your car’s air conditioning (AC) system is essential for optimal performance. Low levels of refrigerant can cause the AC to blow warm air, while too much can damage the compressor. To ensure that your AC system is functioning properly, it is important to check the refrigerant level regularly (and figure out how to fix the AC in your car).
The first step in checking your car’s AC system for proper refrigerant levels is to locate and identify the low-pressure service port. This port will be located near the firewall on most vehicles and will have a black or blue cap with a Schrader valve underneath it.
Once you have identified this port, you will need to attach an AC manifold gauge set to it to measure pressure levels within the system. Once connected, start up your engine and turn on the air conditioning at full blast for at least five minutes before taking any readings from the gauge set.
The low-side pressure should read between 25 and 35 psi when measured with an ambient temperature of 80 degrees Fahrenheit or higher outside of your vehicle. If this reading falls below 25 psi or above 35 psi, then you may need to add more refrigerant to your car’s AC system to bring it back into balance.
It is important that you use only approved automotive grade R134a refrigerants when topping off your car’s AC system as other types may cause damage or malfunctioning of components within it. Additionally, never attempt to open up any part of an automotive air conditioning unit as doing so could result in serious injury due to contact with high-pressure gases contained inside them.
If you are unsure about how much additional refrigerant needs to be added or how best to go about doing so safely then consult a qualified mechanic who has experience working on automotive air conditioning systems before proceeding further yourself.
How to Replace a Blown Fuse in Your Car’s AC System
If your car’s air conditioning system has stopped working, it may be due to a blown fuse. Replacing a blown fuse in your car’s AC system is an easy and straightforward process that can be completed in just a few minutes. This is a good starting point to learn how to fix the AC in your car.
To begin, locate the fuse box in your vehicle. This is usually located under the dashboard on the driver’s side of the vehicle. Once you have located the fuse box, open it and identify which fuse is for the AC system. It should be labeled as such or have an icon of an air conditioner next to it.
Once you have identified which fuse needs to be replaced, use a pair of needle-nose pliers or tweezers to remove it from its slot in the panel. Then take out a new replacement fuse with identical ratings as indicated on the old one and insert it into its slot in place of the old one. Make sure that all connections are secure before closing up your vehicle’s fuse box again.
Finally, turn on your car’s ignition and test out whether or not replacing this blown fuse has fixed your car’s AC system by turning on its air conditioning unit and checking if cool air is coming out from its vents as expected. If so, then congratulations. You have successfully replaced a blown fuse in your car’s AC system.
Step-by-Step Guide on How to Recharge Your Car’s AC System
A car’s air conditioning system is an important component of the vehicle. It helps to keep the interior of the car cool and comfortable during hot summer days. Unfortunately, over time, the AC system can become inefficient due to a lack of refrigerant or other issues. If this happens, it is important to recharge your car’s AC system to restore its cooling power.
This guide will provide step-by-step instructions on how to recharge your car’s AC system (as part of the process of understanding how to fix the AC in your car – and for more insight, check out our guides on how to recharge a car AC system, as well as how to charge the car AC system, in addition to how to recharge AC in a car).
Step 1: Gather Necessary Supplies
Before you begin recharging your car’s AC system, you will need to gather all the necessary supplies and tools. You will need a can of refrigerant (R134a), an AC pressure gauge set, a vacuum pump with hoses and adapters, safety glasses or goggles, gloves, and rags for cleaning up any spills or messes that may occur during the process.
Step 2: Check for Leaks
Once you have gathered all the necessary supplies and tools, it is important to check for any leaks in your car’s air conditioning system before beginning the recharging process. To do this, use a UV light leak detector kit which can be purchased at most auto parts stores or online retailers.
If there are any leaks present in your vehicle’s air conditioning system they must be repaired before proceeding with recharging it as adding more refrigerant won’t fix them and could cause further damage if left unchecked.
Step 3: Connect Gauge Set & Vacuum Pump
Next, you will need to connect both the gauge set and vacuum pump together using their respective hoses and adapters so that they are ready for use when needed later on in the process. Make sure that all connections are secure before continuing on with recharging your vehicle’s air conditioning system as loose connections could lead to inaccurate readings or even worse – damage caused by leaking refrigerant.
Step 4: Evacuate System & Remove Old Refrigerant
Once everything has been connected properly it is time to evacuate (or remove) any old refrigerant from within your vehicle’s air conditioning system using both the gauge set and vacuum pump together as one unit – this should take about 15 minutes depending on how much old refrigerant needs removing from inside. Once complete make sure that no more than 0 psi remains within before moving on to step five below (or refer to our guide on how to evacuate the car AC system)…
Step 5: Add New Refrigerant & Recharge System
Now that all old refrigerant has been removed from within your vehicle’s air conditioning system it is time to add new R134a into it until desired levels have been reached – usually around 30 psi but always refer back to manufacturer specifications first.
Once done turn off both units (gauge set & vacuum pump) then start up the engine again so that the new charge can circulate throughout the entire cooling circuit properly – this should take about 10 minutes depending on size/make/model…
Conclusion Finally once everything has been completed correctly according to customer specifications then congratulations. Your vehicle’s Air Conditioning System should now be fully charged up again ready for those hot summer days ahead.
What You Need to Know About Leaks and Condensation in Your Car’s AC System
Your car’s air conditioning system is an important part of your vehicle, and it is important to understand the potential issues that can arise with it. Leaks and condensation are two common problems that can occur in your car’s AC system. Knowing what causes these issues and how to address them can help you keep your car running smoothly.
Leaks in the AC system are usually caused by a worn or damaged seal or gasket, which allows the refrigerant to escape from the system. This can cause a decrease in cooling power as well as an increase in fuel consumption due to the loss of efficiency.
If you notice any signs of a leak, such as a hissing sound coming from under the hood or visible fluid on the ground, it is important to have it checked out by a professional mechanic right away. Condensation occurs when moisture builds up inside the AC system due to humidity levels outside being higher than those inside your vehicle.
This moisture will then collect on components within the AC unit and eventually drip out onto other parts of your car, such as carpets or upholstery. To prevent this from happening, make sure you regularly check for any signs of condensation buildup and clean off any excess moisture with an absorbent cloth before it has time to spread further into other areas of your vehicle’s interior.
Additionally, using an air filter designed specifically for cars will help reduce humidity levels inside your vehicle and minimize condensation buildup over time. In conclusion, leaks and condensation are two common problems that can occur in your car’s AC system if not properly maintained over time.
It is important to be aware of these issues so that they can be addressed quickly before they cause more serious damage down the line. Regularly checking for signs of leaks or condensation buildup will help ensure that you get the maximum performance out of your air conditioning unit while also keeping other parts of your vehicle safe from potential damage caused by excess moisture accumulation over time.
Maintaining and Troubleshooting Common Issues with Your Car’s Air Conditioner
1. Check the Refrigerant Level: The refrigerant is the liquid that helps cool the air in your car’s air conditioner. If it is low, it can cause your AC to blow warm air. Have a professional check and top off the refrigerant level if needed.
2. Inspect and Clean Condenser Coils: The condenser coils are responsible for cooling down hot air from outside before it enters your car’s cabin. If these coils become clogged with dirt or debris, they won’t be able to do their job properly and you may experience warm air coming out of your AC vents. Have a professional inspect and clean these coils regularly to ensure optimal performance of your car’s AC system.
3. Replace Air Filters: Your car’s cabin filter should be replaced every 12 months or 12,000 miles (whichever comes first). A dirty filter can restrict airflow through the system, causing warm air to come out of the vents instead of cold air as desired.
4. Check Compressor Clutch Operation: The compressor clutch engages when you turn on your AC system to compress refrigerant gas into liquid form so that it can cool down hot outside air before entering your vehicle’s cabin space. If this clutch isn’t working properly, then you may experience warm or lukewarm temperatures coming from inside the vehicle instead of cold temperatures as desired. Have a professional inspect this component for any signs of wear or damage and replace it if necessary.
5. Inspect Hoses for Leaks: Over time, hoses within an AC system can become brittle due to age or exposure to extreme temperatures which could lead them developing cracks or leaks. This will reduce efficiency within an AC system as well as cause poor performance such as blowing lukewarm instead of cold temperatures from inside a vehicle’s cabin space. Have a professional inspect all hoses within an AC system for any signs of wear or damage and replace them if necessary.
6. Troubleshoot Electrical Connections: Electrical connections are responsible for powering components such as fans, compressors, relays, etc., which help keep an AC system running smoothly. If any electrical connections become loose over time due to vibration, corrosion, etc., then this could lead to components not working correctly resulting in poor performance such as blowing lukewarm instead of cold temperatures from inside a vehicle’s cabin space. Have a professional inspect all electrical connections within an AC system for any signs of wear or damage and repair/replace them if necessary.
The Benefits of Installing an Aftermarket Air Conditioning Unit in Your Vehicle
Installing an aftermarket air conditioning unit in your vehicle can provide a number of benefits. An aftermarket air conditioning unit is designed to replace the existing factory-installed system, and it can offer improved performance and efficiency.
Here are some of the advantages that come with installing an aftermarket air conditioning unit in your vehicle (as well as knowing how to fix the AC in your car):
1. Improved cooling power: Aftermarket air conditioning units are designed to provide more powerful cooling than factory-installed systems. This means that you will be able to keep your car cooler on hot days, making for a more comfortable ride.
2. Increased energy efficiency: Aftermarket air conditioners use less energy than their factory-installed counterparts, which can help reduce fuel consumption and save you money on fuel costs over time (not to mention the costs of auto air conditioning repair).
3. Reduced noise levels: Aftermarket units are quieter than factory-installed systems, so you won’t have to worry about loud noises coming from your car’s AC system when it is running at full capacity.
4. Longer lifespan: Aftermarket units tend to last longer than their factory-installed counterparts due to their superior construction and materials used in manufacturing them, meaning that they will require fewer repairs or replacements over time compared to other types of AC systems installed in vehicles today.
Overall, installing an aftermarket air conditioning unit in your vehicle can provide numerous benefits such as improved cooling power, increased energy efficiency, reduced noise levels, and a longer lifespan compared to other types of AC systems available today – all of which make for a better driving experience overall.
What You Should Know Before Replacing the Compressor on Your Vehicle’s Air Conditioner
When it comes to replacing the compressor on your vehicle’s air conditioner (and learning how to fix the AC in your car), there are a few important things you should know before beginning the process.
- First and foremost, it is essential that you have the right tools and supplies for the job. You will need a set of wrenches, screwdrivers, pliers, and other hand tools as well as a vacuum pump to remove any remaining refrigerant from the system. Additionally, you will need to purchase an appropriate replacement compressor for your vehicle’s make and model.
- Second, it is important that you take all necessary safety precautions when working with automotive air conditioning systems. This includes wearing protective gloves and eyewear while handling refrigerant or other hazardous materials. Additionally, be sure to disconnect the battery before beginning work on any electrical components to avoid potential shock hazards.
- Thirdly, be sure that you have thoroughly read through all instructions provided by both your vehicle’s manufacturer as well as those included with your new compressor before attempting installation or repair work on your air conditioner system. This will help ensure that everything is done correctly to avoid any potential damage or injury during the installation or operation of the system afterward.
- Finally, if at any point during installation or repair work on your vehicle’s air conditioner system, you feel uncomfortable or unsure about what needs to be done next then it is best not to proceed until further assistance can be obtained from either a qualified technician or an experienced friend who has worked with similar systems in the past. Doing so can help prevent costly mistakes which could potentially lead to more serious problems down the line if left unchecked.
In conclusion, replacing a compressor on an automotive air conditioning system requires careful consideration of several factors including having appropriate tools and supplies available along with taking necessary safety precautions while working with hazardous materials such as refrigerant gas; reading through all instructions provided by both manufacturers; and seeking assistance from qualified technicians if needed at any point during installation or repair work to avoid costly mistakes which could lead to more serious problems later down the line.
Q&A
Here are some popular FAQs on how to fix the AC in your car:
1. What are the most common causes of AC problems in cars?
A: The most common causes of AC problems in cars include a refrigerant leak, a faulty compressor, an electrical issue, or a blocked condenser.
2. How can I tell if my car’s AC needs to be fixed?
A: If your car’s air conditioning is blowing warm air or not blowing any air at all, it may need to be fixed. Additionally, if you notice any strange noises coming from the system or smell any unusual odors when you turn on the AC, it could indicate that there is an issue that needs to be addressed.
3. What should I do if my car’s AC isn’t working properly?
A: If your car’s air conditioning isn’t working properly, you should take it to a qualified mechanic for diagnosis and repair as soon as possible. They will be able to identify the cause of the problem and recommend an appropriate solution.
4. How much does it cost to fix an AC in a car?
A: The cost of repairing an AC in a car can vary depending on the type and severity of the problem as well as labor costs associated with diagnosing and repairing it. Generally speaking, repairs can range anywhere from $100-$1000 depending on what needs to be done and how long it takes for repairs to be completed successfully.
5. Is there anything I can do myself if my car’s AC isn’t working properly?
A: While some minor issues such as low refrigerant levels or clogged filters may be able to be addressed by yourself with some basic tools and knowledge about automotive systems, more complex issues such as compressor failure should always require professional attention from qualified mechanics who have experience dealing with these types of problems specifically related to automotive air conditioning systems.
6. What are some signs that indicate my vehicle’s A/C system might need servicing?
A: Some signs that indicate your vehicle’s A/C system might need servicing to include weak airflow from vents; strange noises coming from vents; musty smells when turning on A/C; warm temperatures inside the cabin even when set at coldest setting; visible leaks around components; dashboard warning lights indicating potential issues with A/C system; and increased fuel consumption due inefficient cooling performance caused by faulty components within A/C system itself.
7. What kind of maintenance should I perform regularly on my vehicle’s A/C system?
A: Regular maintenance for your vehicle’s A/C system includes checking coolant levels regularly (at least once per year); inspecting hoses for cracks or other damage every few months; replacing cabin filters every 12-15 months (or sooner); cleaning evaporator coils annually (or more often depending on usage); checking pressure readings using special gauges every few years (or more often depending on usage); inspecting belts for wear & tear annually (or more often depending upon usage). Additionally having regular inspections performed by certified technicians is recommended at least once per year so they can check all components within your vehicle’s climate control systems are functioning correctly & efficiently.
8. What steps should I take before attempting any DIY repairs related to my vehicle’s climate control systems?
A: Before attempting any DIY repairs related to your vehicle’s climate control systems make sure you have read through all relevant service manuals & instructions thoroughly so you understand exactly what needs doing & how best to go about doing it safely without causing further damage or injury yourself or others around you while performing these tasks. Additionally, make sure all necessary safety equipment such as gloves & goggles are worn during repair work & ensure the area being worked upon is well-ventilated due presence of hazardous chemicals used during certain procedures.