
- How to Diagnose Alternator Problem
- How to Replace a Bad Alternator
- Tools Needed to Fix an Alternator
- Common Causes of Alternator Failure
- Guide on How To Fix An Alternator
- Troubleshooting an Alternator Issue
- Professional Repair vs DIY Fixes
- Signs That You Needs A Replacement
- Q&A
How to Diagnose an Alternator Problem
Diagnosing an alternator problem can be a difficult task (as is learning how to fix an alternator), as there are many potential causes. However, with the right knowledge and tools, it is possible to identify the issue and take steps to resolve it. This article will provide an overview of how to diagnose an alternator problem.
- The first step in diagnosing an alternator problem is to check the battery voltage. If the battery voltage is low or if it drops quickly when starting the engine, this could indicate a faulty alternator or other electrical issues. It may also be necessary to check for any loose connections between the battery and alternator terminals.
- Next, inspect all of the wiring connected to your vehicle’s charging system for signs of damage or corrosion. If any wires appear damaged or corroded, they should be replaced immediately as they could cause further issues with your vehicle’s charging system.
- If no visible damage is present on any of the wiring connected to your vehicle’s charging system, then you should test each component individually using a multimeter set on DC volts mode (or AC volts mode if applicable).
- Start by testing each component in turn from the highest voltage output (the battery) down through each connection until you reach the ground level (the frame). This will help you identify which component has failed and needs replacing or repairing before continuing with further diagnosis steps.
- Finally, if all components have been tested successfully but still no power is being generated by your vehicle’s charging system then it may be necessary to replace either the entire alternator assembly or just its internal components such as brushes and bearings depending on what type of failure has occurred within it.
- In some cases, however, simply cleaning out dirt and debris from the inside can restore normal operation without needing replacement parts at all.
In conclusion, diagnosing an alternator problem requires careful inspection of both visible components such as wiring connections as well as individual testing using a multimeter set on DC volts mode (or AC volts mode if applicable). This should also help you with determining whether you have a bad alternator vs a bad battery.
Once identified which part has failed then appropriate action can be taken such as replacing/repairing that part (as well as considering an alternator repair job) before continuing with further diagnosis steps until normal operation is restored again.
How to Replace a Bad Alternator
Replacing a bad alternator can be a daunting task, but with the right tools and knowledge, it can be done relatively easily. This guide will provide step-by-step instructions on how to replace a bad alternator (once you’ve learned how to tell if your alternator is bad, as well as how to know if your alternator is bad, and how to tell if the alternator is bad).
Before beginning, make sure you have all the necessary tools and parts for the job. You will need an adjustable wrench, socket set, screwdriver set, new alternator belt (if applicable), and of course the new alternator itself.
Step 1: Disconnect the negative battery cable from your car’s battery using an adjustable wrench. This is important to prevent any electrical shock or damage to your vehicle’s electrical system while working on it.
Step 2: Locate the old alternator (and ensure that you know where is an alternator located) in your engine bay and remove any bolts or screws that are holding it in place using a socket set or screwdriver set depending on what type of fasteners are used. Once all fasteners have been removed you should be able to pull out the old alternator from its mounting bracket without too much difficulty.
Step 3: Install the new alternator into its mounting bracket making sure that all bolts/screws are tightened securely so that it does not move around while driving. If applicable, install a new belt onto both pulleys of your engine and then onto both pulleys of your new alternator as well before tightening them down with an adjustable wrench until they are snug but not overly tight as this could cause damage to either component over time due to excessive tensioning force being applied unnecessarily.
Step 4: Reconnect the negative battery cable back onto your car’s battery once everything else has been installed correctly and start up your vehicle to ensure that everything is working properly before taking it out for a test drive if possible just in case there were any issues during installation which may need further attention before driving again safely at normal speeds on public roads/highways etc.
Once these steps have been completed successfully you should now have replaced your bad alternator with ease (be mindful of considering an alternator replacement and researching the best brand of car alternator).
What Tools Are Needed to Fix an Alternator?
Fixing an alternator requires a few basic tools. These include a socket set, adjustable wrench, screwdriver set, and pliers. Additionally, it is helpful to have a multimeter on hand to test the alternator’s output voltage (for more insight, check out our explainer on how to test a car battery).
A shop manual for the vehicle in question is also recommended as it will provide detailed instructions on how to remove and replace the alternator. Finally, if the alternator needs to be rebuilt or replaced with a new one, then specialty tools such as an armature puller may be necessary.
Common Causes of Alternator Failure and How to Avoid Them
Alternator failure is a common problem that can cause a variety of issues with your vehicle. It is important to understand the causes of alternator failure and how to avoid them to keep your car running smoothly.
- The most common cause of alternator failure is due to wear and tear on the internal components. Over time, the brushes, bearings, and other parts can become worn out or damaged, leading to decreased performance or complete breakdown. In addition, dirt and debris can build up inside the alternator over time which can also lead to problems.
- Another common cause of alternator failure is due to electrical problems such as loose connections or faulty wiring. If these connections are not properly maintained they can lead to an increase in resistance which will reduce the amount of power being supplied by the alternator.
- In order to avoid these issues it is important that you regularly inspect your vehicle’s electrical system for any signs of damage or wear and tear on components such as wires, connectors, fuses, etc. Additionally, it is important that you have regular maintenance done on your vehicle’s engine so that any potential problems with the alternator are identified early on before they become more serious issues.
- Finally, it is also important that you use quality parts when replacing any components related to your vehicle’s electrical system as this will help ensure optimal performance from all parts involved in supplying power from the battery through the charging system into other systems within your car such as lights and audio systems, etc.
By following these simple steps you should be able to avoid the most common causes of alternator failure while ensuring optimal performance from all related components within your car’s electrical system for years down the road.
Step-by-Step Guide on How To Fix An Alternator
Introduction
An alternator is an important component of a vehicle’s electrical system. It is responsible for generating the electricity needed to power the car’s accessories, such as headlights, radio, and air conditioning.
If your alternator fails or malfunctions, it can cause a variety of problems with your vehicle. Fortunately, there are some steps you can take to diagnose and fix an alternator issue. This guide will provide step-by-step instructions on how to troubleshoot and repair an alternator problem.
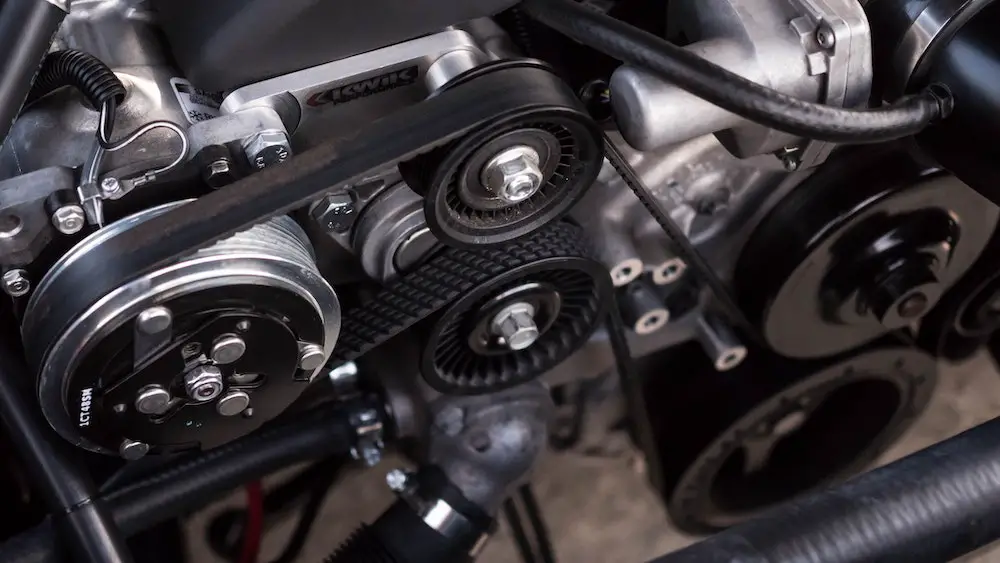
Step 1: Check the Alternator Belt
The first step in diagnosing an alternator issue is to check the belt that connects it to the engine. If this belt is loose or worn out, it could be causing your alternator problems. To check the belt, open up your hood and locate the belt that runs from your engine pulley to your alternator pulley.
Inspect this belt for any signs of wear or damage such as cracks or fraying edges. If you find any issues with this belt then you should replace it before continuing with further diagnosis and repair work on your alternator. To find out more, you could also refer to our write-up on how to check if the alternator is bad (including OBD error codes such as P0562).
Step 2: Test Your Battery Voltage
The next step in diagnosing an alternator issue is testing the voltage output of your battery using a multimeter tool (or voltmeter). To do this properly you should disconnect both battery cables from their terminals before taking any readings from them using a multimeter tool (or voltmeter).
The reading should be between 12 volts and 14 volts when taken directly off of each terminal post on either side of the battery itself; if not then there may be something wrong with either one or both terminals themselves which would need further investigation into why they are not providing enough voltage output for proper operation of other components within its electrical system such as its starter motor etc.
Step 3: Check Your Alternators Fuses & Connections
Once you have tested both sides of your battery’s voltage output then it’s time to move on checking all fuses related directly towards powering up its main components like its starter motor etc., along with all connections leading into/out from these components too – including those connected towards powering up its main control unit (ECU) which controls most functions within modern vehicles today.
To do so simply use a fuse tester/multimeter tool (or voltmeter) again but this time around focus solely on checking each individual fuse/connection point (including the actual alternator fuse) until everything has been checked over thoroughly – if anything appears faulty then replace accordingly before moving on further diagnosis work.
Step 4: Test Your Alternators Output Voltage
Now that all fuses & connections have been checked over thoroughly we can now move on to testing our actual Alternators output voltage by connecting our multimeter tool (or voltmeter) directly across two points located at either end side near where our main power cable connects to/out from the alternator casing itself – once done take note down what reading appears here as anything below 13 volts indicates something may be wrong internally within our unit itself which would require further investigation into why exactly this might be happening.
Step 5: Replace Any Faulty Parts & Reassemble Everything Back Together Again
If after testing everything out we find that certain parts need replacing due to being faulty then go ahead & purchase these new parts accordingly before reassembling everything back together again following manufacturer guidelines closely – once done start up the engine again & test out whether the problem has been fixed successfully by taking another reading off same two points mentioned earlier in order confirm whether correct amount voltage being produced now matches what was expected originally.
Conclusion
In conclusion, fixing an alternator issue requires careful diagnosis and troubleshooting steps to identify where exactly the problem lies so appropriate repairs can be made accordingly afterward without having guesswork involved throughout the entire process.
By following the above steps outlined here today hopefully anyone experiencing similar issues will be able to get their vehicle running smoothly again soon enough without too much hassle involved along the way too.
Tips for Troubleshooting an Alternator Issue
1. Check the Alternator Belt: Make sure the alternator belt is in good condition and properly tensioned. A loose or worn belt can cause the alternator to not charge correctly (thus, causing issues such as where you have a new alternator but it’s not charging the battery).
2. Check Battery Voltage: Use a multimeter to check the voltage of your battery when the engine is running. If it’s below 12 volts, then there may be an issue with your alternator not charging correctly.
3. Inspect Wiring Connections: Make sure all wiring connections (be sure to refer to online resources such as the one-wire alternator wiring diagram for a Chevy or the 3-wire alternator wiring diagram) are secure and free from corrosion or damage that could prevent proper current flow from the alternator to the battery and other electrical components in your vehicle.
4. Test Alternator Output: Use a multimeter to test for output voltage at various RPMs while driving your vehicle, as this will help you determine if there is an issue with your alternator’s output capacity or if it’s simply not charging correctly due to a faulty connection or component failure elsewhere in your vehicle’s electrical system.
5. Replace Faulty Components: If any of these tests indicate that there is an issue with one of the components related to your alternator, such as a faulty regulator, diode, or bearing, then you should replace them as soon as possible (to find out more, check out our guide on how to change a car alternator and how to change an alternator) to restore proper charging capability for your vehicle’s battery and other electrical components.
The Benefits of Professional Repair vs DIY Fixes for An Alternator Problem
When it comes to alternator problems, many car owners are tempted to try a DIY fix. However, there are several benefits to having a professional repair the issue instead.
- First and foremost, professional mechanics have the experience and expertise necessary to diagnose and repair an alternator problem correctly. They can quickly identify the source of the issue and determine what needs to be done to fix it. This ensures that any repairs made will be effective and long-lasting.
- In addition, professional mechanics have access to specialized tools that may be needed for certain repairs or replacements. These tools can help ensure that any work is done properly and safely, which is especially important when dealing with electrical components like an alternator.
- Finally, having a professional mechanic handle an alternator problem can save time in the long run as they will likely be able to complete the job more quickly than someone without experience or specialized tools would be able to do on their own. This means less time spent waiting for your car’s repairs and more time spent enjoying it on the road again.
Overall, while DIY fixes may seem appealing at first glance due to their cost savings potential (not to mention the cost of a new alternator), they often come with risks that could end up costing you more money in the long run if not done correctly or safely.
For this reason, it is usually best practice for car owners facing an alternator problem to seek out a qualified professional mechanic who has both experiences working with these types of issues as well as access to specialized tools needed for certain repairs or replacements.
Warning Signs That Your Vehicle Needs An Alternator Replacement
1. Dimming or Flickering Lights: If the headlights, dashboard lights, or other electrical components of your vehicle are flickering or dimming, this could be a sign that your alternator is failing.
2. Dead Battery: If you have a dead battery and it won’t hold a charge even after being jumped (for more context, check out our explainer on whether can you jump-start a car with a bad alternator), it could be due to an alternator issue.
3. Strange Noises: Alternators can make strange noises when they are failing such as whining, grinding, or squealing sounds coming from the engine bay.
4. Burning Smell: A burning smell coming from the engine bay may indicate that something is wrong with your alternator and should be checked out immediately by a professional mechanic.
5. Warning Light on Dashboard: Many vehicles will have an “ALT” warning light on the dashboard (basically, it’s an alternator warning light) which will illuminate if there is an issue with the alternator system in your car.
Q&A
1. What is an alternator and what does it do?
An alternator is a device that converts mechanical energy into electrical energy in the form of alternating current (AC). It is used to power the electrical system of a vehicle, including the headlights, interior lights, radio, and other accessories.
2. What are some common signs that an alternator needs to be fixed?
Common signs that an alternator needs to be fixed include dim or flickering headlights, slow engine cranking speed when starting the car, dashboard warning lights illuminating on the dashboard indicating a charging system issue, and strange noises coming from under the hood such as whining or grinding sounds.
3. How can I test my alternator to see if it needs repair?
You can test your alternator by using a multimeter set to measure voltage output at your battery terminals while your engine is running. If you get readings below 13 volts then you may need to replace or repair your alternator.
4. What tools do I need in order to fix my own alternator?
To fix your own alternator you will need basic hand tools such as wrenches and screwdrivers as well as specialty tools such as an ammeter for testing voltage output from the battery terminals while running and a voltmeter for testing voltage output from each individual component within the charging system circuit while running. You may also need additional parts depending on what type of repair you are attempting such as brushes or bearings for brush-type motors or diodes for electronic motors if they have failed due to age or wear and tear over time.
5. How long does it take to replace an entire Alternator?
Replacing an entire Alternator typically takes between 1-2 hours depending on the make/model of the vehicle and the complexity of the installation process required by manufacturer specifications (some vehicles require more labor-intensive processes than others).
6. Are there any safety precautions I should take when working with my Alternators?
Yes. Always disconnect the negative terminal from the battery before beginning work on any part of the electrical system in order ensure no accidental shorts occur which could cause serious injury or damage to property/equipment/vehicle itself. Additionally, always wear protective eyewear when working with electricity due prevent potential eye injuries caused by sparks flying off components during the repairs/installation process.
7. What should I do if my alternator still isn’t working after replacing it?
If after replacing your alternators it still isn’t working properly then first check all connections made during the installation process ensuring they are secure & free from corrosion; next check all fuses associated with the charging system circuit ensuring none have blown; finally, check all wiring harnesses associated with charging system circuit ensuring none have become damaged over time due age/wear & tear, etc… If all these checks fail then contact a professional mechanic who can diagnose the issue further & provide an appropriate solution(s) needed resolve problem quickly & safely.
8. Where can I find replacement parts for my Alternators?
Replacement parts for most make & models of vehicles’ alternators can usually be found online through various retailers specializing in automotive parts & accessories; alternatively, local auto stores may carry some stock items but selection will likely be limited compared to online retailers so the best bet would be searching online first before heading out store.