
- How To Diagnose And Fix Common Issues
- Benefits Of Regularly Scheduled Oil Changes
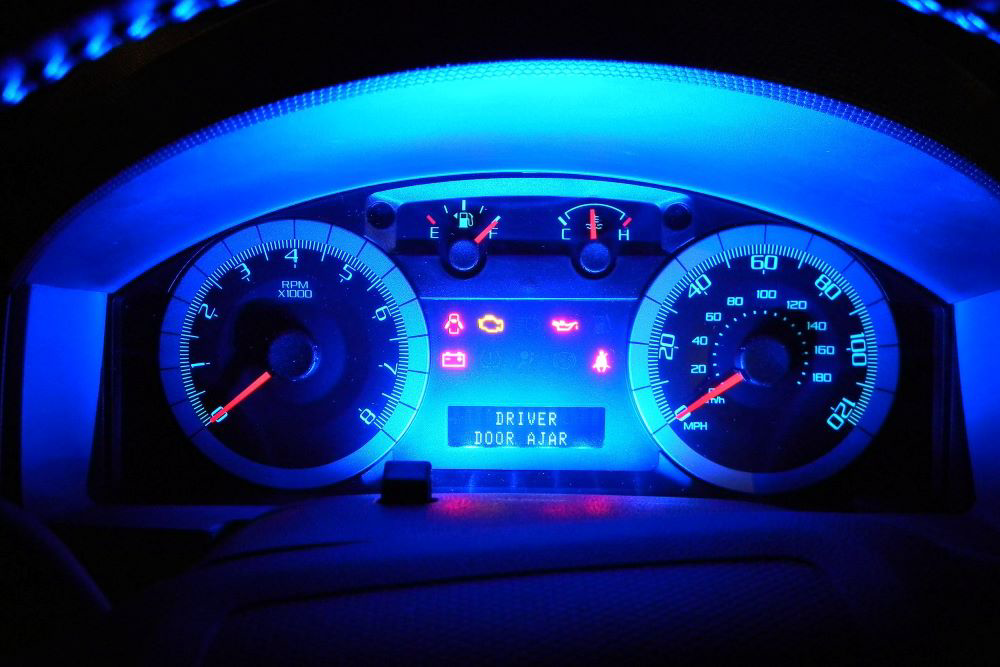
- What You Should Do When It Comes On
- Common Reasons For A Check Engine Light
- How To Reset Your Vehicle’s Computer System
- Tips For Preventing Damage Caused
- Have Your Vehicle Inspected If It Comes On
- Pros And Cons Of DIY vs Professional Diagnostics
- Different Options For Repairing Or Replacing Parts
How to Diagnose and Fix Common Issues
The check engine light is a common indicator of potential issues with your vehicle. After an oil change, it is not uncommon for the check engine light to come on. Fortunately, there are several steps you can take to diagnose and fix the issue that triggered the warning light.
- First, you should check your oil level and make sure it is at the correct level. If it is too low or too high, this could be causing the issue. You should also inspect your oil filter to ensure that it has been properly installed and tightened after being replaced during your oil change service.
- Next, you should inspect all of the hoses connected to your engine for any signs of damage or wear-and-tear such as cracks or leaks. If any hoses appear damaged or worn out, they should be replaced immediately as they could be causing a vacuum leak which would trigger the check engine light.
- You should also inspect all of your spark plugs and wires for any signs of damage or wear-and-tear such as corrosion or fraying wires which could cause misfires in your engine cylinders resulting in a triggering of the check engine light due to an incorrect air/fuel ratio in one cylinder compared to another cylinder within its bank (V6/V8 engines).
Finally, if none of these steps have resolved the issue then you may need to have a professional mechanic run a diagnostic scan on your vehicle’s computer system using specialized equipment designed specifically for this purpose in order to identify what exactly triggered the warning light after an oil change service was performed on it recently.
The Benefits of Regularly Scheduled Oil Changes
Regularly scheduled oil changes are an important part of vehicle maintenance and can help avoid a check engine light. Oil is the lifeblood of any engine, and it needs to be changed regularly to keep the engine running smoothly. When oil becomes old or contaminated, it can cause a variety of problems that can lead to a check engine light.
- Oil changes are necessary because, over time, oil breaks down and becomes less effective at lubricating the moving parts in an engine. This breakdown causes friction between the parts which leads to increased wear and tear on the components. If left unchecked, this wear and tear can cause serious damage that will require expensive repairs or even replacement of certain components.
- In addition to preventing excessive wear on your vehicle’s components, regularly scheduled oil changes also help keep your car running more efficiently by removing dirt and debris from your engine’s internal parts. This helps reduce friction between these parts which improves fuel economy as well as overall performance.
- Finally, regular oil changes help prevent sludge buildup in your vehicle’s system which can lead to clogged filters or other issues that may trigger a check engine light warning signal on your dashboard display panel.
- Sludge buildup is caused by contaminants such as dirt particles or moisture mixing with motor oil over time; if left unchecked this sludge will eventually clog up vital filters within the system leading to decreased performance or even complete failure of certain components within the system resulting in costly repairs being needed for repair or replacement purposes.
Overall, regular oil changes are essential for keeping your car running smoothly while avoiding costly repairs due to excessive wear on its internal components as well as preventing potential issues such as sludge buildup that could trigger a check engine light warning signal on your dashboard display panel.
By following manufacturer recommendations for when you should change out motor oils, you will ensure that all these benefits are realized while helping extend the life expectancy of both your car’s mechanical systems and its overall value.
What You Should Do When Your Vehicle’s Check Engine Light Comes On
If your vehicle’s check engine light comes on after an oil change, it is important to take action as soon as possible. The first step is to determine the cause of the issue. If you recently had an oil change, it is possible that a loose or faulty part was installed during the service. It could also be a sign of a more serious problem with your vehicle’s engine or other components.
The best way to diagnose and address the issue is to take your car to a qualified mechanic for inspection and repair. A professional can use diagnostic tools and expertise to identify any underlying problems that may have caused the check engine light to come on after an oil change. They can then recommend any necessary repairs or replacements needed for your vehicle to run safely and efficiently again.
It is important not to ignore this warning sign, as it could indicate a serious problem with your car’s performance or safety features if left unchecked. Taking prompt action will help ensure that you get back on the road quickly and safely without further damage being done by neglecting this warning signal from your vehicle’s computer system.
The Most Common Reasons for a Check Engine Light to Come On After an Oil Change
A check engine light coming on after an oil change is a common occurrence and can be caused by a variety of factors. The most common reasons for this to happen are (you could learn more in our guide on the flashing check engine light):
1. Incorrect Oil Level: If the oil level is too low or too high, it can cause the check engine light to come on. This is because the oil pressure sensor will detect an incorrect reading and trigger the warning light.
2. Loose or Faulty Oil Filter: If the oil filter has not been properly tightened or if it has become faulty, this can also cause the check engine light to come on as it will affect how much oil is being circulated through your vehicle’s system.
3. Faulty Spark Plugs: If your spark plugs have become worn out or damaged, they may not be able to ignite fuel correctly which could lead to misfires and trigger your check engine light.
4. Dirty Air Filter: A dirty air filter can reduce airflow into your vehicle’s combustion chamber which could lead to poor performance and cause your check engine light to come on as a result of this reduced performance level.
You must take note of any warning lights that appear after an oil change so that you can address any potential issues before they become more serious problems down the line.
Reset Your Vehicle’s Computer System After an Oil Change
If you have recently changed the oil in your vehicle, it is important to reset the computer system to avoid a false positive on the check engine light. Resetting your vehicle’s computer system after an oil change is a simple process that can be done in just a few steps (and, this is crucial if you notice a flashing check engine light in your Ford).
- First, locate the reset button or switch on your dashboard. This will usually be located near the speedometer and odometer gauges. If you cannot find it, consult your owner’s manual for further instructions.
- Once you have located the reset button or switch press and hold it for several seconds until you hear a clicking sound or see an indicator light come on. This indicates that the computer has been successfully reset and is now ready to monitor your vehicle’s performance again.
- Finally, start up your engine and allow it to run for several minutes before turning it off again so that all of its systems can recalibrate themselves properly. After this process has been completed, you should no longer experience any false positives from your check engine light due to an oil change being performed recently.
By following these steps each time you perform an oil change on your vehicle, you can ensure that its computer system remains properly calibrated and functioning correctly at all times without any unnecessary issues arising from false positives caused by recent maintenance work being done on it. You can also learn more in our guide on the BMW check engine light reset.
Tips for Preventing Damage Caused by Ignoring a Check Engine Light
1. Make sure to have your oil changed regularly according to the manufacturer’s recommended schedule. This will help ensure that your engine is running at its best and can help prevent damage caused by ignoring a check engine light.
2. Have a qualified technician inspect your vehicle after an oil change to make sure all components are working properly and that no issues have arisen since the last service visit.
3. Pay attention to any warning lights or indicators on your dashboard, especially the check engine light, as this could indicate a problem with your vehicle’s performance or emissions system that needs immediate attention.
4. If you notice any changes in how your car runs, such as increased vibration or decreased fuel efficiency, take it to a mechanic for inspection right away as these could be signs of an underlying issue that needs addressing before it causes further damage to the engine or other components of the car.
5. Keep up with regular maintenance such as tune-ups and fluid changes so that any potential problems can be identified early on and addressed before they become more serious issues down the line.
Understanding Why It Is Important to Have Your Vehicle Inspected
Having your vehicle inspected if the check engine light comes on following an oil change is an important step in ensuring that your vehicle remains safe and reliable. More so if the check engine light comes on and off. The check engine light is a warning sign that something may be wrong with the vehicle, and it is important to have it checked out as soon as possible.
- When you take your car in for an oil change, the technician will usually reset the check engine light. However, if the light comes back on shortly after this reset, it could indicate a problem with one of the components of your car’s engine or emissions system. This could include issues such as faulty spark plugs or oxygen sensors, worn-out hoses or belts, or even a clogged catalytic converter.
- If these problems are not addressed quickly and properly, they can lead to further damage to other parts of your car’s system and potentially cause more expensive repairs down the line. Additionally, some of these issues can also affect how well your car runs and its fuel efficiency.
- Therefore, having your vehicle inspected if the check engine light comes on following an oil change can help you avoid costly repairs in the future by identifying any potential problems early on so they can be fixed before they become worse.
In conclusion, having your vehicle inspected if the check engine light comes on following an oil change is essential for maintaining its safety and reliability over time. It helps identify any potential problems early so that they can be addressed before becoming more serious and costly to repair down the line.
The Pros and Cons of DIY vs Professional Diagnostics
When a post-oil-change check engine light issue arises, car owners must decide whether to attempt a DIY diagnosis or seek professional help. Both options have their advantages and disadvantages, so it is important to weigh the pros and cons before making a decision. This is vital if you’re considering how to turn off the check engine light.
- The primary benefit of attempting a DIY diagnosis is cost savings. Professional diagnostic services can be expensive, especially if the problem turns out to be minor or nonexistent. Additionally, many auto parts stores offer free diagnostic services with the purchase of certain parts or tools. However, it is important to note that these free services are often limited in scope and may not provide an accurate assessment of the issue at hand.
- On the other hand, professional diagnostics offer several advantages over DIY attempts. Professionals have access to specialized tools and equipment that can quickly identify problems with greater accuracy than most home mechanics possess. Furthermore, they are familiar with common issues related to oil changes and can provide advice on how best to address them without wasting time or money on unnecessary repairs or replacements. Finally, professionals are typically insured against any damage caused by their workmanship; this provides peace of mind for those who would rather leave such matters in experienced hands rather than risk further complications themselves.
Ultimately, when faced with a post-oil-change check engine light issue car owners need to consider both options carefully before deciding as each has its own set of benefits and drawbacks that should be weighed accordingly to ensure an informed choice is made for their particular situation.
Exploring Different Options for Repairing or Replacing Parts
If your vehicle’s check engine light (CEL) is triggered after an oil change, several potential causes may need to be addressed. Depending on the cause, you may need to repair or replace certain parts to resolve the issue.
The first step is to diagnose the problem by connecting a scan tool or code reader to your vehicle’s onboard diagnostic system. This will provide you with a trouble code that can help identify the source of the issue. Common causes of CEL activation after an oil change include:
1) Faulty Oil Filter: If your oil filter was not properly installed or is defective, it can cause a CEL activation due to low oil pressure. To fix this issue, you will need to replace the filter and ensure it is properly installed according to manufacturer specifications.
2) Low Oil Level: If too little oil is added during an oil change, it can trigger a CEL due to low pressure in the system. To fix this issue, simply add more motor oil until it reaches its proper level as indicated by your vehicle’s dipstick or manual instructions.
3) Clogged Oil Pickup Tube: If debris has clogged up your vehicle’s pickup tube for its lubrication system, it can cause a CEL activation due to low pressure in the system as well as poor lubrication of internal components. To fix this issue, you will need access and remove any debris from the inside of the tube before reinstalling it back into place according to manufacturer specifications.
4) Faulty Oil Pressure Sensor: A faulty or damaged oil pressure sensor can also trigger a CEL after an oil change if its readings are inaccurate or unreliable for some reason. For this part to be replaced correctly and safely without causing further damage, professional assistance from an experienced mechanic may be necessary depending on how complex your particular model’s design is.
In conclusion, if your check engine light comes on after an oil change there could be several potential causes that require repair or replacement parts for them all to be resolved correctly and safely without causing further damage down the line.
By using diagnostic tools such as scan tools and code readers, you should have no problem identifying which part needs attention so that appropriate action can then be taken accordingly.