
Although it won’t render your car undriveable, chipped paint is unpleasant to have around. Although it isn’t as obvious to others as it is to you, it nevertheless makes you wince whenever you see it. Fortunately, the cost to repair paint chip on car isn’t that expensive (especially once you learn how to fix paint chips on car).
You’ve landed in the right place if you’ve been wondering how much it costs to repair chipped paint on an automobile. We’ll discuss costs and what to anticipate while having your car scratched or dented.
Paint Chips
Unfortunately, every car can develop paint chips. It may get damaged for a variety of reasons that are beyond your control, not always having anything to do with the caliber of the car or the paint. Typical causes of paint chipping include:
Cost To Repair Paint Chip On Car, Paint Chip Causes #1 – Debris
The most frequent causes of paint chipping on vehicles are rocks, garbage, and other roadside objects. The vehicles come into contact with a great deal of airborne debris while you drive. Your car may occasionally get nicks due to rocks that may shoot up from the gravel.
Cost To Repair Paint Chip On Car, Paint Chip Causes #2 – Weather
Things expand and contract when the temperature changes between hot and cold. You can be more susceptible to paint chips or damage if you reside in a region with unpredictable weather.
Keeping Paint From Chipping
It isn’t much you can do to stop isolated little incidents. Although you can apply sealants to the car to protect the topcoat, they won’t be completely successful. Try this preventative approach when you have little paint chips to lower the costs associated with large paint chips.
Cost To Repair Paint Chip On Car, Prevention Tips #1: Clean It Up
Clean the spot in which the chips are first, then add a little rubbing alcohol.
Cost To Repair Paint Chip On Car, Prevention Tips #2: Sand It Down
Make circular motions with a sanding material as you gently sand that chipped area. Before continuing, make sure everything feels smooth to the touch.
Cost To Repair Paint Chip On Car, Prevention Tips #3: Apply A Base
Make sure the foundation you chose is permitted for use with your vehicle before making your selection. Then, apply a small amount to each region that has been buffed.
Cost To Repair Paint Chip On Car, Prevention Tips #4: Paint It Up
Apply a very small amount of paint after the foundation has dried. Prevent having any on the areas that aren’t harmed and only cover the portion you’re painting over.
Cost To Repair Paint Chip On Car, Prevention Tips #5: Sand It Down Again
Use the same sanding medium to cover the region you worked on after the coats are thoroughly dry. This will guarantee that all of the paint is level and give it a lovely, even appearance.
When you notice chips, you should follow this 5-step procedure to stop them from cracking or suffering more serious damage. You’ll spend less time and money doing it, which will help your paint work last longer.
Cost To Repair Paint Chip On Car, Prevention Tips #6: Stop Paint Chips Before They Start
If there are paint chips on your car, it is essential to fix them as soon as you can. Prevent them from spreading throughout your car by stopping them before they get severe. You can appreciate your car’s beauty while cruising around more quickly the faster you take better care of it.
Paint Chip Repair
Now that we understand the cost to repair paint chip on car let’s see how the repair is done. Paint chips on your car are more than just something sore for your eyes. They may also expose the metal of your car to accelerated corrosion.
If you have a reasonable degree of expertise, you can improve the appearance of your automobile and stop additional rust development without having to make an expensive visit to the auto body shop. You might not be able to restore your car’s finish to its original showroom condition. How? Read on.
Step 1: Kits For Touch Up
You can purchase straightforward kits for touch-ups from brands like Duplicolor at your neighborhood car parts store, but also many dealerships will offer a simple paint pen that comes in the factory color of your automobile. Additionally, you may purchase more complex kits as well as other supplies online.
A good example is the PaintScratch kit, which includes color-matched paint, the clearcoat, primer, and a paint thinner.
To confirm the correct paint color, PaintScratch made use of information from the car’s VIN, which proves a lengthy combination of letters and numbers. These kits cost more money and require more procedures. However, the end effect is better and lasts longer.
Step 2: Checking The Door
All around your vehicle, there is important information that is critical for different situations. One of the areas where such information is to be found is on the car door. Here you can get the paint code for your vehicle.
If the vehicle has never had its paint changed, finding its paint code will be simple and verify that you are purchasing the right type of paint. This information could be located on a label on your driver’s door and door jamb on the majority of vehicles manufactured since 1983.
The VIN, which can be located on the door sticker or even the VIN plate on the dash, may also be required by the paint vendor in order to ensure a perfect match.
You’ll need to locate that hue instead if the car has ever had a repaint in a different shade. If not, you’ll probably want to go paint shopping by yourself to ensure you’re obtaining the right match. Ideally, that color is documented someplace in the paperwork for the automobile.
Step 3: Shopping For Tools
The secret to attaining good results is preparation. You’ll need glue dots, several paper punches, thin-tip splinter tweezers, cotton swabs, craft sticks, and extremely small 1000-grit wet or dry sandpaper. Everything from the local craft shop, minus the tweezers.
Step 4: Make Sanders
We’ll need to create our own micro sanders because the majority of commercially available tools for sanding would ruin plenty of good paint that is around the chip.
Cut out tiny sandpaper circles with the punches, then use glue to attach these to craft sticks as well as dowels. Once at the craft store, don’t be hesitant to think out of the box. A wooden axles bag that cost $1.99 had lovely, rounded edges that worked great with bigger chips.
Step 5: Car Washing
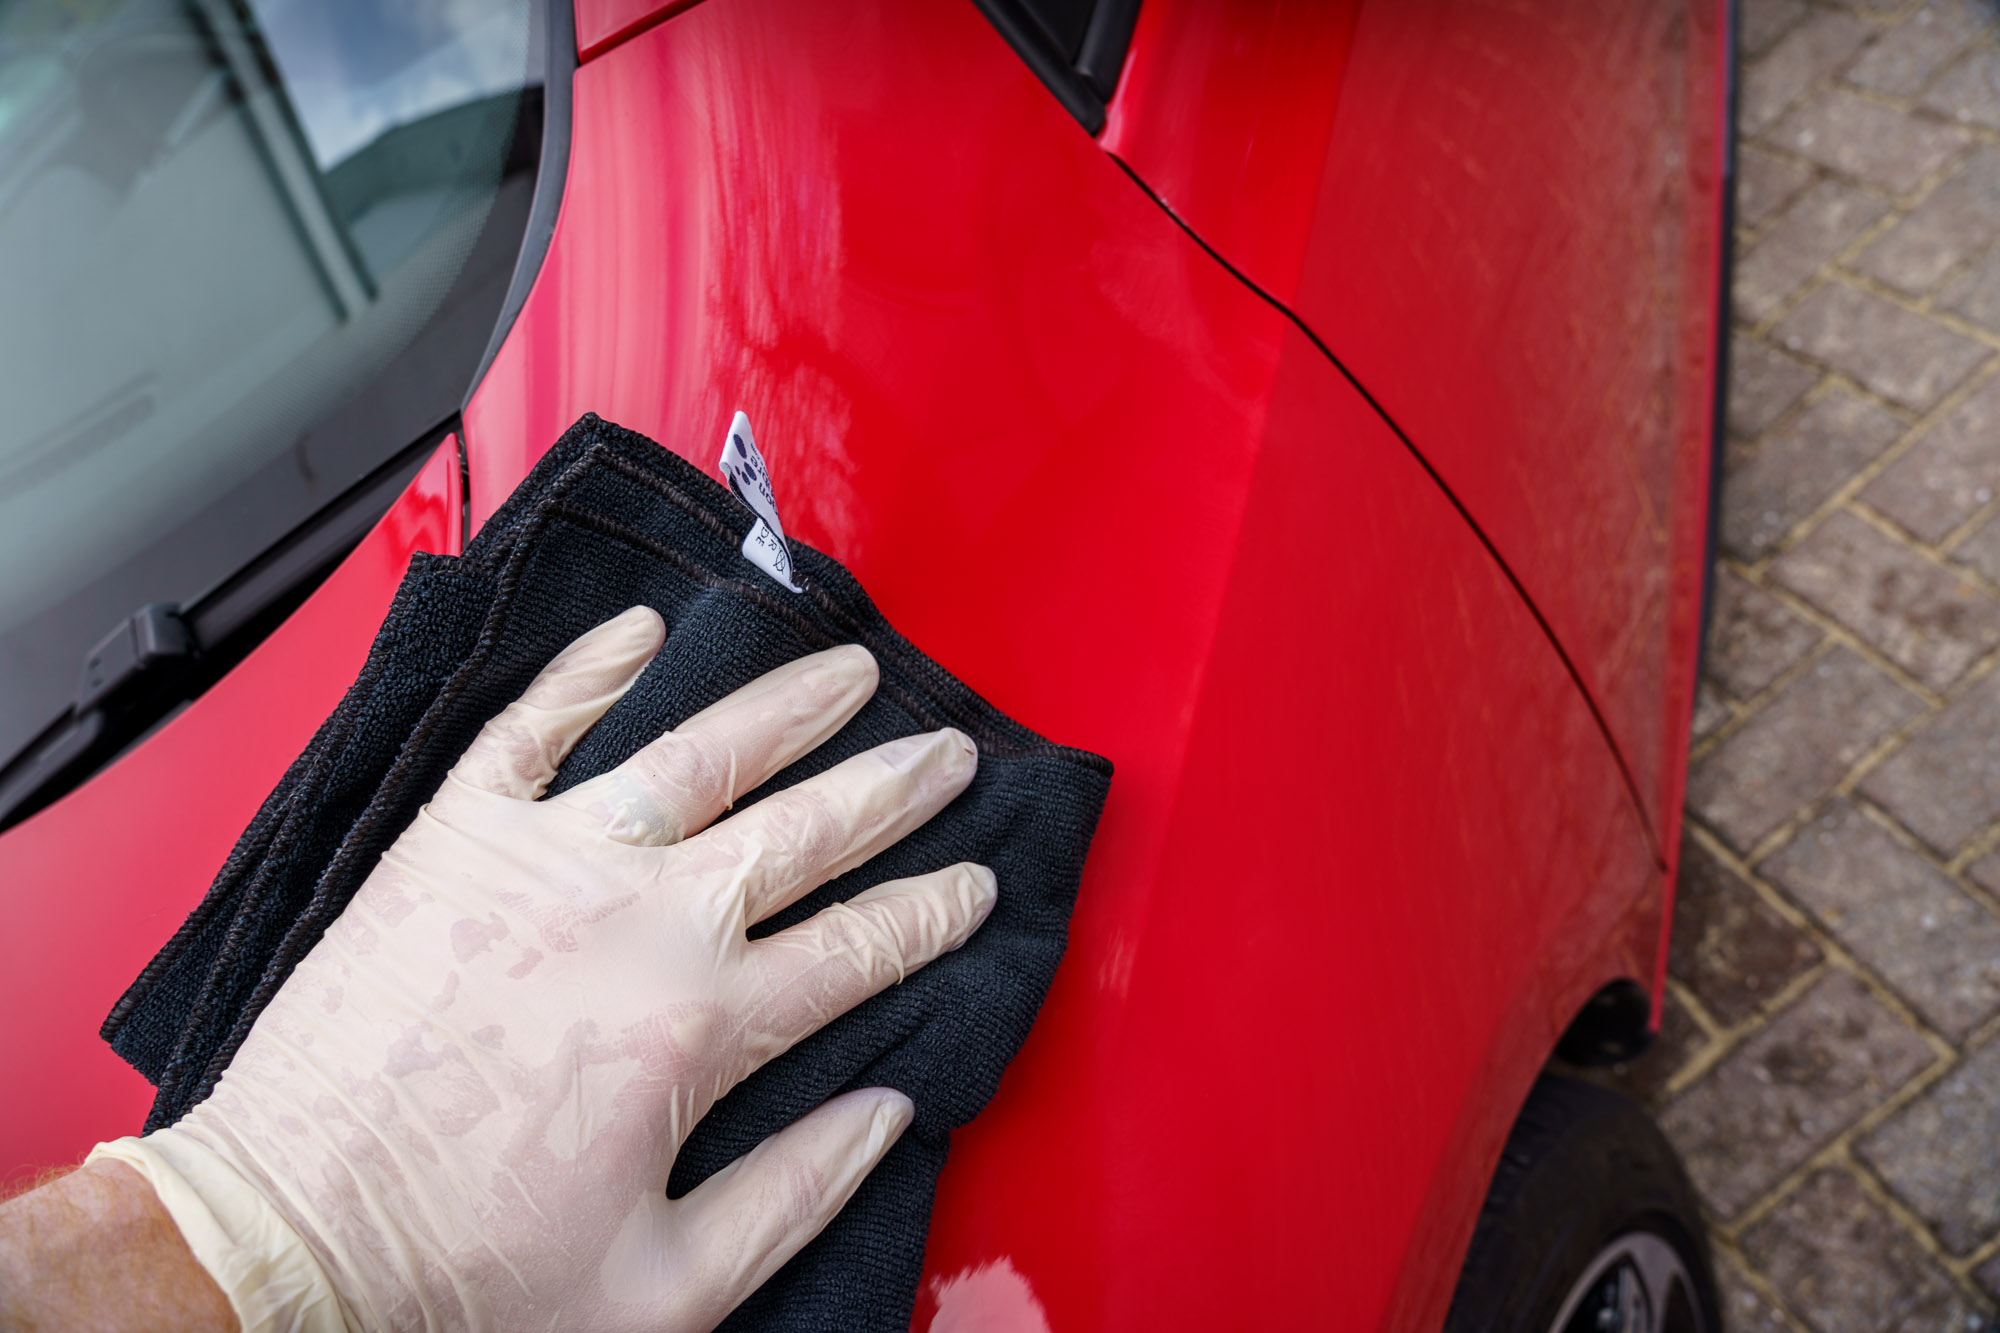
Wash the automobile first with warm water that has soap, then thoroughly rinse it before letting it dry. To ensure a seamless repair, and the cost to repair paint chip on car is kept low, ensure that the vehicle is totally clean.
Step 6: Remove Oils
Remove any oils, wax, or silicone from your car’s surface next so that new paint can adhere to it. Oil will cause less-than-ideal results if it is not removed formed the surface before painting. It could cause the paint to fail to stick properly and even result in a lack of smooth surface after painting the vehicle.
An example of such a solvent that is suitable for this is PPG Acryli-Clean, which is available in some major auto stores and professional body shop outlets.
Step 7: Filling Small Chips
We advise using the paint pen for incredibly tiny chips. The Duplicolor pen’s tiny tip made it simple to manage and simple to fill the divot.
Paint should be applied such that it barely protrudes above the surface. As a result, drying shrinkage is permitted, and any minor excess can be sanded with wet sandpaper and then taken through a smooth rub.
The edge of your hood is likely where the majority of stone chips will be located. Lift up the hood till the chip lies parallel to the ground allowing it to hold the paint even when it is still wet and keep the paint from flowing before it dries.
You’re lucky if there are no more chips your automobile has! If not, keep reading.
Step 8: Clean Medium Chips
Sometimes you may find that the chips which remain are considerably large. Continue to Step 11 if the chips that remain are larger. We’ll need to utilize the brush tool for medium-sized chips. With your tweezers, remove any loose particles and then paint from the chip before you begin brushing anything on.
Step 9: Adding The Primer
Utilizing the brush, apply the primer as instructed. Because they can differ amongst paint vendors, it’s crucial to read as well as abide by the directions.
Pay special note to how long every layer, whether it be paint, primer, or clearcoat, will take to dry. Working on wet paint may result in bubbles, rough patches, or even holes in the surface, which would lessen the protection and aesthetic appeal of the vehicle.
Step 10: Applying Paint
Applying paint is done once the priming has dried. The appearance of the repair was greatly enhanced by wet sanding, adding a clearcoat on top, then wet sanding once more, and finally ensuring the chip is smooth via rubbing.
Afterward, depending on your vision as well as the amount of sunlight, the repair appeared great from a distance of around three feet. You must choose how much effort you need to put into this.
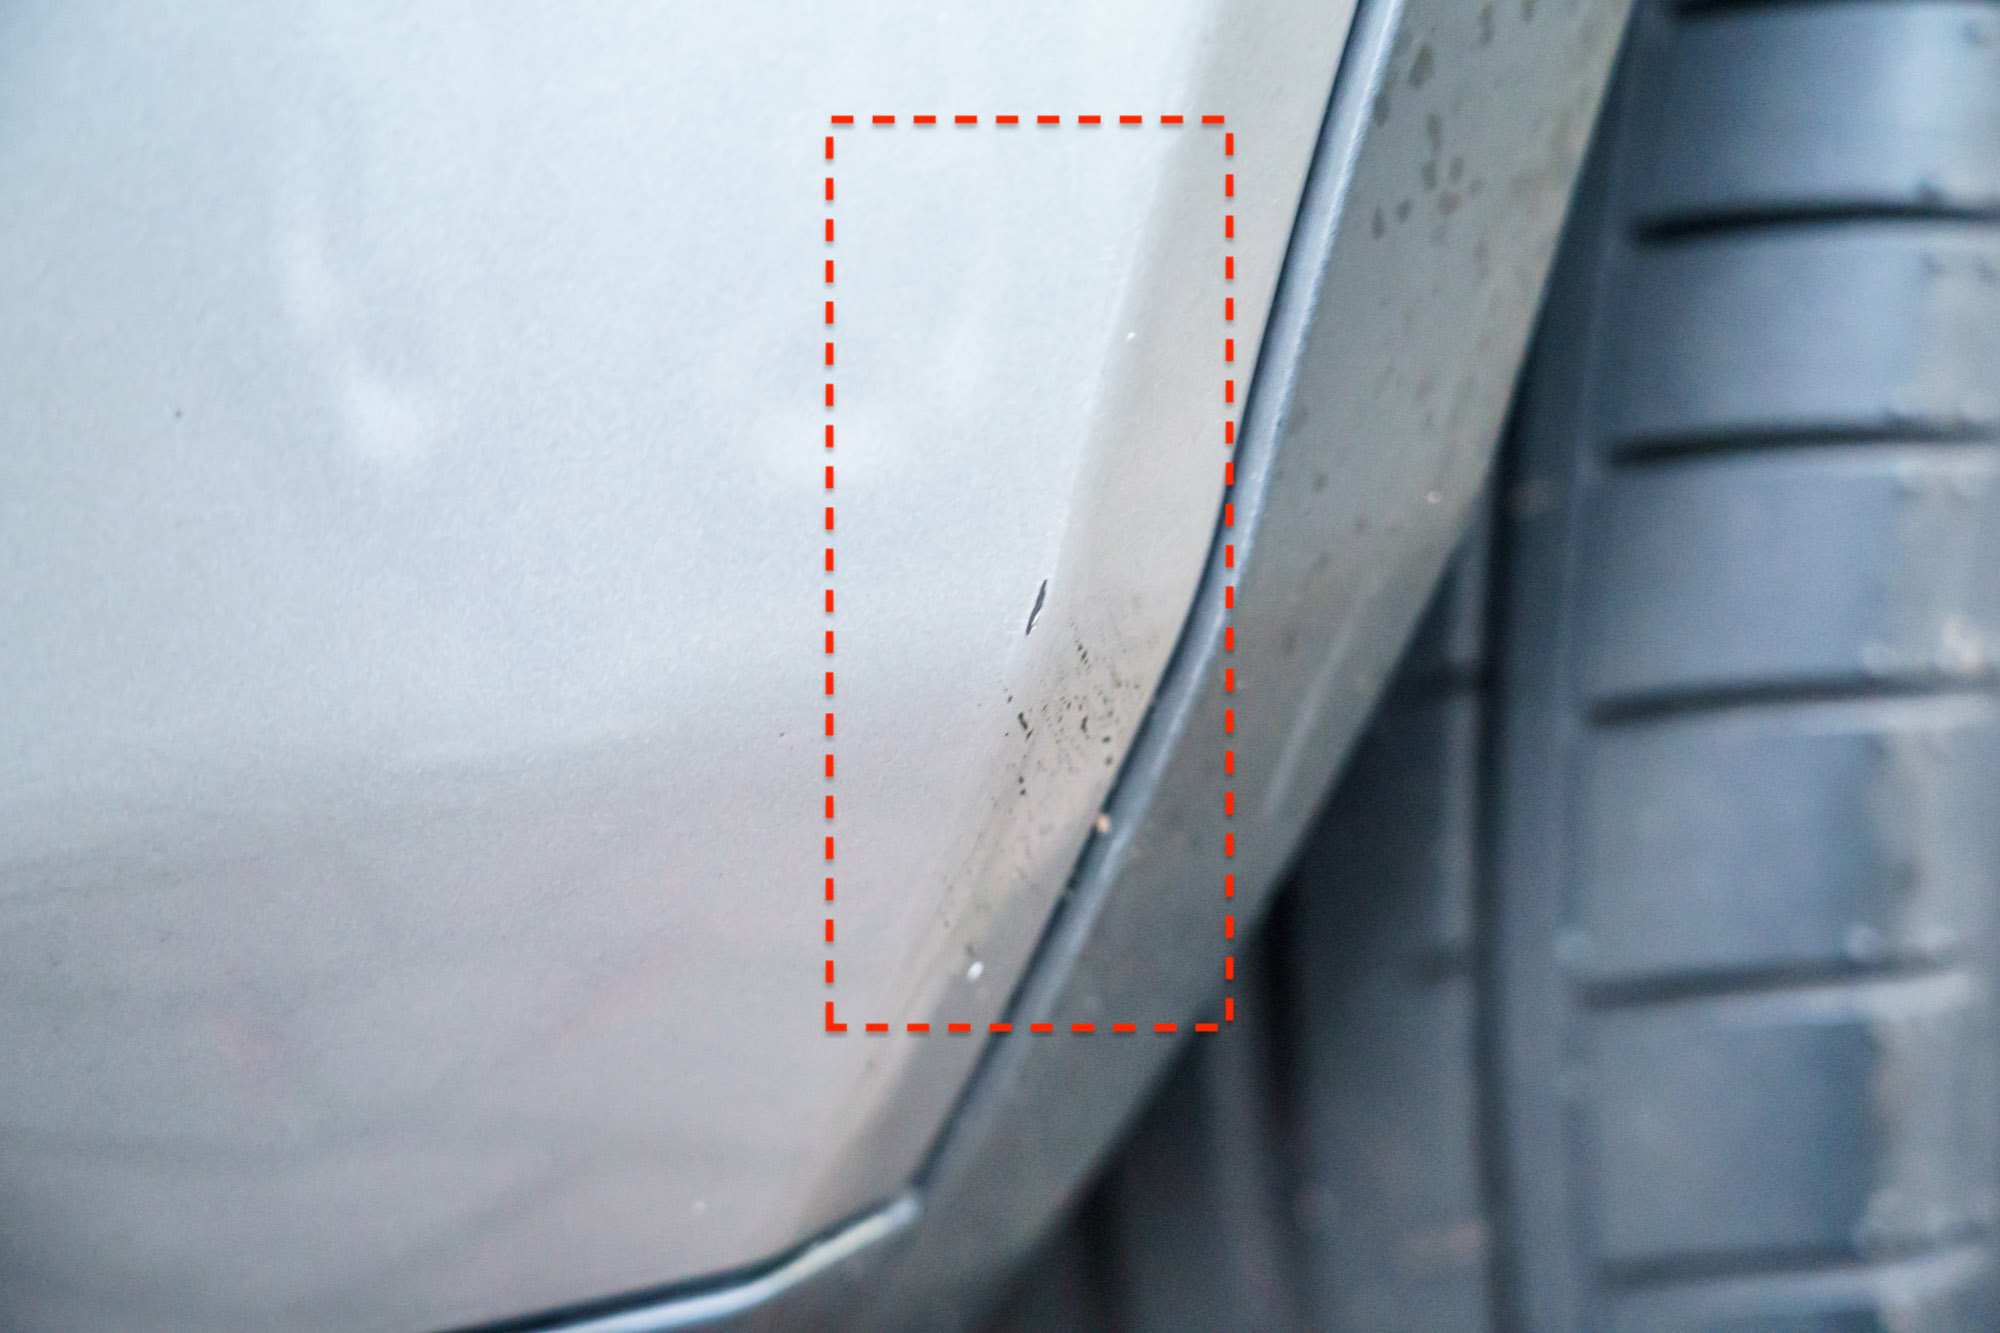
Step 11: Cleaning Up Large Chips
Larger chips, that will expose the car’s exposed surface to the environment and cause further damage, should be repaired using the remaining stages. Use a small dental pick for removing any paint that is loose from larger chips and those where a rust colony is already developing.
If you disturb any paint that isn’t already loose, you run the risk of turning a relatively small chip into a bigger one. If you remove the loose paint, it will ultimately flake off by itself and ruin the repair.
Step 12: Removing Rust
To dissolve as well as remove rust from the chip a rust remover, a comparable rust remover to the chip. Do this repeatedly until the swab is clean. After that, use isopropyl alcohol to rinse the chip of the rust remover. If you don’t get rid of the rust, then the paint won’t stick to the automobile correctly, and the rust will start to show through the paint job.
Step 13: Sanding The Edges
Sand the chip’s edges meticulously using dry sandpaper until they appear more rounded and smoother. Avoid the sharp edges that’d draw attention to the repair.
The end of the wooden axle was the perfect instrument for this because of its curved shape. Sanding should be dry because water will reactivate the rusting process.
If used for dry sanding, the 3M sandpaper quickly becomes clogged, but still, the adhesive dots help to make switching sanding circles simple.
Step 14: Applying Leverage
Now it’s time to get a flat stick and a tiny sandpaper circle. When sanding the chip as well as the area surrounding it, use the flat wood sanding stick edge to get additional leverage. Be careful not to sand outward too far, though, as this will remove the clearcoat as well as highlight the place.
To make the borders of your repair less obvious, you should taper the chip’s edges. Before proceeding to the following step, ensure you wipe and blow off any sanding residue.
Step 15: Applying The Primer
Applying primer should be done slowly, working your way outwards away from the center. Don’t extend yourself past the chip’s edge. In case you do, quickly remove any extra priming with the cotton swab dampened using lacquer thinner.
On a tiny table, put all of the painting tools within easy reach. The paint doesn’t stay wet for very long, so you do not want to dig around and struggle to find a mistake.
Step 16: Allowing The Primer To Dry
Depending on the humidity as well as temperature, allow the primer to completely dry. Follow the instructions that came accompanied your paint and repair kit carefully because they can tell you how many coats of paint, primer, and clearcoat you’ll need, and how long each layer has to cure. Allow enough time for the primer to thoroughly dry before painting over it.
Step 17: Wet Sanding
When preparing the primer base to paint when it has dried, wet sand the primer. Once more, avoid sanding away from the chip’s core too far to avoid wearing it through the surrounding clear coat. If the paint on your automobile is dark or shiny, sanding through to the clearcoat will be very obvious.
For such wet sanding sticks, we advise using a much stronger adhesive that is also water-resistant. You won’t have to switch sandpaper as frequently when wet sanding, but it is non-removable.
Step 18: Ensure Hands Are Steady
A factory finish will never be possible when applying paint to a chip of this size using a brush, however, you can seal the metal back as well as make it appear good from a distance.
You will get the best results using steady hands as well as little paint on the brush.
Before you begin, make sure the primer is completely dry.
Step 19: Adding The Clearcoat
Till the painted area is smooth, continue wet sanding it. Apply the clearcoat next using a brush. Similar to paint, the clearcoat is thin, lacquer-based, and dries quickly.
The line separating the original enamel from the new lacquer is visible in this image. That occurs when the repair’s edges aren’t sufficiently polished.
Before moving on to the following phase, take care of the initial work and ensure the chip is smooth as possible. However, if you’re fine with how things turn out, you can move on to step 21.
Step 20: Continuing On With The Repairs
Don’t worry if your fix didn’t work out the first time; there are many ways to save it. Sand the area once more till you reach the primer using wet and dry sandpaper after your first effort has dried.
This time, it’s crucial to keep inside the repair area, therefore you should probably cut your sandpaper area so that it sits flush with the stick’s radius.
After removing extra dust and moisture, repaint the affected area. When the paint is fully dry, wet sand this area using 1000-grit paper. After adding your clearcoat, wet sand once more.
Step 21: The Rubbing Compound
Take a little rubbing compound then polish this area using a cotton towel once the patch is flush with the rest of the paint. To remove all of the rubbing substance, properly rinse the spot with soapy water, and then allow it to dry. Prior to waxing your car, give the repair roughly a week to fully cure.
Step 22: You Are Done
This is the exact spot where the big chip was. It is a significant improvement but won’t fool a Concours judge.
Paint chip restoration is simple enough to attempt on your own unless you are short on time. Give chips some attention as quickly as you will be able to.
Not only are you saving plenty of money on a complete painting, but also on subsequent repairs. After all, your car’s paint serves as its primary defense against the elements. Behave accordingly.
Cost To Repair Car Paint Chips
Once you’ve determined the type of damage you’re working with, follow the procedure below to discover how much is the cost to repair paint chip on car.
For minor damage: Near you, mobile specialists will be probably available for each of the aforementioned types of automobile paint damage. A mobile technician that comes to you will be the least expensive option!
For all the scrapes, small paint chips, dents, or repair work they can accomplish for your automobile, you’ll spend anywhere from $150 to $250. Touch-up works well for small, superficial chips and scratches. Repairing dents will cost about $75 per panel. Or, you could DIY it if you’re willing to learn how to get dents out of car.
Cost To Repair Paint Chip On Car – Touch-Ups
Touch-up fixes will cost significantly less and yet look much better than body shop work, even though they won’t necessarily make your car look brand new. They will stop the damage from growing worse and should last for as long as you own the vehicle.
If the damage is extensive and widespread, you might choose to have the paint of your automobile sprayed instead of simply touching it up.
If there is mild damage to a vertical surface (like a car door), use mobile spray paint solutions. This is your greatest option if you have multiple faulty panels and the cost to repair paint chip on car will be between $200 and $400.
If the moderate to significant damage to your automobile is on a flat surface (such as the hood), is just too extreme for touch-ups or mobile spray painting, or you just need it to seem brand new, you’ll require a body shop.
Vertical versus horizontal surfaces have different effects on the amount of dust and other particles that stick to the car.
It is nearly impossible to avoid particulates from impeding a spray paint job on horizontal surfaces unless you are working in a controlled environment.
You would therefore be better off taking your car to a body shop that has access to a facility that is sterile, ventilated, and set aside specifically for that purpose.
Depending on the body shop and where you reside, a panel at a body shop might cost anywhere between $250 and $600.
FAQs On Cost To Repair Paint Chip On Car
How Much To Paint A Car
From $300 to $1,000 is spent on necessities. To achieve an appealing finish, the price of a regular paint job will include sanding the entire exterior as well as taking out the rust before applying paint. The typical price is between $1,000 to $4,500.
Where Can I Get My Car Painted
While dents certainly lessen your car’s aesthetic appeal, it can be expensive to have a body shop apply fresh paint or even just a minor touch-up. You can use toothpaste to rub away surface scratches, use a scratch-removal product for smaller scratches, or sand the area and repaint it if the damage is deep.
How To Buff Out Scratches On Car
As soon as your car has dried, take some toothpaste (whitening types work best) and dab a quarter-sized amount of it on a microfiber towel. Rub the toothpaste further into the scratch as well as buff it with a circular motion and medium pressure.