
- How to Diagnose a Failing Alternator
- Tools Needed to Change an Alternator
- Guide to Replacing an Alternator
- Choose the Right Replacement Alternator
- Signs of a Failing Alternator
- Maintaining Your Vehicle’s Alternator
- Benefits of Upgrading Your Alternator
- Problems with an Aftermarket Alternator
- Q&A
How to Diagnose a Failing Alternator
The alternator is an essential component of a vehicle’s electrical system, as it is responsible for generating the power needed to keep the battery charged and all of the vehicle’s electrical components running. This is the reason why understanding how to change alternator can be crucial.
But, what do you need to know about how to tell if your alternator is bad, or how to know if your alternator is bad? Well, here are some pointers:
- A failing alternator can cause a variety of issues, including dim headlights, slow engine cranking, and even complete electrical failure. To diagnose a failing alternator, there are several steps that should be taken.
- First, check the battery voltage with a multimeter or voltmeter. If it reads 12 volts or less when the engine is off and 14 volts or more when it’s running then this indicates that there may be an issue with the alternator. This is important to differentiate the difference between a bad battery vs a bad alternator.
- Next, inspect all wiring connected to the alternator for any signs of corrosion or damage. If any wires appear to be damaged they should be replaced immediately as this could indicate an issue with either the wiring itself or with one of its connections to other components in your vehicle’s electrical system.
- Finally, check for any visible signs of damage on both sides of your alternator belt such as cracks or fraying which could indicate that it needs replacing due to wear and tear over time. Additionally, you should also listen out for any strange noises coming from your engine bay which could indicate that something isn’t quite right within your car’s electrical system such as bearing noise from inside your alternator itself which would require further investigation by a qualified mechanic if heard during operation.
If after completing these steps you still suspect that there may be an issue with your car’s alternator then you should take it to a qualified mechanic who will have access to more advanced diagnostic tools to accurately diagnose and repair any faults found within its systems.
What Tools Are Needed to Change an Alternator
So, what tools do you need to learn how to change alternator? Changing an alternator requires a few basic tools. These include a socket set, ratchet, and extension bar. A wrench set may also be necessary depending on the type of alternator being changed.
Additionally, it is important to have a screwdriver and pliers on hand for any additional tasks that may arise during the process. Finally, safety glasses should always be worn when working with automotive parts to protect against debris or sparks from flying into the eyes.
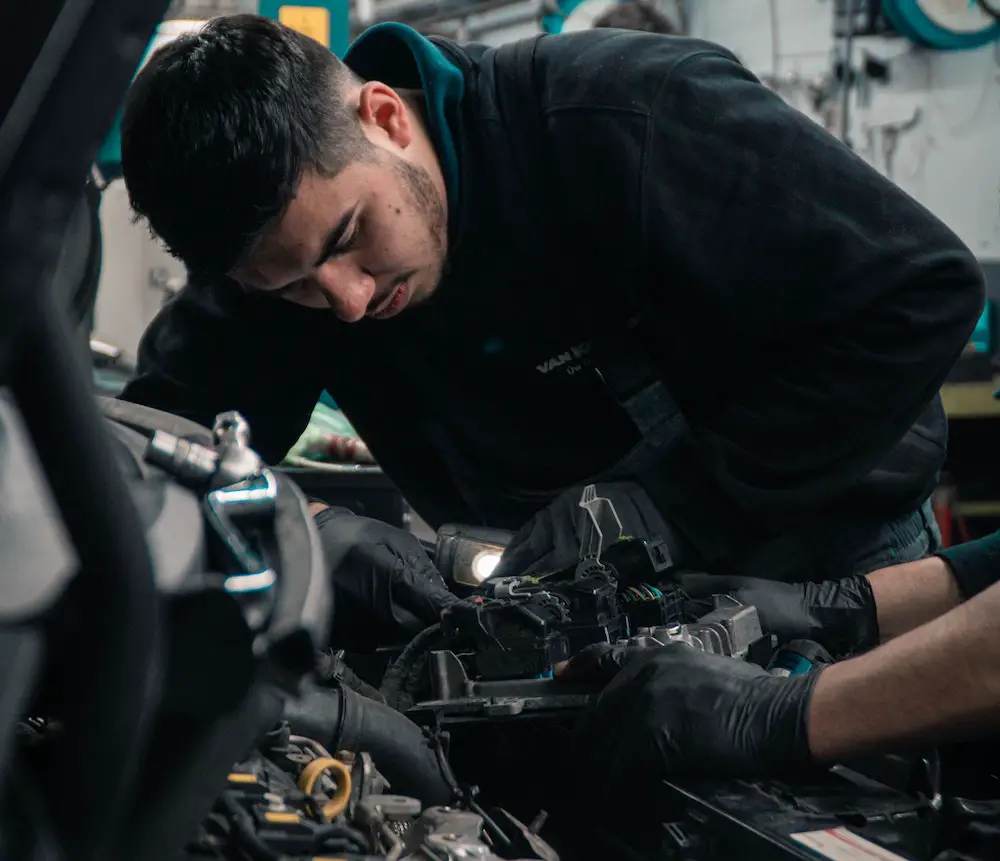
Step-by-Step Guide to Replacing an Alternator
The alternator is an essential component of a vehicle’s electrical system. It is responsible for generating the electricity needed to power the car’s accessories, such as headlights, radio, and air conditioning. As such, understanding how to change alternator can be a useful trick, once you’ve figured out how to tell if the alternator is bad.
When an alternator fails or begins to malfunction, it can cause a variety of problems with your vehicle. Fortunately, replacing an alternator is not a difficult task and can be done in just a few steps. This guide will provide step-by-step instructions on how to replace an alternator in your vehicle.
Step 1: Disconnect the Battery
Before beginning any work on your car’s electrical system, it is important to disconnect the battery first. This will prevent any accidental short circuits or shocks while you are working on the car. To do this, locate the negative terminal of your battery (in addition to knowing where is an alternator located) and use a wrench to loosen and remove it from its post. Once removed, set it aside in a safe place where it cannot come into contact with metal objects or other sources of electricity.
Step 2: Remove the Old Alternator
Once you have disconnected the battery from its post, you can begin removing the old alternator from your vehicle’s engine bay. Start by locating all of the bolts that hold it in place and use a wrench or socket set to loosen them until they are free from their posts. Once all of these bolts have been removed, carefully pull out the old alternator from its mounting bracket and set it aside for disposal later on. To learn more, do check out our guide on how long does an alternator last.
Step 3: Install a New Alternator
Now that you have removed your old alternator from its mounting bracket, you can begin installing your new one in place instead. Start by lining up all of its mounting holes with those found on your engine bay before securing them together using new bolts provided with your replacement part (or reusing those taken off earlier). Make sure that each bolt is tightened securely before moving on to connecting up any wiring harnesses associated with this component as well.
Step 4: Connect Wiring Harnesses
Once all bolts are secured tightly into place around both sides of this new part (as well as any additional brackets if necessary), you can now move on to connecting up any wiring harnesses associated with this component too. Begin by locating each connector found along either side before plugging them back together again – making sure that they fit snugly against one another without leaving any gaps between them at all times.
Step 5: Reconnect Battery & Test New Alternator
Finally, once everything has been connected back together correctly – including both sides of this new part as well as their respective wiring harnesses – then go ahead and reconnect back up again too. After doing so make sure that everything works properly by starting up the engine once more before testing out various functions such as headlights/radio/air conditioning etc…to ensure they are running smoothly without issue now too.
Replacing an alternator may seem like an intimidating task but following these simple steps should make replacing yours much easier than expected. Be sure to take extra caution when handling wires or components near live batteries though – always wear protective gear when working around electricity just in case something goes wrong during the installation process itself.
How to Choose the Right Replacement Alternator for Your Vehicle
When it comes to replacing the alternator in your vehicle, it is important to choose the right one for your specific make and model. The wrong alternator can cause a variety of problems, including poor performance and even engine damage. Here are some tips on how to choose the right replacement alternator (or perhaps a simpler alternator repair) for your vehicle.
- First, you should determine what type of alternator you need. Alternators come in different sizes and configurations depending on the make and model of your vehicle. You should consult with a qualified mechanic or look up information online about what type of alternator is compatible with your car or truck.
- Next, you should consider the amperage rating of the new alternator that you are considering purchasing. The amperage rating indicates how much power an alternator can produce at any given time; higher ratings indicate more power output from an engine’s electrical system.
- Make sure that the new alternator has a higher amperage rating than what was originally installed in your vehicle; this will ensure that it can handle all of its electrical needs without overloading itself or other components in its system.
- Finally, check to see if there are any special features available on certain models that may be beneficial for your particular application such as voltage regulators or built-in cooling fans which help keep temperatures down during heavy use periods like long drives or hauling heavy loads over long distances. These features may be worth investing in if they fit within your budget and provide additional benefits for extended use periods where extra power output is needed from time to time.
By following these tips when selecting a replacement alternator for your vehicle, you can ensure that it will perform optimally while also protecting other components from potential damage due to excessive strain caused by inadequate power output levels from an improperly sized unit being used instead
Common Signs of a Failing Alternator and What To Do About It
The alternator is an essential component of a vehicle’s electrical system, providing power to the battery and other electrical components. Unfortunately, like all car parts, it can fail over time. Knowing the signs of a failing alternator can help you take action before it fails completely and leaves you stranded on the side of the road.
- One common sign of a failing alternator is dim or flickering headlights. This occurs when there isn’t enough power being generated by the alternator to keep up with demand from other components in your vehicle. If this happens, check your battery voltage with a multimeter to see if it’s below 12 volts; if so, then your alternator may be failing and needs to be replaced as soon as possible.
- Another sign is strange noises coming from under the hood when you start your car or accelerate. This could indicate that one or more bearings in the alternator are worn out and need replacing. If this is happening, have a mechanic inspect your vehicle immediately for further diagnosis and repair work if necessary.
- Finally, another symptom of an impending failure is an illuminated dashboard alternator warning light that says “ALT” or “GEN” (for generator). This indicates that there’s something wrong with either your battery or alternator; again, have a mechanic inspect it right away for further diagnosis and repair work if necessary.
If any of these signs are present in your vehicle then it’s important to take action quickly before things get worse – having an experienced mechanic inspect and replace any faulty parts will ensure that you don’t end up stranded on the side of the road due to an unexpected breakdown caused by a faulty part.
Tips for Maintaining Your Vehicle’s Alternator
1. Check the Alternator Belt: The alternator belt should be checked regularly for signs of wear and tear, such as cracks or fraying. If the belt is worn, it should be replaced immediately to ensure the proper operation of the alternator.
2. Monitor Battery Voltage: The battery voltage should be monitored regularly to ensure that it is not dropping too low or becoming overcharged due to a faulty alternator. If the voltage drops below 12 volts, it may indicate a problem with the alternator and should be checked by a professional mechanic.
3. Clean Connections: All connections between the battery and alternator should be kept clean and free from corrosion to ensure the proper operation of both components. A wire brush can be used to remove any dirt or debris that has built up on these connections over time.
4. Inspect Wiring Harness: The wiring harness connecting the battery and alternator should also be inspected periodically for signs of damage or wear-and-tear that could lead to an electrical short circuit or other problems with your vehicle’s electrical system.
5. Replace Fuses Regularly: Fuses are designed to protect your vehicle’s electrical system from overloads caused by faulty wiring or components, so they must always remain in good condition for your vehicle’s electrical system to function properly at all times. It is important that you replace any blown fuses (such as the alternator fuse) as soon as possible in order to prevent further damage from occurring due to an overloaded circuit.
The Benefits of Upgrading Your Vehicle’s Alternator
The alternator is an essential component of any vehicle, as it helps to keep the battery charged and powers all of the electrical components. Upgrading your vehicle’s alternator can provide a number of benefits, including improved performance, increased reliability, and better fuel economy.
- One of the primary advantages of upgrading your vehicle’s alternator is improved performance. A higher-output alternator will be able to provide more power for all of your electrical components, such as lights and audio systems. This can help ensure that these components are running at their peak efficiency and will not be affected by voltage drops or other issues caused by a weak or failing alternator.
- Another benefit to upgrading your vehicle’s alternator is increased reliability. A higher-output model will be able to handle more load without becoming overworked or failing prematurely due to excessive strain on its internal components. This can help ensure that you don’t experience any unexpected breakdowns due to a faulty part in the middle of nowhere with no way home.
- Finally, upgrading your vehicle’s alternator can also lead to better fuel economy. By providing more power for all electrical components without having them draw too much energy from the battery, you may find that you get better gas mileage overall since less energy is being wasted in powering those items unnecessarily.
In conclusion, there are many benefits associated with upgrading your vehicle’s alternator including improved performance, increased reliability, and better fuel economy. If you’re looking for ways to improve the overall efficiency and longevity of your car or truck then investing in an upgraded model could be just what you need.
Troubleshooting Common Problems with an Aftermarket Alternator
Aftermarket alternators are a popular choice for many vehicle owners, as they offer increased power and efficiency compared to stock alternators. That’s especially so with the best brand of alternator around.
However, like any other automotive component, aftermarket alternators can experience problems that require troubleshooting. Here are some of the most common issues and how to address them:
1. Alternator Not Charging: If your aftermarket alternator is not charging the battery, it could be due to a faulty voltage regulator or wiring issue. Check all connections and wiring for signs of corrosion or damage. If everything looks good, then you may need to replace the voltage regulator or have it tested by a professional mechanic (as one would with knowing how to test a car battery, as you learn how to check if the alternator is bad).
2. Alternator Overheating: An overheating alternator can be caused by an incorrect belt tension setting or an undersized pulley on the crankshaft drive system. Make sure that the belt tension is set correctly according to manufacturer specifications and check for any signs of wear on the pulley system components such as bearings or seals that may need replacing.
3. Alternator Making Noise: A noisy aftermarket alternator can be caused by worn-out bearings in either the rotor assembly or stator assembly inside of it which will need replacing if this is found to be the case during inspection with a mechanic’s stethoscope toolkit. Additionally, make sure all mounting bolts are tightened properly as loose bolts can cause vibration which leads to noise from within your engine bay area when running at higher RPMs.
4. Alternator Not Producing Enough Power: If your aftermarket alternator isn’t producing enough power then you should first check its output rating against what your vehicle requires to ensure compatibility between them both. Additionally, inspect all electrical connections for corrosion, loose wires, frayed insulation, etc., as these could also lead to the insufficient power output from your unit.
By following these steps you should be able to identify and resolve any issues with your aftermarket alternator quickly and easily so that you can get back on the road again without delay.
How To Change Alternator: Q&A
1. How do I change an alternator?
To change an alternator, you will need to disconnect the negative battery cable, remove the drive belt and pulleys, unbolt the alternator from its mounting bracket, and then install a new one in its place. Make sure to follow all safety precautions when working with electrical components.