
- When It’s Time to Replace Cabin Air Filter
- Guide to Replacing Your Cabin Air Filter
- How to Choose the Right Replacement
- Easily Accessing and Replacing a Filter
- Mistakes People Make When Replacing
- DIY vs Professional Installation of New Filter
- Signs That You Need a Replacement Filter
- Q&A
How to Identify When It’s Time to Replace Your Cabin Air Filter
It is important to regularly check and replace your cabin air filter in order to ensure the quality of the air you breathe inside your vehicle. A clogged or dirty cabin air filter can reduce airflow, cause unpleasant odors, and even lead to health issues. Here are some signs that it may be time to replace your cabin air filter:
1. Reduced Airflow: If you notice a decrease in airflow from the vents when you turn on the fan, this could be an indication that your cabin air filter is clogged or dirty.
2. Unpleasant Odors: If there is an unpleasant smell coming from the vents when you turn on the fan (just as bad as mold in car), this could also indicate that it’s time for a new cabin air filter.
3. Allergies or Respiratory Issues: If you find yourself experiencing allergies or respiratory issues while driving, this could be due to poor quality of air caused by a clogged or dirty cabin air filter.
4. Visible Dirt and Debris: If you can see dirt and debris coming out of the vents when you turn on the fan, then it’s definitely time for a new cabin air filter.
By regularly checking and replacing your cabin air filter as needed, you can ensure that only clean and fresh-smelling air enters your vehicle’s interior space – keeping both yourself and your passengers safe from any potential health risks associated with breathing in contaminated indoor car air.
Step-by-Step Guide to Replacing Your Cabin Air Filter
1. Locate the cabin air filter. Depending on your vehicle, the cabin air filter may be located in different places. Common locations include behind the glove box, under the hood, or near the firewall of your vehicle.
2. Remove and inspect the old filter. Carefully remove the old filter from its housing and inspect it for any signs of damage or debris buildup that could indicate a need for a replacement sooner than recommended by your manufacturer’s guidelines.
3. Purchase a new cabin air filter that is compatible with your vehicle’s make and model year. Make sure to check with your local auto parts store (or the best online auto parts stores) to ensure you are purchasing an appropriate replacement part for your car or truck’s specific needs.
4. Install the new cabin air filter into its housing in place of the old one you removed earlier, making sure it is properly seated and secured in place before closing up any panels or compartments you opened during this process.
5. Dispose of old filters responsibly. Once you have installed a new cabin air filter into its housing, dispose of any used filters responsibly according to local regulations and guidelines for hazardous waste disposal.
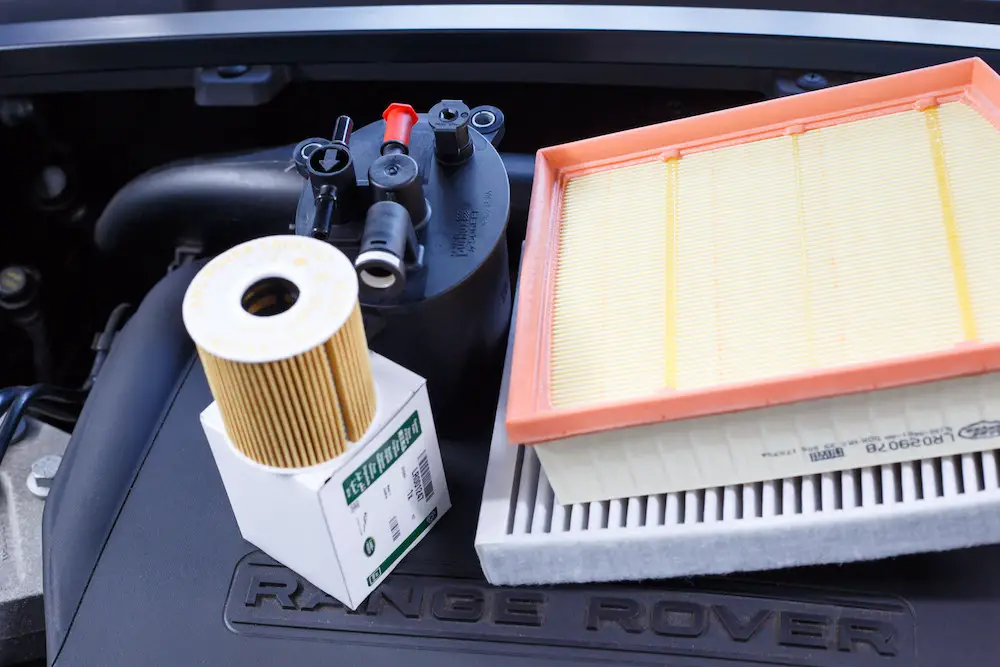
How to Choose the Right Replacement Cabin Air Filter for Your Vehicle
When it comes to maintaining the quality of air inside your vehicle, a cabin air filter is essential. This filter helps to keep out dust, pollen, and other airborne particles that can cause allergies or respiratory issues.
It also helps to reduce odors from outside sources such as exhaust fumes and cigarette smoke (for more insight, check out our guide on how to get cigarette smell out of car, as well as how to get rid of smoke smell in car, and how to get rid of cigarette smell in car).
Replacing your cabin air filter regularly is important for keeping the air in your car clean and healthy. Choosing the right replacement cabin air filter for your vehicle can be a daunting task. Here are some tips to help you make an informed decision:
1. Check Your Vehicle’s Manual: The first step in choosing the right replacement cabin air filter is to check your vehicle’s manual (or even auto repair manuals, such as Haynes versus Chilton) for specific instructions on how often you should replace it and what type of filter you need. This will ensure that you get the correct size and type of filter for your car or truck.
2. Consider Your Climate: Depending on where you live, certain types of filters may be more suitable than others due to climate conditions such as humidity or temperature extremes. For example, if you live in an area with high levels of humidity, then a charcoal-based activated carbon filter may be best suited for trapping moisture before it enters the interior of your vehicle’s cabin space.
3. Choose Quality Materials: When selecting a replacement cabin air filter, make sure that it is made from quality materials such as pleated paper or synthetic media which are designed specifically for trapping airborne particles without restricting airflow into the interior space of your car or truck’s passenger compartment area. Additionally, look out for filters with additional features like anti-bacterial agents which help reduce odors caused by bacteria buildup over time.
4. Compare Prices: Once you have narrowed down which type and size of replacement cabin air filters are best suited for your needs, compare prices between different brands so that you can get one at an affordable price point. Be sure to read customer reviews online so that you can get an idea about how well each brand performs before making a purchase decision.
By following these tips, choosing the right replacement cabin air filter should be much easier.
Tips for Easily Accessing and Replacing a Hard-to-Reach Cabin Air Filter
1. Make sure you have the right tools for the job. You will need a flathead screwdriver, a Phillips head screwdriver, and possibly some needle-nose pliers to access and replace your cabin air filter.
2. Locate the cabin air filter housing in your vehicle’s engine compartment or glove box area. Depending on your make and model of car, it may be located in different places so consult your owner’s manual if you are unsure where to look.
3. Remove any screws or clips that are holding the housing in place using either a flathead or Phillips head screwdriver depending on what type of fastener is used to secure it in place.
4. Carefully remove the old cabin air filter from its housing by gently pulling it out with your hands or using needle-nose pliers if necessary to loosen any stubborn pieces of debris that may be stuck inside the filter itself.
5. Insert the new cabin air filter into its housing making sure that all edges are properly aligned before pushing it down firmly into place until it is securely seated within its frame/housing unit again using either your hands or needle-nose pliers if necessary for extra leverage when pushing down on stubborn pieces of debris that may be stuck inside the new filter itself as well as ensuring proper alignment before securing back into place with screws/clips again depending on what type of fastener was used originally to secure it in place initially when removing from its frame/housing unit earlier during this process as well.
6. Finally, replace any screws/clips removed earlier during this process back onto their original positions once more using either a flathead or Phillips head screwdriver depending on what type of fastener was used originally to secure them back into position again after replacing and seating firmly within its frame/housing unit once more with new cabin air filter now installed correctly at this point too.
Common Mistakes People Make When Replacing Their Cabin Air Filters
1. Not Checking the Size: Before purchasing a new cabin air filter, it is important to check the size of the filter that is compatible with your vehicle. If you purchase a cabin air filter that is too large or too small, it will not fit properly and may cause damage to your vehicle’s ventilation system.
2. Not Replacing Often Enough: Cabin air filters should be replaced every 12,000 to 15,000 miles or at least once a year to ensure optimal performance and cleanliness of the air inside your vehicle. Neglecting to replace your cabin air filter can lead to poor airflow and an accumulation of dust and debris in the ventilation system.
3. Installing Incorrectly: When replacing your cabin air filter, make sure that you are following all instructions carefully so as not to damage any components of the ventilation system while installing it incorrectly could lead to further issues down the line.
4. Not Cleaning Out Debris: Before installing a new cabin air filter, make sure that you have removed any debris from around the area where it will be installed as this can interfere with its performance if left unchecked.
The Pros and Cons of DIY vs Professional Installation of a New Cabin Air Filter
When it comes to replacing the cabin air filter in your vehicle (and learning how to change a cabin air filter), you have two options: do-it-yourself (DIY) installation or professional installation. Both have their pros and cons, so it’s important to consider them carefully before making a decision.
The Pros of DIY Installation
The main advantage of DIY installation is that it can save you money. You don’t need any special tools or skills to install a new cabin air filter, and the parts are relatively inexpensive. Additionally, if you’re comfortable with basic automotive maintenance tasks, then installing the filter yourself can be an easy and straightforward process.
The Cons of DIY Installation
On the other hand, there are some potential drawbacks to doing your own installation. If you don’t know what you’re doing or make a mistake during the process, then it could lead to costly repairs down the line.
Additionally, if something goes wrong during installation and causes damage to your vehicle or its components, then you may not be covered by any warranty that came with your car or parts.
The Pros of Professional Installation
Having a professional install your new cabin air filter has several advantages over DIY installation. For one thing, they will have access to specialized tools and equipment that may not be available for home use; this means they can get the job done quickly and correctly without having to worry about making mistakes or causing damage in the process.
Additionally, most professionals will offer some kind of warranty on their workmanship; this means that if something does go wrong after they finish installing your new filter then they will take responsibility for fixing it at no additional cost to you.
The Cons of Professional Installation
The main disadvantage associated with professional installation is cost; depending on where you live and who does the work for you this could end up being quite expensive compared to doing it yourself at home with the minimal expense involved aside from purchasing parts themselves.
Additionally, since most professionals charge by labor time (i.e. the mechanic labor rate), there is always a chance that they might take longer than necessary in order to complete their task which would result in higher costs overall.
Signs That You Need an Immediate Replacement for Your Old Cabin Air Filter
If you are noticing any of the following signs, it is likely time to replace your old cabin air filter:
1. Unusual odors come from the air vents when the fan is on. This could be a sign that your filter has become clogged with dust, dirt, and other debris.
2. Reduced airflow from the vents when you turn on the fan. This could indicate that your filter is blocked and needs to be replaced to restore proper airflow.
3. An increase in allergens or pollutants inside your vehicle’s cabin space. If you are noticing an increase in sneezing or coughing while driving, this could be a sign that your cabin air filter needs to be replaced as soon as possible to reduce exposure to these allergens and pollutants.
4. Visible signs of damage or wear on the filter itself such as tears or holes in its surface area can also indicate that it needs replacing immediately for optimal performance and efficiency of your vehicle’s climate control system.
Q&A
1. What is a cabin air filter?
A cabin air filter is an air filter that cleans the air entering the interior of a vehicle through the heating, ventilation, and air conditioning (HVAC) system. It helps to reduce dust, pollen, and other airborne contaminants from entering the vehicle’s interior.
2. Why should I replace my cabin air filter?
Replacing your cabin air filter regularly can help improve your car’s performance by allowing more clean and fresh air into the engine compartment as well as reducing odors inside your car’s interior. Additionally, it can help reduce allergens in the car which can be beneficial for those with allergies or asthma.
3. How often should I replace my cabin air filter?
It is recommended to replace your cabin air filter every 12 months or 12,000 miles (whichever comes first). However, this may vary depending on how often you drive in dusty or polluted areas so it’s best to check with your owner’s manual for specific recommendations for your make and model of vehicle.
4. Where is my cabin air filter located?
The location of a vehicle’s cabin air filter will vary depending on make and model but typically they are located behind either the glove box or dashboard area near where fresh outside airflow enters into the HVAC system of a vehicle’s interior space.
5. What tools do I need to replace my cabin Air Filter?
In order to replace a cabin air filter you will need pliers; a screwdriver; a replacement cabin air filter; gloves; a flashlight; vacuum cleaner (optional).
6. How do I know when it’s time to change my cabin air filter?
You may notice decreased airflow from vents when running AC/heat settings in addition to increased odors coming from vents when running AC/heat settings if it is time for you to change out your cabin air filter.
7. What are some signs that indicate that I need a new cabin air filter?
Some signs that indicate you may need a new cabin air filter include decreased airflow from vents when running AC/heat settings as well as increased odors coming from vents when running AC/heat settings. Additionally, if there appears to be excessive dust buildup around vent openings this could also be an indication that it is time for you to change out your cabin air filter.
8. What happens if I don’t replace my cabin air filter regularly?
If not replaced regularly then dirt particles can build up within the HVAC system which could lead to clogged filters resulting in reduced efficiency of heating & cooling systems as well as poor quality indoor environment due to too much dust & pollen being circulated throughout the passenger compartment.