Half a year ago, I bought 2016 Bentley Continental GT Speed, which has since become the newest member of Motor Verso’s project cars. Among the many things that I had intended to do on the Bentley was working on that ancient infotainment system that now plagues pretty much any old VW Group car from years past. It wasn’t just doing project car things for the sake of creating content either, as I do intend on spending as much time as possible behind the wheel. As you can imagine, trying to fall back on modern creature comforts like using up-to-date satellite navigation or listening to podcasts using that old head unit is a bit of a pain. On the bright side, there are some upgrade kits on the market, like those offered by Integrated Automotive.
Integrated Automotive is one of the leading companies, here in the UK, in particular, that has a lot of expertise under their belt when it comes to upgrading and retrofitting old infotainment units. One of their specialities, in fact, is being able to add Apple CarPlay and Android Auto functionality to these old systems, which were never designed to run them in the first place. Besides that, their upgrade kits could even add features such as wirelessly pairing your phone to run Apple CarPlay or Android Auto, allowing you to use digital voice assistants, and more. However, the question remains… Is it even worth it upgrading your old infotainment system, in the first place? Well, to answer this, I’ll be installing one of Integrated Automotive’s upgrade kits onto the Bentley.
What Do You Get In The Box?
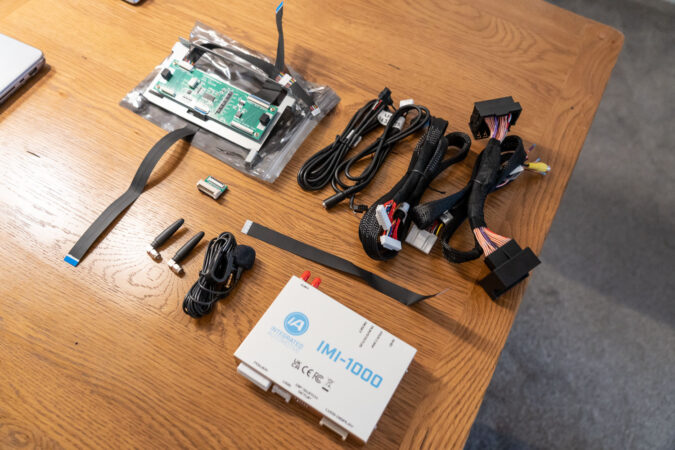
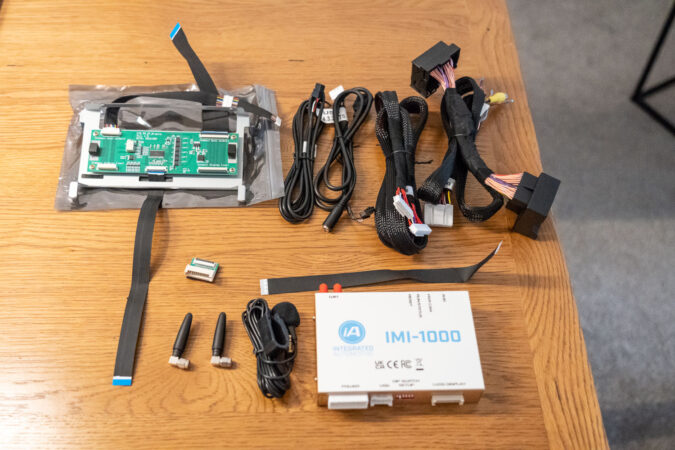
Specifically, we’re taking a closer look at Integrated Automotive’s Apple CarPlay and Android Auto upgrade kit for the Bentley RNS810 infotainment system. This specific head unit was fitted into Continental GTs and Flying Spurs made from the 2011 to the 2018 model years. When you open the box, what you’re greeted with might seem rather intimidating at first, since this upgrade kit does include everything you’ll be needing out of the box. However, once you understand what each thing does and how it all goes together, it makes more sense then. So, with that in mind, let’s dissect a bit more as to what you’ll be dealing with when it comes time to install them.
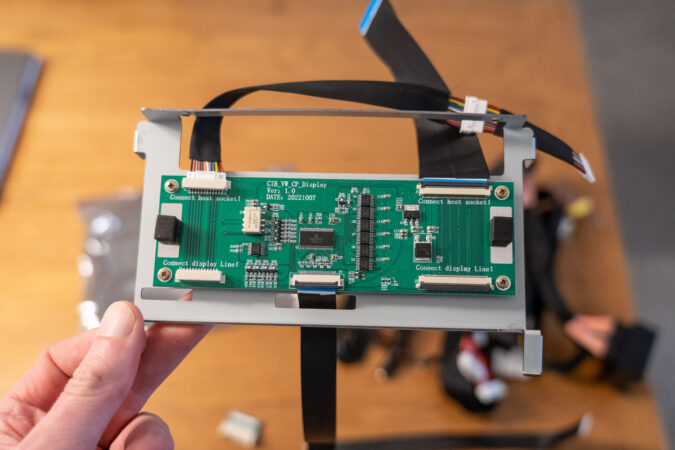
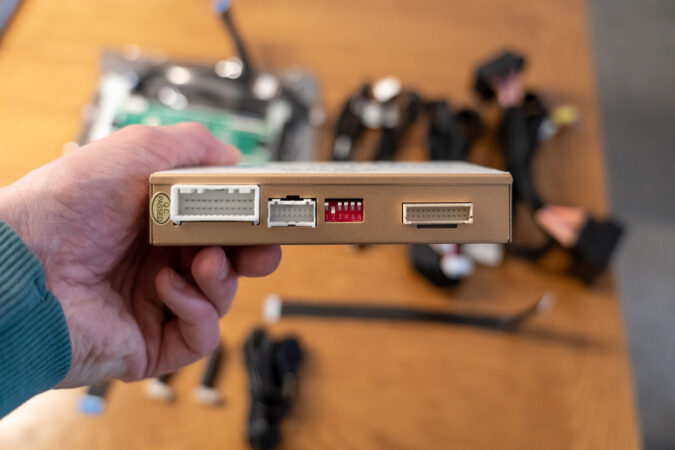
Much of the brains and processing power of this upgrade kit is Integrated Automotive’s own, bespoke IMI-1000 microcomputer. It’s what connects everything together and powers it, and it’ll be in two parts; a large white-silver hub, alongside a compact PCB that you’ll have to wire into your car’s existing head unit and infotainment display. Additionally, you’ll also get wiring looms and cabling, depending on which car you’re installing this into. This is very important, so before you buy one of these, you’ll have to make sure that you get the right upgrade kit from Integrated Automotive for your specific vehicle’s make, model, and model year.
It’s worth bearing in mind, as well, that what Integrated Automotive is offering here is an upgrade or a retrofit for your existing infotainment system. In other words, you’re essentially adding Apple CarPlay and Android Auto functionality – in addition to extra features like wireless connectivity – onto your car’s factory head unit. It’s not, therefore, a replacement, like the many aftermarket single or double-DIN head units that you could swap out with your car’s old stereo system or infotainment unit. As we’ll discuss later on, there are pros and cons to this as an alternative. But first, I’ll have to install Integrated Automotive’s upgrade kit to the Bentley, so here’s how that went.
Phase 1: Disassembling The Centre Console And Dash
The installation process, if you’re opting to do this DIY, can be quite a daunting process. Thankfully, there are a tonne of guides, walkthroughs, and resources online to help you out and guide you each step of the way. So, if you’re unsure at any point, it’s best to refer to the official installation manuals prepared extensively by the folks at Integrated Automotive. Still, I’m going to try my best to document what I’ve done and give you a quick rundown of what I had to go through to fit this Integrated Automotive RNS810 Apple CarPlay and Android Auto upgrade kit.
First off, before you proceed with anything, it’s always a good idea to disconnect your car’s battery before you work on any electrical parts or electronic components. For the Bentley, in particular, there is a little light on the dashboard that shows the passenger airbag status light, and this system might not be too happy if you don’t unplug the battery first.
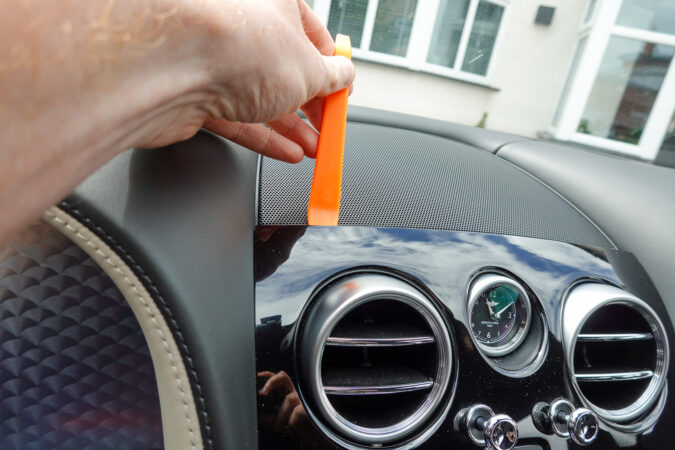
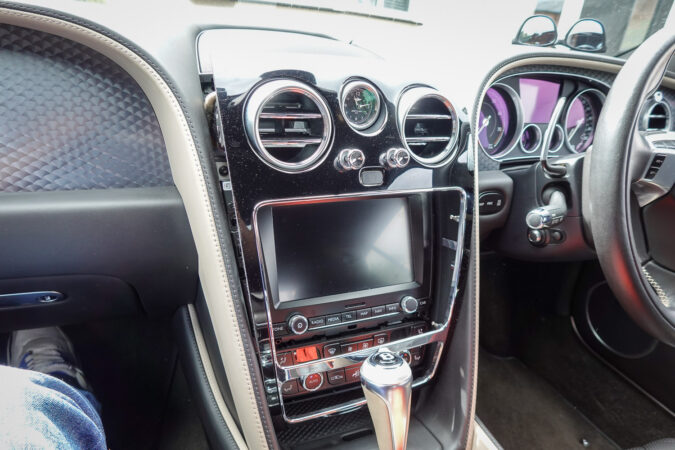
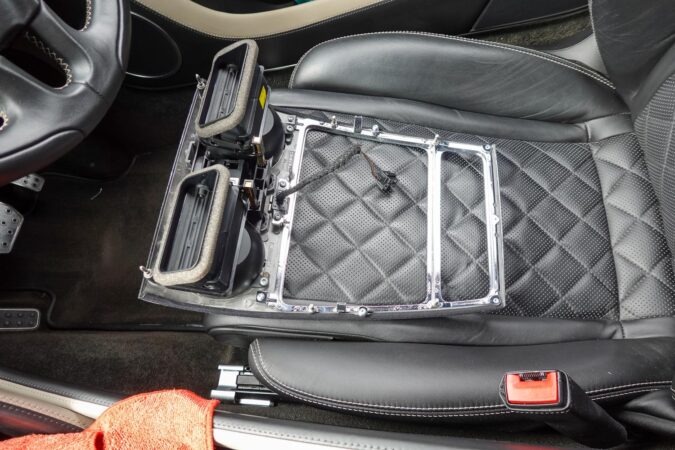
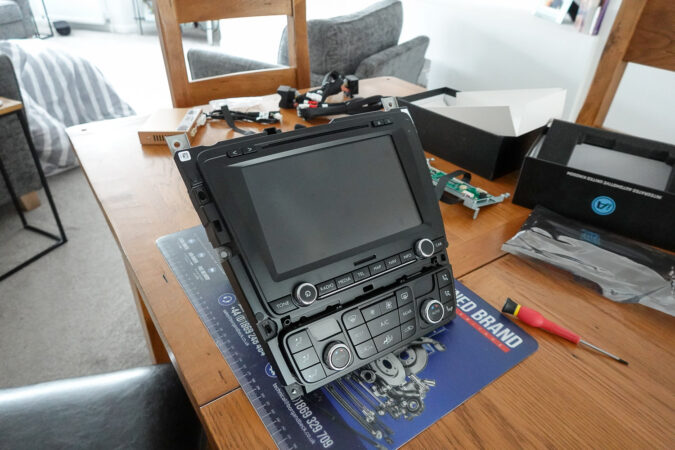
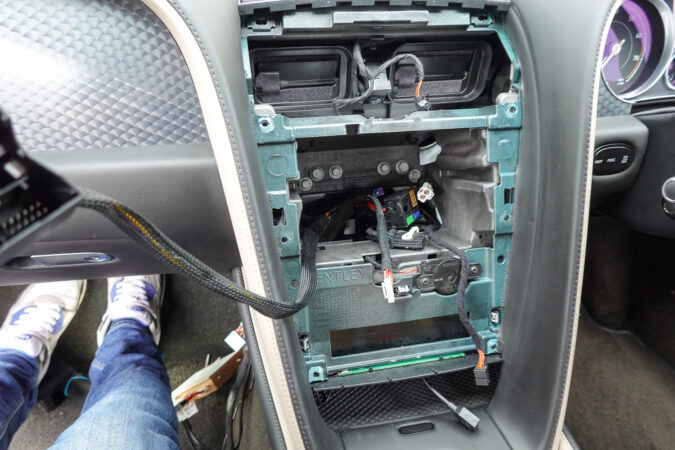
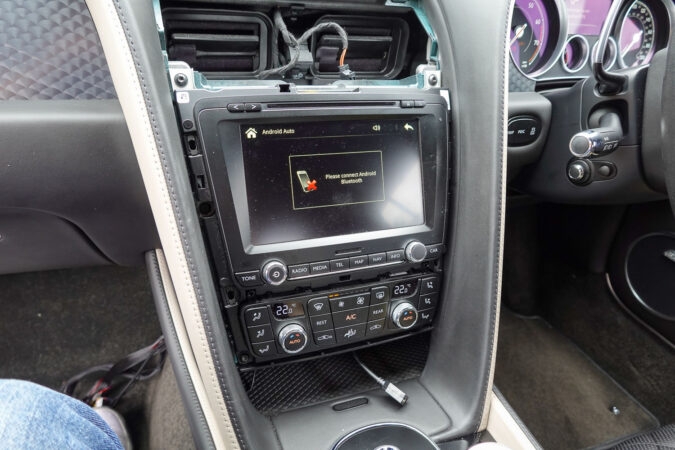
Once that was done, I had to use a plastic lever bar to remove the large centre console trim that houses the Bentley’s infotainment system, as well as other bits and pieces of the interior. That includes the air vents, the dashboard clock, and the climate control and multimedia buttons, among others. You have to be careful, as brute-forcing it could risk damaging the surrounding upholstery. In the Bentley, there’s a lot of really soft and supple leather around this trim piece that could easily get scratched or torn. Aside from that, you need to be wary of causing damage to the actual trim piece itself. The most fragile part here is accidentally snapping off the plastic tabs that hold it in place, which you’ll need once you’re ready to put everything together.
This process will differ from car to car, but Integrated Automotive includes car-specific guides and manuals, which should make things easier to follow. Nonetheless, with the 2016 Bentley Continental GT, this large piano black trim piece hides a few wires for that aforementioned dash clock, as well as the air-con vents. So, when you’re pulling that trim piece apart, ensure that you don’t just rip it off the centre console, without first unplugging these. At this point, it was safe for me to move on to the head unit itself, and remove that from your centre console.
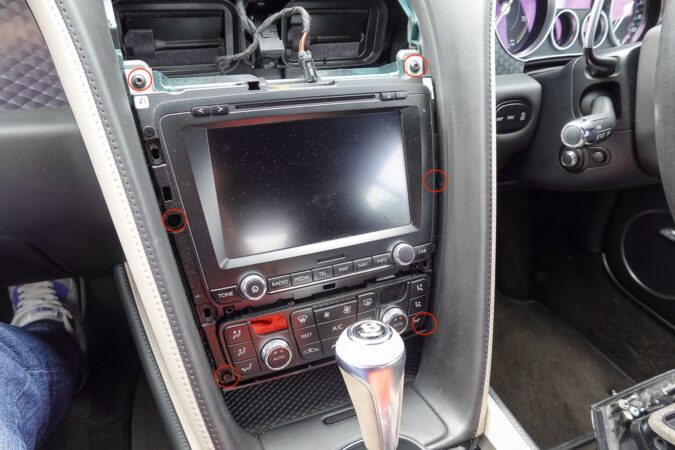
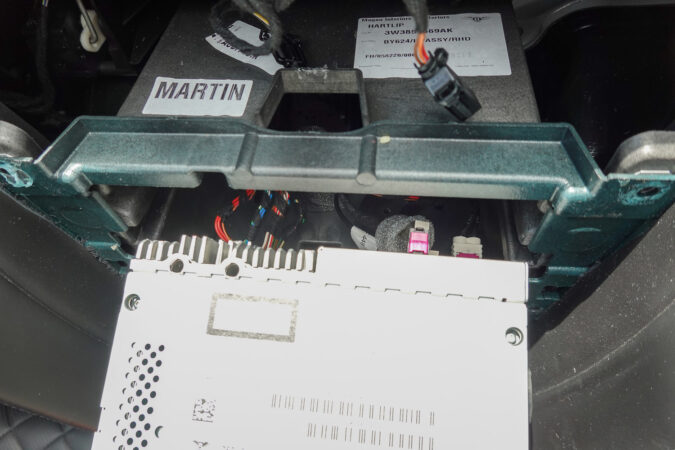
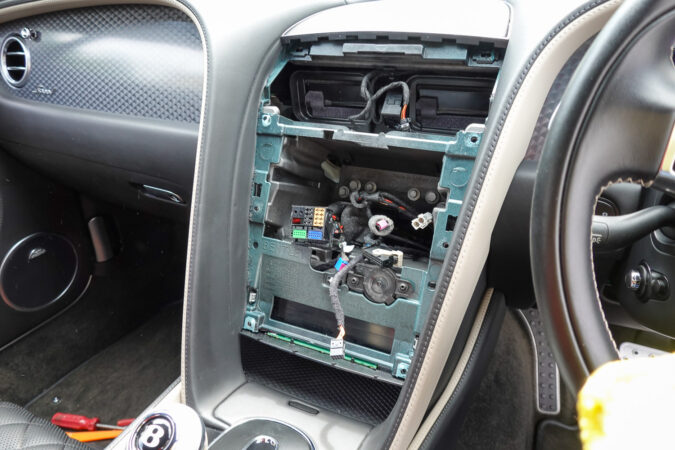
On the head unit, there are 6 screws that needed to be undone. After you’ve unscrewed them, you can then safely and gently pull out the entire head unit, before then unplugging all the cables and wires behind it. This part might be a bit tricky on some cars. For example, on the Bentley, it required a bit of finesse to only slightly pull out the head unit – which can only go so far out with those cables in place – and then squeeze my hand through and unplug those wires. With that out of the way, the now-unplugged head unit on the Bentley should be fairly easy to slot out and remove.
Phase 2: Plugging In The Additional PCB To The Head Unit
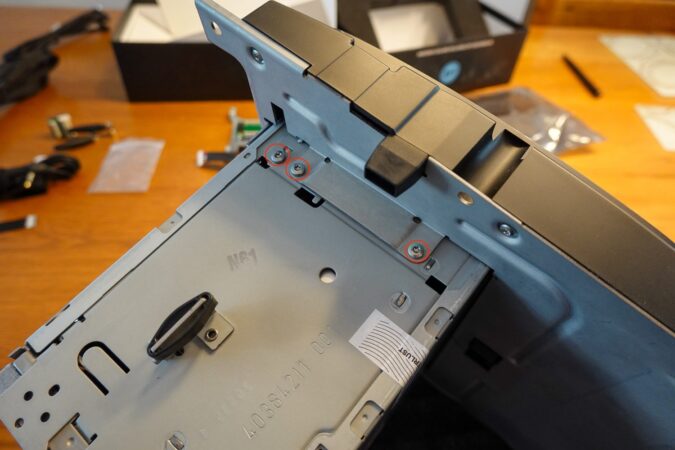
For the next stage of the installation process, we’re focusing mainly on the RNS810 head unit. Moving on, to install the Integrated Automotive retrofit and upgrade kit, you’ll have to start by disassembling the head unit. To do this, you’ll have to find the 3 screws on either side (so, 6 in total) that connect the front of the head unit (where the screen and the buttons are) to the back of the head unit (which is where all that processing power is housed). With those 6 screws now removed, and before you pull those two pieces apart, there are a couple of ribbon cables that connect the display to the head unit base. So, make sure you unplug those very gently.
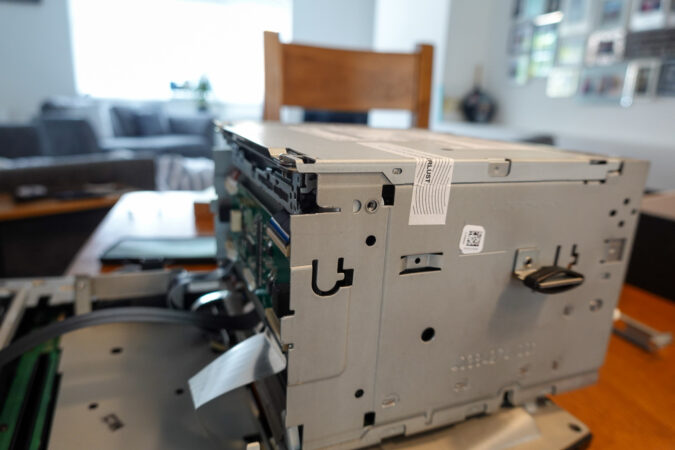
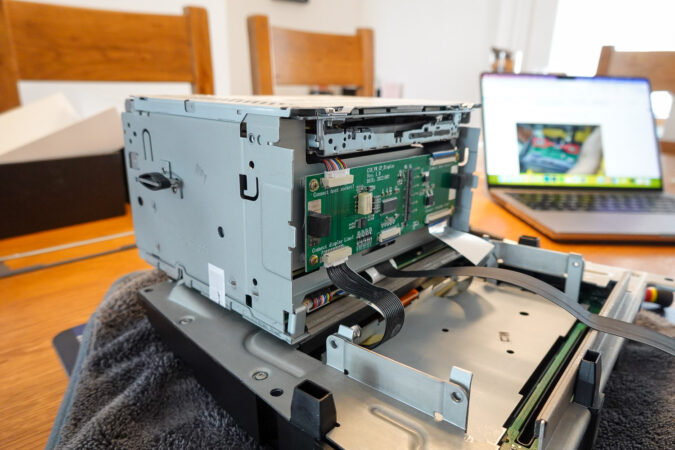
Next up, once I was able to access the head unit base, all I could see then was a black hole that houses all the electronics and chipsets needed to power the infotainment system. Once you’ve reached this step, what you’ll have to do now is place and screw in that aforementioned small PCB to the front of the head unit base. This printed circuit board is basically sandwiched between the head unit base and the display side. To start off, you’ll have to unscrew one of the small panels on the upper front side of the head unit base that’s holding it together.
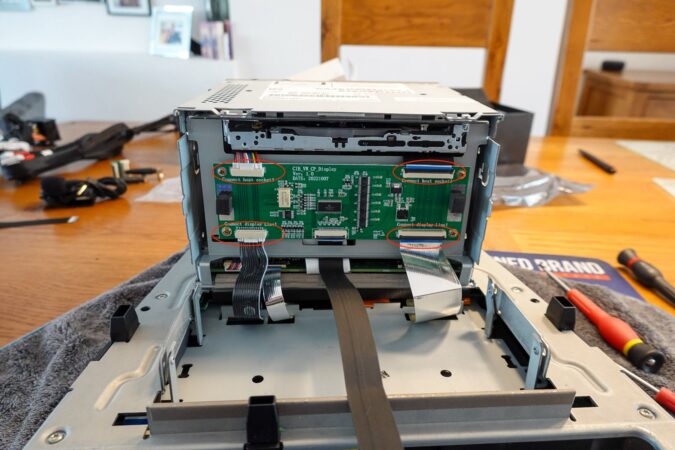
Then, you’ll need to unplug a couple more ribbon cables, and then secure the PCB onto the top. As you might have noticed earlier, Integrated Automotive has specifically designed a very fitting metal frame around the IMI-1000’s companion PCB. This should allow you to guide it in place and safely clip it to the head unit base. On the Bentley’s RNS810 head unit, the metal frame containing the PCB clips in at the bottom, and you can then tilt it upward and screw it in once you’re done sorting out the cables.
Speaking of, all you need to do now, once the entire PCB frame is in place, is to reconnect all those ribbon cables correspondingly. They are all labelled on the PCB itself, so this ought to make it a bit more straightforward to re-plug everything back in. In order, you’ll have to connect the two host sockets on the IMI-1000 PCB to where you previously unplugged the display ribbon cables from the original motherboard, so bear that in mind. Next up, you’ll have to connect the two original display cables from the infotainment unit’s screen onto the IMI-1000 PCB, where it’s labelled as such.
One tip I’ve learned by working on computers and electronics is taking a lot of pictures anytime you’re removing or installing anything, and keeping them on your phone. Therefore, by documenting each step visually, you can always refer back to know which cables plug into where, and you have those snapshots to guide you. Lastly, with those four ribbon cables now connected to the IMI-1000 PCB, the one other elephant in the room is the long ribbon cable in the middle of the PCB that came with the kit.
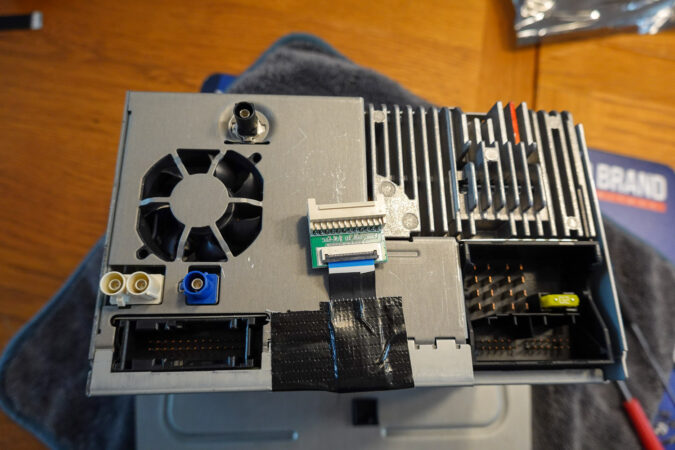
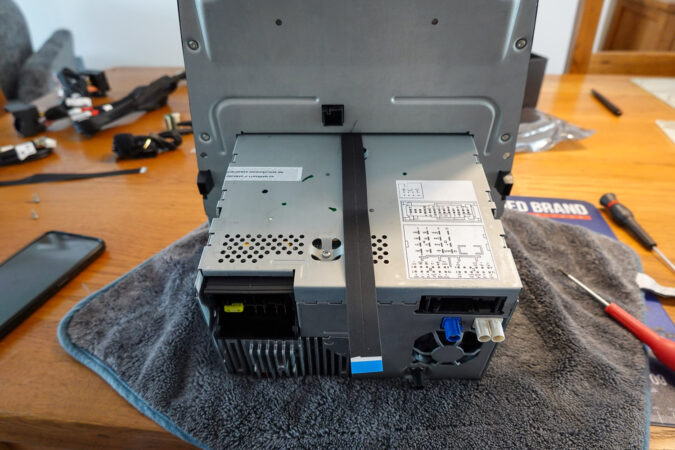
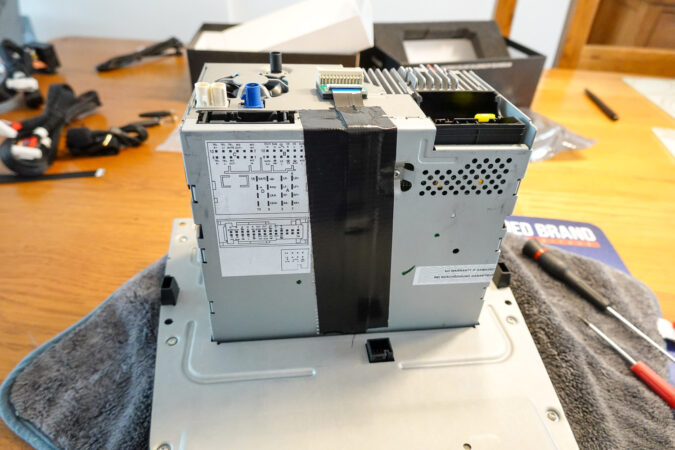
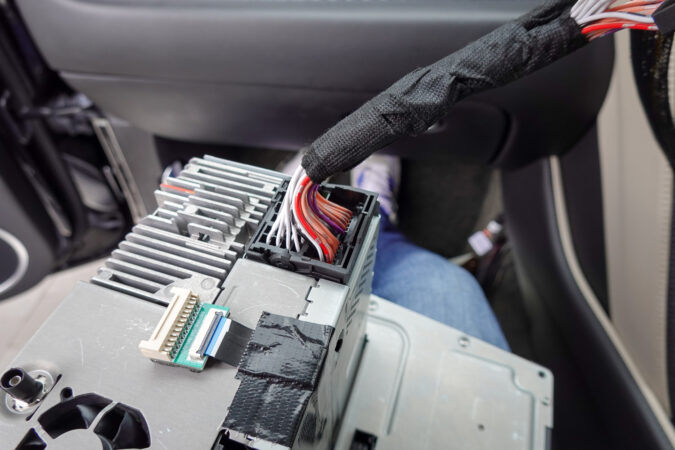
For this cable, you’ll need to fold and loop it outside of the head unit, through a tiny gap between the head unit base and the front display. Once this long ribbon cable is out of the way, you can then attach the small, included LVDS (low-voltage differential signalling) PCB to a connector at the top of the head unit. Additionally, you’ll have to plug in that long ribbon cable to the connector on the LVDS PCB. One more thing to take into account is trying to keep this fragile ribbon cable safe, particularly once you’re re-assembling the entire head unit. In my case, I added some tape over the top of the cable, guiding it to the LVDS PCB. I think this ought to keep it safe.
Phase 3: Re-Cabling And Re-Assembling The Head Unit
At this point, you’re nearly done with the head unit, so it’s time for you to deal with those extra cables that Integrated Automotive has supplied with the upgrade kit. There’s one pretty long cable that connects to that aforementioned LVDS PCB, which thus connects via a ribbon cable, leading it back to the main IMI-1000 PCB, and then back to the IMI-1000 hub. Aside from that, there are three more cables that plug into the IMI-1000 hub, which gives it power, connects it to the rest of the Bentley’s wiring loom, and then there’s another cable that connects the IMI-1000 to a microphone.
So, a bit more on that microphone, there are dip switches on the back of the IMI-1000 hub, which you can configure and set up the system accordingly. So, for instance, you could configure it so that you can pair your phone using Bluetooth to either the car directly, or to the Integrated Automotive IMI-1000. This is where that aftermarket microphone in the box comes in, used for phone calls and such. If your car already has built-in microphones, you could otherwise opt to not do this. Elsewhere, the upgrade kit also includes an AUX cable, though I didn’t use it.
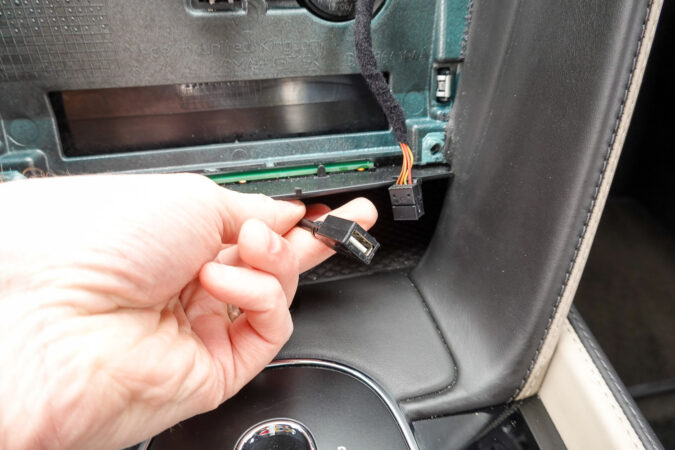
While I do intend on using Apple CarPlay and Android Auto wirelessly – one of the key selling points of Integrated Automotive’s upgrade kit – there is a USB port on the IMI-1000 that you can plug your phone into, instead. Just make sure you connect this to the IMI-1000, too. Oh, and while you’re here, you’ll have to now connect the included Wi-Fi and Bluetooth antennae to the IMI-1000 hub. Admittedly, I did skip documenting some of the nitty-gritty details, so for more specifics and step-by-step guides on the cabling and which connectors it goes to, I’d highly recommend checking out Integrated Automotive’s installation manuals.
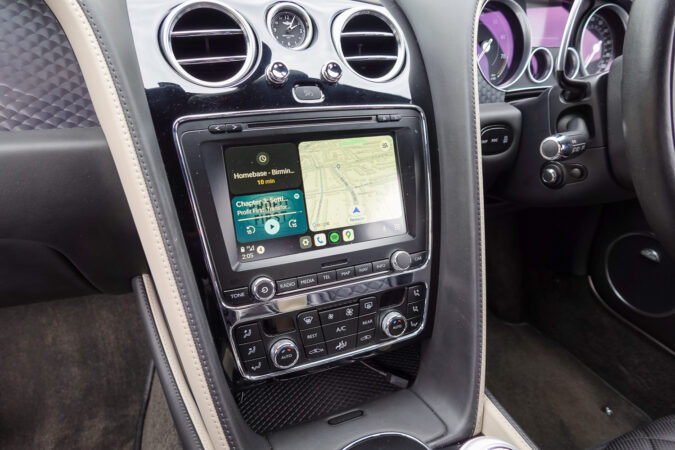
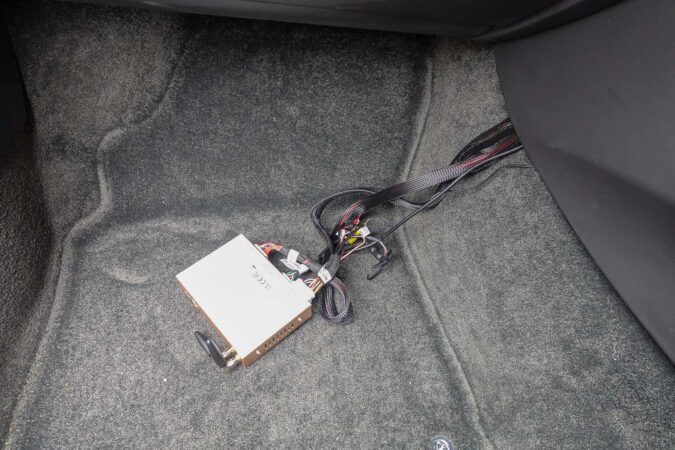
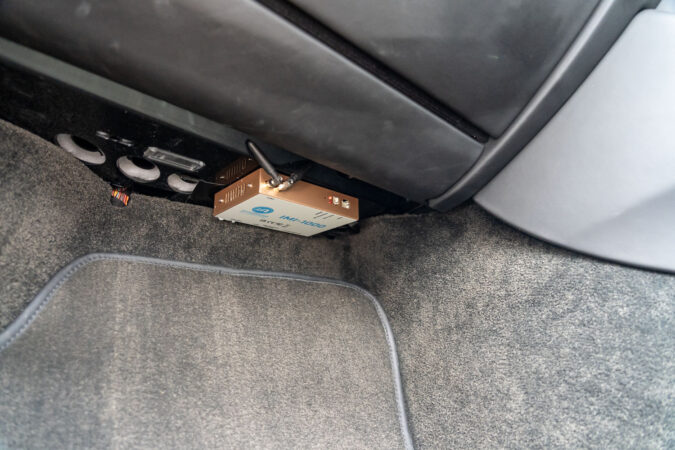
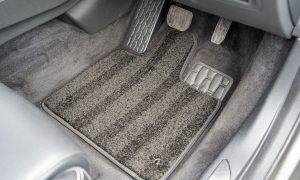
Okay, the next steps may require a bit of creativity and think out of the box, depending on how you’d like to do it with your car. On the Bentley, once I had plugged in all the cables to the head unit and I connected the head unit back to the centre console of the Bentley – and crucially, plugging in that giant quad lock connector – I pulled and ran all those cables down into the passenger footwell. This is where the IMI-1000 hub will be installed. To make this a much neater install, I also hid all the cables inside the passenger footwell carpeting, and used some double-sided tape to tack the IMI-1000 hub onto the bottom of the glovebox. I think I did a really good job at keeping everything as far out of sight as possible, and you’d be hard-pressed to notice that anything’s changed.
After this step is complete, the rest of the process is doing the disassembly, but in reverse. So, you’ll need to carefully tuck all those head unit wires back in, fit and re-screw the head unit into place, and then re-install the centre console trim, and finally re-plugging everything back in. I’d also suggest that it might be a good idea to power on the head unit and make sure that it actually works and that you’ve done everything correctly, before spending all that time trying to neatly reassemble it. Although the physical installation is complete for now, there are additional set-up procedures to get things up and going within the infotainment system itself. However, you would probably learn more from the included installation manual, so refer to that for the specifics.
Pros And Cons With Installing An Upgrade Kit
As I’ve discussed at length thus far, installing and fitting in this Integrated Automotive upgrade kit does require a bit of advanced know-how, as well as you have to be somewhat comfortable with taking things apart in your car. Therefore, if you’re not comfortable doing this yourself, it’s probably best to let a professional do it for you. For me, I’ve had experience working on and upgrading the head units on other cars before, so it took me around 4 hours to fully install the Integrated Automotive upgrade kit and then get both Apple CarPlay and Android Auto running. Regardless, after the installation is all over, how does it actually look?
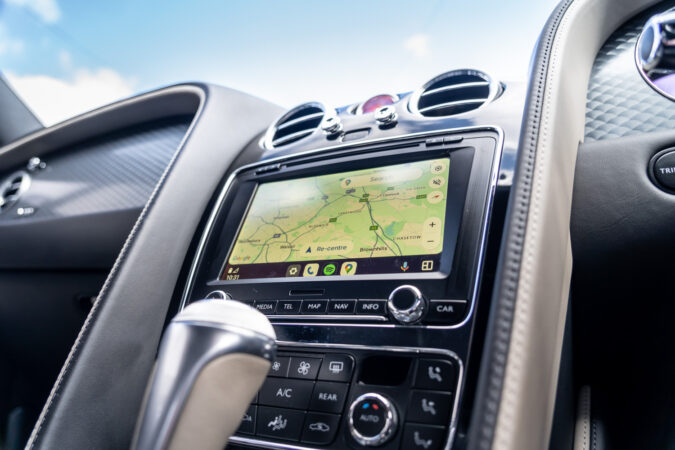
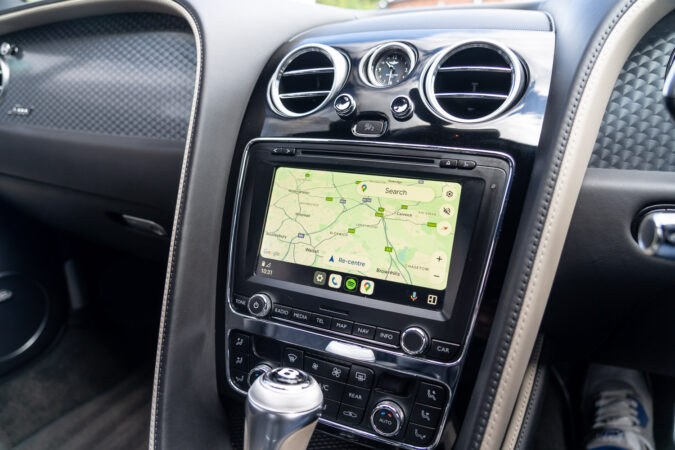
Well, one of the benefits of upgrading your existing infotainment system is that it retains the OEM user interface and design, so it feels familiar to use and it doesn’t look out of place. This is especially true in something older like the Bentley. Likewise, since the original, OEM infotainment system still exists underneath all these upgrades, your car’s original tech and other equipment should work without issues. For example, I was still able to use the Continental GT’s factory backup cameras and switch between it and Android Auto or Apple CarPlay without a hitch. This is one area where aftermarket head units can prove challenging, owing to incompatibilities between their software and your OEM equipment.
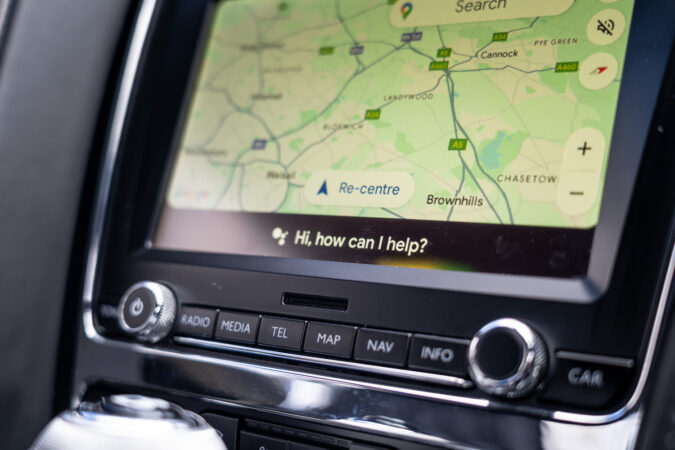
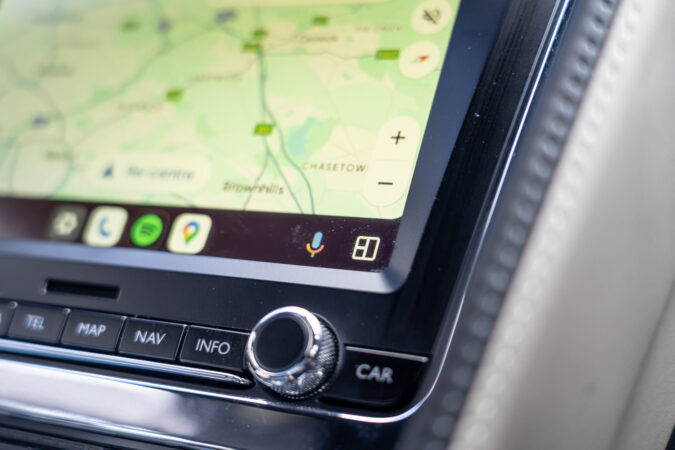
Of course, there are downsides to installing an infotainment upgrade kit. Most notably, you’re still interacting with, in my case, an outdated VW/Bentley screen and infotainment system, and most of it remains the same as it was for the past (nearly) decade. As a result, the display resolution, refresh rate, screen contrast, touchscreen sensitivity, as well as overall system performance, aren’t upgraded and remain stock. So, don’t expect this to change if you install an upgrade kit. You can even tell in some of these pictures that the colours on my Bentley’s head unit’s display are washed out. Granted, that fault lies with this ancient Bentley RNS810 infotainment system, and not the Integrated Automotive upgrade kit.
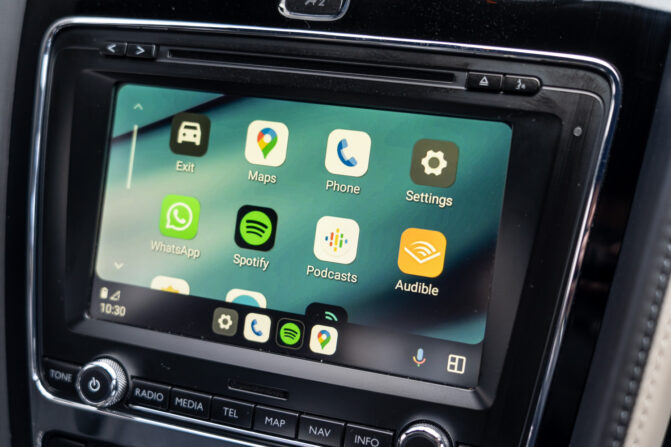
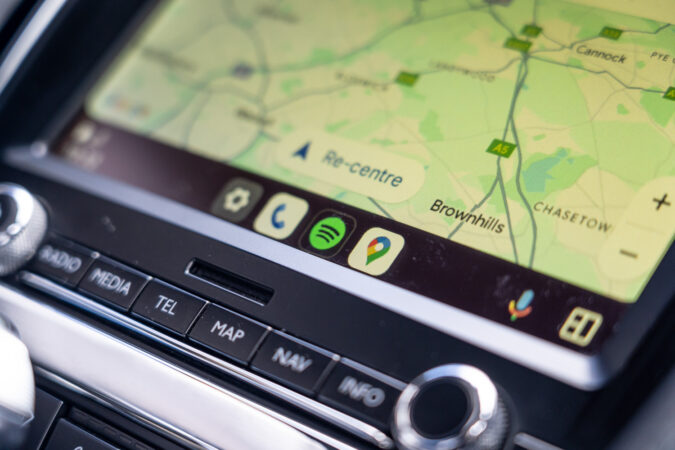
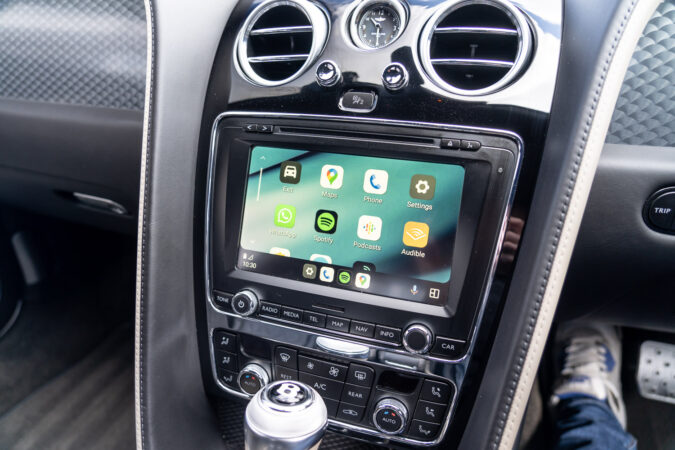
Yet, on the other hand, for a relatively accessible price of £460 (at least compared to swapping out the entire head unit), given all the kit that you get, it feels seamless to use. You’ve successfully retrofitted an old head unit and infotainment system to now run fully-fledged Apple CarPlay and Android Auto – wirelessly, too – and with all the goodies that it affords you. As such, you can install apps, natively run Google Maps, check your WhatsApp messages, and more. Not to mention, Integrated Automotive’s upgrade kit lets you use Siri or Google Assistant for voice controls, all from a base head unit that was never designed for any of this, in the first place.
Was Installing An Upgrade Kit Worth It?
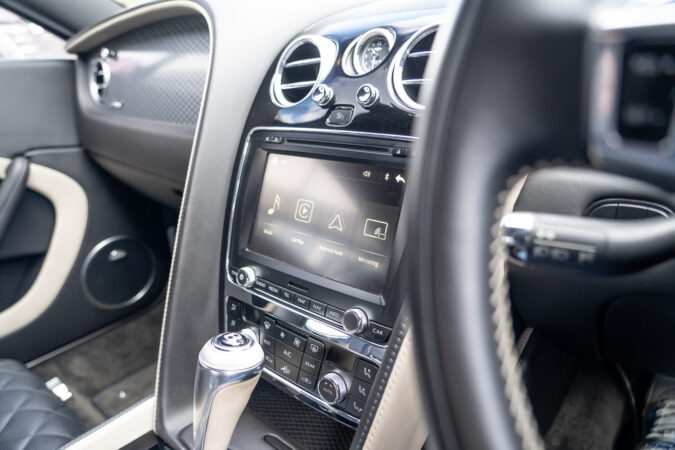
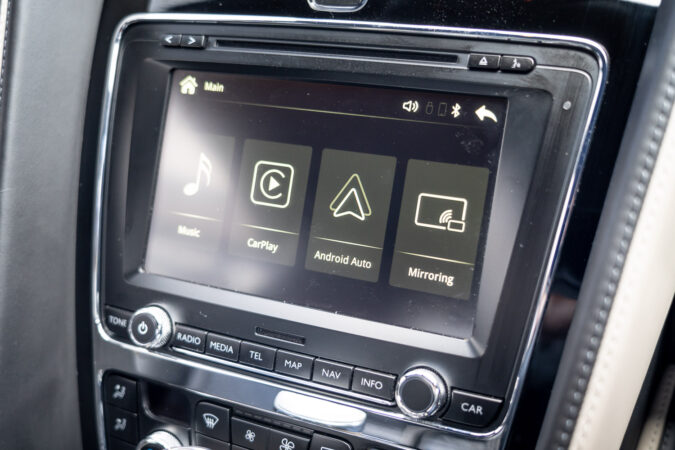
Whenever my car turns on, it automatically loads into Android Auto, which is what I prefer, and I’ve had zero issues connecting my phone to it wirelessly. In addition, this upgrade kit from Integrated Automotive lets you back out of Android Auto, and the default, simplistic menu screen appears with additional options. This includes running with Apple CarPlay instead, directly mirroring your phone’s screen to the head unit’s display, or simply listening to music with a local storage media. Whether you’re fiddling around with the default menu or once you’re in Apple CarPlay or Android Auto, I’ve found the entire system very slick and intuitive. That’s despite the upgrade kit being powered by whatever old chipset and hardware that’s inside the Bentley RNS810.
There’s even the added bonus of being able to hold down the Menu button on the Bentley’s steering wheel, and that enables me to quickly swap in and out of Android Auto, or back into your car’s default infotainment menus. As I noted earlier, I still have effortless access to all those settings, and this meant seamless and quick access to the Bentley’s reversing cameras, as well as the default satnav, radio, telephone, media controls, and so on. In so doing, you’re not losing anything that came with the stock infotainment system. I’m probably not going to use most of these anyway, but it’s nice to have the option to be able to fall back to the factory system.
Overall, it’s safe to say that I’m really chuffed with this upgrade, for the relatively painless installation process (which went through without a hitch, assuming you’re careful and patient), not to mention the comparatively affordable price for this entire kit, and all the functionality it adds to your car. After all, it has finally brought the Bentley Continental GT up to date, and by upgrading what is arguably its most dated element; the previously antiquated infotainment system. So, if you’re looking to add Apple CarPlay and Android Auto to your car’s old infotainment system, Integrated Automotive offers these upgrade kits for a bunch of different cars, so check them out!

