
How to Diagnose an Ignition Coil Problem
An ignition coil is an important component of a vehicle’s ignition system, responsible for providing the spark that ignites the fuel and air mixture in the engine’s cylinders. If your vehicle is experiencing problems starting or running, it may be due to an issue with its ignition coil. Hence, the importance of learning how to test the ignition coil:
To diagnose this problem, you will need to perform a few simple techniques to figure out how to test a coil.
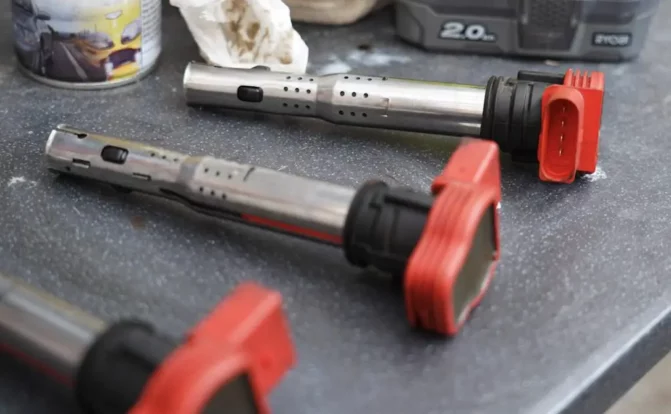
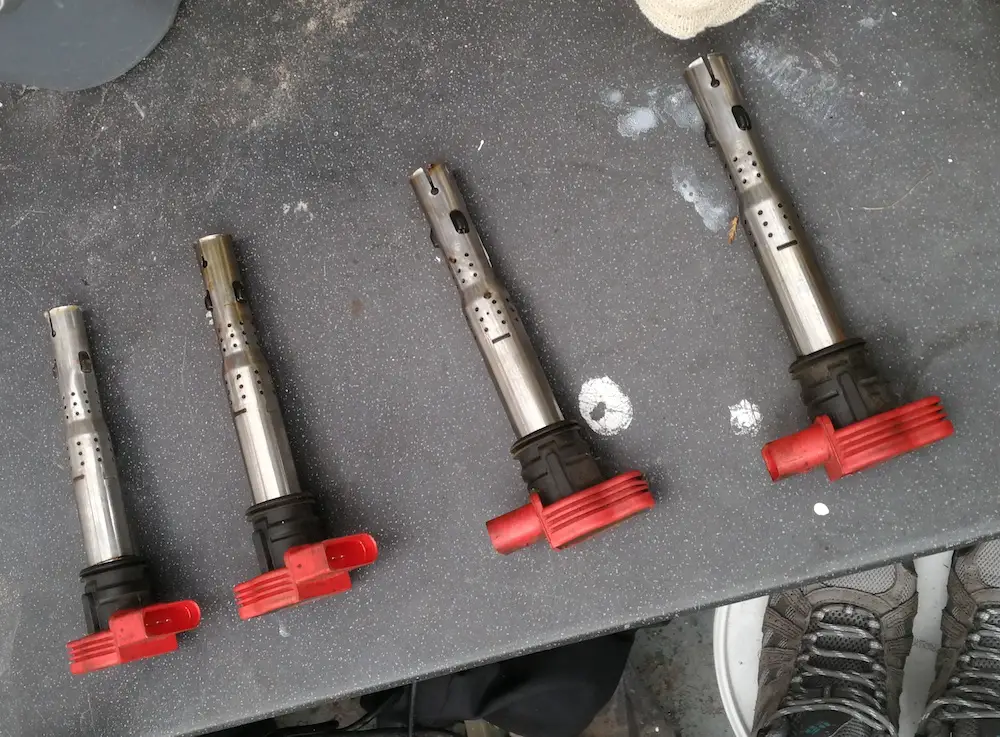
- First, check for any visible signs of damage on the coil itself. Look for cracks or other signs of wear and tear that could indicate a faulty part. If you find any damage, replace the coil immediately as it cannot be repaired.
- Next, use a multimeter to test the resistance of each terminal on the coil by connecting one lead from your multimeter to each terminal and checking for continuity between them. The resistance should be within manufacturer specifications; if not, then you have likely found your problem and should replace the coil accordingly.
- Finally, check all wiring connections leading to and from your ignition coils for corrosion or lose connections which can cause poor performance or even complete failure of your coils over time.
- Clean off any corrosion with electrical contact cleaner before reconnecting them securely in place; if they are already secure but still showing signs of corrosion then consider replacing them altogether as they may no longer be reliable enough to provide proper power delivery to your coils.
By following these steps you should be able to diagnose whether or not an issue with your vehicle’s ignition coils is causing it difficulty starting up or running properly – allowing you to take appropriate action such as replacing faulty parts where necessary to get back on track quickly.
How to Test an Ignition Coil with a Multimeter
Testing an ignition coil with a multimeter is a simple process that can be done in just a few steps. This procedure is useful for determining whether the coil pack is functioning properly and can help diagnose any potential issues with the vehicle’s ignition system.
Before beginning, it is important to ensure that the multimeter being used has been set to measure resistance (ohms). Additionally, it may be helpful to refer to the vehicle’s service manual for specific instructions regarding testing procedures and specifications.
To begin, disconnect the negative battery cable from the battery terminal and remove any spark plug wires connected to the coil. Next, locate two terminals on top of the coil; these are typically labeled “+” and “-” or “primary” and “secondary.” For more insight, check out our guide on how to test a coil pack with a multimeter.
Connect one lead of the multimeter to each terminal on top of the coil; if there are more than two terminals present, refer back to your service manual for guidance on which ones should be tested. Once connected, observe your multimeter display; if it reads between 0.2 ohms and 2 ohms then your ignition coil is functioning properly.
If not, then further investigation may be necessary as this could indicate an issue with either wiring or components within your vehicle’s ignition system. Finally, once you have completed testing disconnect both leads from their respective terminals before reconnecting any spark plug wires or reattaching the negative battery cable back onto its terminal post.
What is the Difference Between Primary and Secondary Ignition Coils?
The primary and secondary ignition coils are two components of an ignition system in a vehicle. The primary coil is responsible for creating the initial spark that ignites the fuel-air mixture in the combustion chamber, while the secondary coil amplifies this spark to ensure a more efficient burn.
The primary coil is typically composed of a single winding of copper wire, which is connected to the battery and receives its power from it. This winding creates an electromagnetic field when current passes through it, which then collapses and produces a high-voltage spark when it reaches its peak. This spark is sent to the distributor cap where it is routed to each cylinder in turn.
The secondary coil consists of many windings of copper wire wrapped around an iron core, which amplifies the voltage created by the primary coil up to 20 times or more before sending it out through its terminals. This increased voltage ensures that there will be enough energy available for a strong spark at each cylinder’s plug gap, allowing for the complete combustion of fuel-air mixtures during engine operation.
In summary, while both coils are essential components in any vehicle’s ignition system, they serve different functions: The primary coil creates an initial low-voltage spark that is then amplified by the secondary coil into a much higher voltage capable of igniting fuel-air mixtures efficiently during engine operation.
How to Replace a Faulty Ignition Coil
Replacing a faulty ignition coil is an important part of maintaining the performance and reliability of your vehicle. Ignition coils are responsible for providing the spark that ignites the air-fuel mixture in the combustion chamber, so it is essential to replace them when they fail. This guide will provide step-by-step instructions on how to replace a faulty ignition coil.
Before beginning, make sure you have all the necessary tools and parts ready. You will need a new ignition coil (be wary of the differences between the ignition coil vs spark plug), spark plug wires, and any other necessary components such as gaskets or seals. Additionally, you should have basic hand tools such as wrenches and screwdrivers available for use during installation.
Step 1: Locate the faulty ignition coil by consulting your vehicle’s service manual or by visually inspecting under the hood of your car. The location may vary depending on the make and model; however, it is usually located near or around the engine block or cylinder head assembly.
Step 2: Disconnect any electrical connections from the old ignition coil before removing it from its mounting bracket or base plate (if applicable). Make sure to note which wire goes where so that you can reconnect them correctly later on during the installation of the new part.
Step 3: Remove any bolts holding down the old part before carefully lifting it out from its mounting location with both hands (or with help if needed). Be careful not to damage any surrounding components while doing this step as some parts may be fragile due to age or wear and tear over time.
Step 4: Install your new part into place using either bolt (if applicable) or simply push it into position until secure enough not to move around freely when jostled slightly with your hands (this method works best for plastic brackets). Make sure all electrical connections are properly reattached according to their original positions prior to the removal of the old part in Step 2 above before moving on to the next step below.
Step 5: Reinstall spark plug wires onto their respective terminals on top of the new ignition coil according to the manufacturer’s specifications found in the service manual/instructions included with the purchase of replacement part(s). Double-check all connections once more before starting the engine up again.
Finally, start up the engine after double-checking everything one last time just in case something was missed earlier during the installation process – if all looks good then congratulations. You have successfully replaced a faulty ignition coil without having too much trouble along the way.
What are the Common Causes of Ignition Coil Failure?
Ignition coil failure is a common problem in many vehicles. Ignition coils are responsible for providing the spark that ignites the air-fuel mixture in the combustion chamber, and when they fail, it can cause a variety of issues with your vehicle. Common causes of ignition coil failure include:
1. Excessive Heat: Ignition coils generate a lot of heat during normal operation, and if they become too hot, they can fail prematurely. This is often caused by inadequate cooling or an overly rich air-fuel mixture.
2. Vibration: Vibrations from rough roads or engine misfires can cause ignition coils to break down over time due to physical stress on the components inside them.
3. Electrical Issues: Faulty wiring or poor connections can lead to electrical problems that will eventually damage the ignition coil and cause it to fail prematurely.
4. Age: Over time, ignition coils will wear out due to normal use and need to be replaced periodically as part of regular maintenance on your vehicle (just bear in mind the ignition coil replacement cost).
How to Troubleshoot an Engine That Won’t Start Due To a Faulty Ignition Coil
If your engine is not starting due to a faulty ignition coil, there are several steps you can take to troubleshoot the issue. First, check the spark plug wires for any signs of damage or corrosion. If they appear to be in good condition, then move on to checking the spark plugs themselves. Make sure that they are clean and free of debris or oil residue.
If they appear dirty or damaged, replace them with new ones. Next, inspect the ignition coil itself for any signs of wear and tear such as cracks or breaks in its insulation material. If it appears to be in good condition, then test it using an ohmmeter set at a low voltage range (1-2 volts). The reading should be between 0-0.5 ohms; if it is higher than this value then the coil needs replacing.
Finally, check all other components related to the ignition system such as distributor caps and rotors for any signs of damage or wear and tear that could be causing problems with your engine’s starting process. Replace any parts that appear worn out before attempting to start your engine again; this should help resolve any issues caused by a faulty ignition coil.
What Are the Benefits of Upgrading Your Vehicle’s Ignition Coils?
Upgrading your vehicle’s ignition coils can provide a number of benefits. Ignition coils are responsible for converting the low voltage from the battery into high voltage, which is then used to ignite the fuel and air mixture in the combustion chamber. Upgrading your vehicle’s ignition coils can improve engine performance, and fuel economy, and reduce emissions.
- Improved Engine Performance: Upgrading your vehicle’s ignition coils can help to improve engine performance by providing a more consistent spark at higher voltages. This helps to ensure that all of the fuel is burned efficiently in each cylinder, resulting in improved power output and acceleration.
- Increased Fuel Economy: By providing a more consistent spark at higher voltages, upgrading your vehicle’s ignition coils can also help to increase fuel economy by ensuring that all of the fuel is burned efficiently in each cylinder. This reduces wasted energy and improves overall efficiency.
- Reduced Emissions: By improving engine performance and increasing fuel economy, upgrading your vehicle’s ignition coils can also help to reduce emissions by burning less fuel per mile traveled. This helps to reduce air pollution and make vehicles more environmentally friendly.
Understanding the Basics of Electrical Systems: Testing Your Vehicle’s Ignition Coils
Ignition coils are an essential component of any vehicle’s electrical system. They are responsible for providing the spark that ignites the fuel and air mixture in the combustion chamber, allowing your engine to run. Testing your vehicle’s ignition coils is a simple process that can help you diagnose potential problems with your car’s electrical system.
To begin, you will need to locate the ignition coils on your vehicle. In most cars, they are located near the spark plugs and distributor cap or rotor. Once you have identified them, disconnect each coil from its respective spark plug wire and remove it from its mounting bracket.
Next, use a multimeter to test each coil for resistance by connecting one lead of the meter to one terminal of the coil and then connecting the other lead of the meter to another terminal on the same coil. The reading should be within manufacturer specifications; if not, replace it with a new one as soon as possible.
You should also check for continuity between both terminals on each coil by setting your multimeter to “continuity” mode and touching both terminals with its leads simultaneously; if there is no continuity present then replace it with a new one immediately as well.
Finally, inspect all wiring connections between each ignition coil and its respective spark plug wire for any signs of corrosion or damage (and the symptoms of a bad ignition coil); if any are found then clean or repair them accordingly before reinstalling everything back into place to ensure proper operation of your vehicle’s electrical system once again.
By following these steps you can easily test your vehicle’s ignition coils to diagnose potential problems with its electrical system quickly and accurately without having to take it into a mechanic shop unnecessarily – saving yourself time and money in doing so.
Q&A
1. What is an ignition coil?
An ignition coil is a type of transformer that converts the low voltage from a car’s battery into the high voltage needed to ignite the fuel in an internal combustion engine.
2. How do you test an ignition coil?
To test an ignition coil, you will need to use a multimeter set to measure resistance (ohms). Connect one lead of the multimeter to each terminal on the coil and check for continuity. If there is no continuity, then it means that your ignition coil has failed and needs to be replaced.
3. What should I look for when testing an ignition coil?
When testing an ignition coil, you should look for any signs of corrosion or damage on the terminals or wires leading up to them. You should also check for any shorts between terminals or wires as this can cause problems with your engine’s performance and reliability.
4. What are some common symptoms of a faulty ignition coil?
Common symptoms of a faulty ignition coil include misfiring, poor acceleration, rough idle, stalling, and difficulty starting your vehicle’s engine.
5. How often should I replace my vehicle’s spark plugs?
It is recommended that spark plugs be replaced every 30-50 thousand miles depending on how often they are used and what type of driving conditions they are exposed to (i.e., city vs highway). It is also important to inspect them regularly for signs of wear or damage such as cracks in the ceramic insulator or corrosion on metal parts which can indicate that it may need replacing sooner than expected due to excessive heat buildup from normal operation over time causing premature failure in these components.
6. Can I test my spark plugs with a multimeter?
Yes, you can use a multimeter set at ohms range mode (Ω)to measure the resistance across each plug’s electrodes which will tell you if they are functioning properly or not by comparing their readings against manufacturer specifications listed in your owner’s manual/service manual/repair guide book, etc.
7. What other components should I check when testing my vehicle’s electrical system?
Other components such as distributor caps & rotors, spark plug wires, fuel injectors, oxygen sensors, mass air flow sensors, etc..should all be checked during routine maintenance intervals as well since these parts play important roles in ensuring proper operation & performance from your vehicle’s electrical system.
8. What safety precautions should I take when working with automotive electrical systems?
When working with automotive electrical systems always make sure all power sources have been disconnected before attempting any repairs & always wear protective gear such as gloves & safety glasses while handling any live circuits/wires so as not to get shocked by accidental contact with live current.