
A faulty distributor can reduce the efficiency of your engine by wreaking havoc on the ignition. The distributor is an integral part of the ignition, and therefore, any faults in it can affect your car in adverse ways. As we look at bad distributor symptoms, it can have severe effects ranging from rough idling, shaking, and even stalling.
There are many reasons why a distributor can develop problems. Some of the most common reasons include wear and tear over time. The distributor is also prone to developing problems because of the harsh environment it is located in. However, before we delve more into bad distributor symptoms, it is prudent you first understand how a distributor works.
Moreover, besides discussing its functions, processes, and the bad distributor symptoms, we’ll also look at what causes it to fail, in the first place. In addition, we’ll dive deep into diagnosing as well as troubleshooting a faulty distributor. Here, you’ll also learn how you can solve and fix distributor issues for good too, and get your car running right again.
- How Does A Distributor Work?
- 20 Common Signs Of A Bad Distributor
- 14 Causes For A Faulty Distributor
- How To Diagnose & Test A Distributor?
- Fixing & Repairing A Bad Distributor
- Replacing The Distributor Cap And Rotor
- Final Conclusion
- Frequently Asked Questions (FAQs)
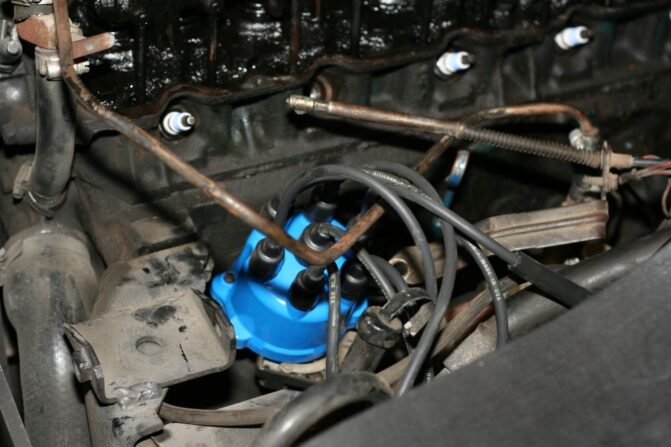
Car Distributor
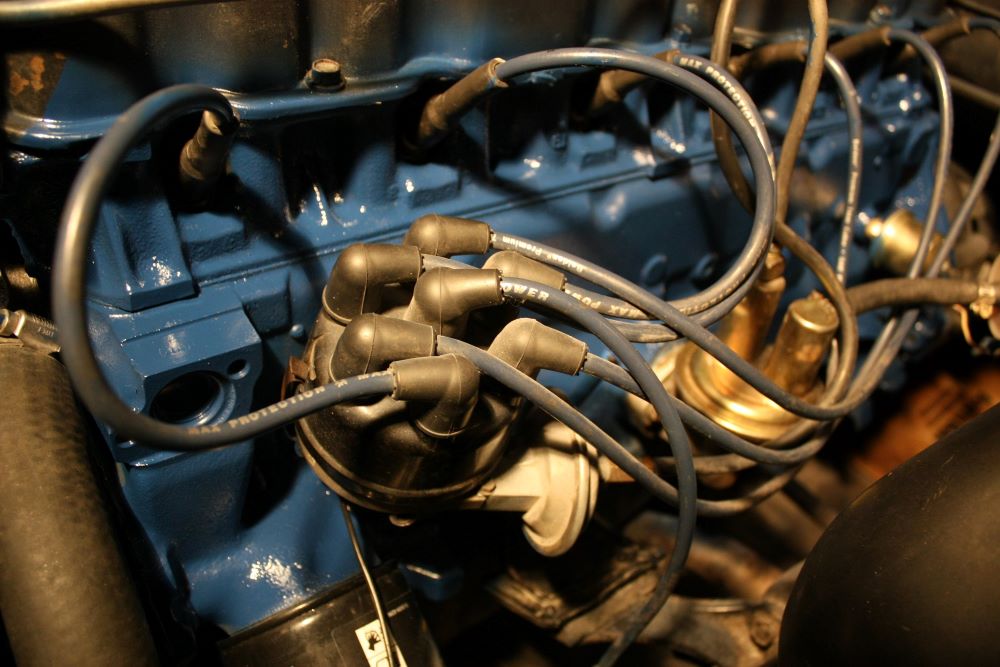
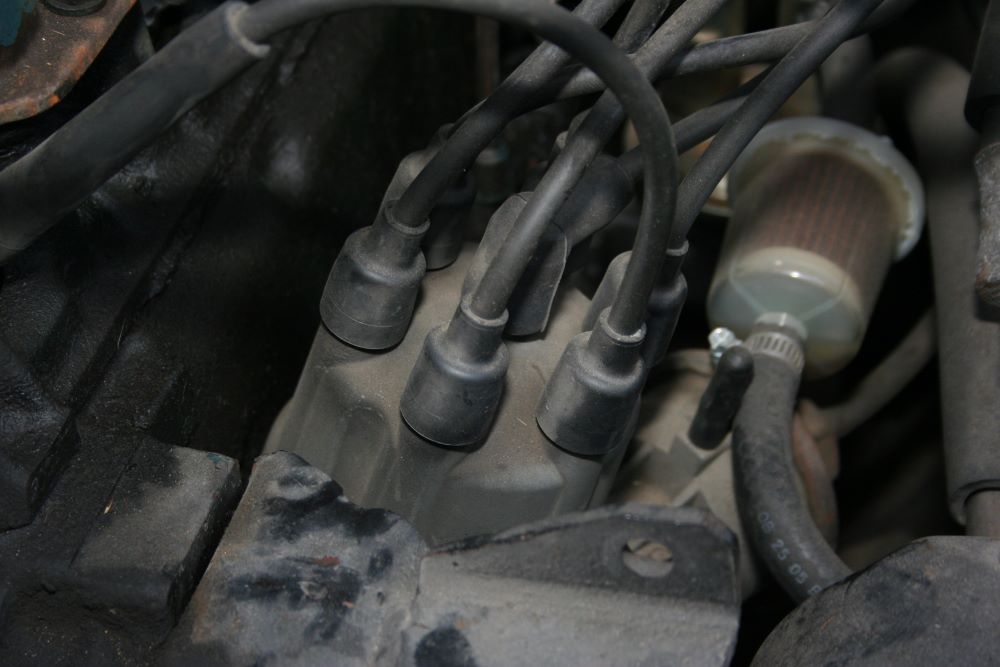
The distributor plays a critical role in the ignition process. It transfers high voltage from the secondary coil to the right spark plugs at the correct interval and in the correct firing order. Taking a closer look, the distributor handles several tasks. The first task is done by the distributor cap and rotor.
They transfer high voltage from the coil to the right cylinders. The secondary coil is connected to the distributor rotor, which happily sits on the distributor cap. The ignition coil is connected to the rotor by a spring-loaded brush. The electric current produced by the engine turns the rotor.
Without making any contact, the rotor distributes high voltage to a series of contacts as it spins. The high-voltage pulses run down the spark plug wire and transfer to the correct cylinder. This precision is crucial to achieving optimum engine performance and efficiency.
Over time, this arcing causes the rotor and cap to wear out. This is why they are both replaced when you are doing a tune-up. The spark plug wires may also wear out with the distributor and cause some very mysterious engine issues. If you own an older model car, it may have a different type of distributor. These older engines came fitted with distributors that had breaker points.
“Engine Painted” by aresauburn™ is licensed under CC BY-SA 2.0 ![]()
![]()
![]() .
.
Sign Of Bad Distributor
If any malfunction develops in the distributor parts, the spark plugs won’t receive the necessary spark. This means the spark plugs won’t be able to ignite the fuel mixture. In turn, this will affect your car engine’s ability to distribute power efficiently. A faulty distributor is the beginning of a car’s starting problem and a host of other performance issues.
As you are now aware, the distributor may be a small part, but it plays a critical role in the working of a car. For sure, a car with distributor problems is not something you would want in your possession.
However, such problems do develop, even when you are driving. It is therefore important that you learn to spot a faulty distributor before the problem escalates further. Here are eight of the most common bad distributor symptoms.
Bad Distributor Symptoms #1: Car Won’t Start
If the distributor cap is not working as it should or is not firmly on, your car may not start. This is because the essential spark needed for combustion is not being delivered. Without the spark being delivered to the spark plugs, the engine won’t run. Apart from the cap, a faulty rotor or shaft can also prevent your car from starting.
This is particularly evident in the cold season when most starting problems manifest. In low temperatures, the distributor parts freeze. The abrupt heat surge causes the distributor cap to develop cracks when you attempt to start the car.
The cracks will ultimately lead to breakage. This case is particularly common with cars that are parked outside. Cars that are parked in unheated garages with low temperatures are also prone to starting problems.
Bad Distributor Symptoms #2: Engine Misfires
Sure, many engine problems may manifest in engine misfires. But a faulty distributor is one of the most common reasons for engine misfires. If you are experiencing engine misfires, the distributor is the safest place to check first. Thoroughly inspect the cap for any cracks as well as the distributor rotor.
Typically, an engine misfire is a sign that the rotor and cap are subject to replacement. A misfiring engine feels like it’s stumbling. Misfiring occurs when the distributor cap fails to supply enough current to the spark plugs. The cap regulates the engine’s firing order, and any malfunction in its parts can be felt in the engine’s performance.
Bad Distributor Symptoms #3: Unusual Shaking
Inexplicable shaking, while the engine is running is a classic symptom of a failing distributor. This may range from a light vibration to a more pronounced shaking that can be felt throughout the car. A possible cause for this is a distributor rotor that is not spinning as it should. Also, if the cap does not supply the voltage properly in the right cylinder power stroke, it may shake.
Anything that messes up the firing and timing process in the cylinders causes the vehicle to shake inexplicably. If you have noticed that your vehicle is shaking during idle or coming to a halt, the most probable culprit is a faulty distributor. The shaking can also be prominent when shifting gears or starting the vehicle.
Bad Distributor Symptoms #4: Stalling And Backfire
Backfiring from the exhaust or stalling while coasting with the car is another telltale sign that your car has a bad distributor. The car backfires or stalls when the engine loses power due to improper combustion. If your car stalls a few seconds after starting the engine, you are most probably dealing with a failing distributor.
As we mentioned earlier, the cap must deliver enough voltage to the spark plugs for internal combustion to occur. If the rotor is not turning properly, the engine will not achieve optimum combustion. A crack on the cap or clog in the distributor can stop the rotor from spinning properly. This may result in a backfiring situation or stalling.
Bad Distributor Symptoms #5: High Pitched Squealing Noises
Another common symptom that the distributor is bad is high-pitched noises from the bearings inside the distributor. Typically, you will hear the squealing noise when starting the engine. A bad distributor produces a unique squealing noise that can be easily distinguished from other engine noises. If you hear such a sound from the engine bay, check under the distributor cap.
Generally, a distributor will produce a squealing noise when it’s caked with grease and other pollutants. These buildups cause blockage of the air circulation, which in turn produces a high-pitched sound. If the yelling sound persists even after a thorough cleanup of the cap, it’s time to visit your mechanic for a more detailed inspection.
Bad Distributor Symptoms #6: Difficulty Turning Over
Along with the engine stalling, you may also notice the vehicle is having a hard time turning over. Typically, the engine fails to turn over when it’s cold and rarely when it’s hot. When you turn the ignition key, the battery delivers electricity to the spark plugs. The resulting spark makes the initial combustion.
The energy generated from the initial combustion turns the crankshaft and allows the car to move. Lack of turning over, which is the movement of the crankshaft, points to issues with a malfunctioning distributor. Most of the time, this is usually the case of a cap that is not intact. If the cap is intact, the problem could be in the timing belt or the crankshaft itself.
Bad Distributor Symptoms #7: Check Engine Light
The engine control unit (ECU) will detect an improper combustion process and illuminate the check engine warning light. A bad distributor rotor or cap is one of the common causes of improper combustion. The check engine light will come on if the distributor is not distributing voltage consistently or correctly.
A cracked or broken cap and a clogged rotor are one of the major culprits of improper combustion. The check engine light comes on if the ECU detects even the slightest instance of messed-up firing order or timing. Of course, many other errors can cause the check engine light to come on.
However, you should check your distributor if you see the check engine light and other telltale signs of a faulty distributor. Most vehicles equipped with a distributor are likely to have been made before the era of the ECU. Therefore, detecting distributor errors can’t be a matter of reading error codes.
Bad Distributor Symptoms #8: Irregular RPMs
Irregular RPMs are another common symptom of a bad distributor. If you notice that your RPMs are likely off, have your distributor rotor and cap checked. Distributor wires are also likely to be the cause of your irregular RPMs. If the wires have been damaged, the distributor supplies inconsistent current to the cylinders.
Check if the distributor rotor turns properly and if the cap is burned, cracked, or corroded. If they seem to be working just fine, check every distributor wire.
Bad Distributor Symptoms #9: Engine Overheating
The distributor plays a crucial role in the overall function and efficiency of the engine. When the distributor is malfunctioning, the engine may work harder than necessary, leading to overheating. If you find your temperature gauge rising unexpectedly or you notice steam from under the hood, it’s essential to pull over and let the engine cool down.
While there are many reasons for engine overheating, a malfunctioning distributor can definitely contribute. It’s best to inspect your distributor and related components when this happens, especially if other symptoms coincide.
Bad Distributor Symptoms #10: Poor Fuel Economy
You might wonder how a distributor can affect fuel economy. The distributor is responsible for timing and directing the spark to the correct cylinder. If the timing is off due to a faulty distributor, fuel won’t burn as efficiently, and you might find yourself visiting the gas station more frequently.
If you notice a sudden drop in miles per gallon, paired with other distributor-related symptoms, there’s a good chance you’ve identified the culprit.
Bad Distributor Symptoms #11: Weak Engine Power
Experiencing a noticeable lack of power, especially during acceleration? A bad distributor can cause the engine to lag. Proper combustion requires the distributor to send the spark at the right moment. If this is misaligned, combustion becomes less efficient, reducing the engine’s overall power output.
If your vehicle struggles to maintain speed, climb hills, or feels sluggish overall, it might be time to inspect the distributor.
Bad Distributor Symptoms #12: Oily or Dirty Distributor Cap
On visual inspection, if you notice that the distributor cap appears oily or excessively dirty, it can indicate potential issues. Oil or debris can disrupt the flow of current, hampering the performance of the distributor. This usually signifies that oil or other engine fluids are leaking into the distributor. It’s vital to clean and determine the source of the leak promptly.
Bad Distributor Symptoms #13: Burnt Smell Under the Hood
A malfunctioning distributor can sometimes lead to electrical issues causing a burnt or electrical smell. This can happen if the distributor overheats or if there’s an electrical short. If you ever detect a burnt aroma while driving or after parking, inspect the distributor for signs of damage, burns, or melting.
Bad Distributor Symptoms #14: Corroded or Damaged Connectors
Corrosion can be an engine’s silent enemy. On examining the distributor, if you spot corroded connectors or points, it could be impeding the smooth flow of current to the spark plugs. Not only can this lead to poor engine performance, but over time, it can worsen, leading to complete engine failure. Make sure to replace corroded parts and ensure all connections are clean and secure.
Bad Distributor Symptoms #15: Erratic Behavior at High Speeds
When cruising at higher speeds, if you sense unexpected surges or reductions in power, the distributor might be to blame. As speed increases, any discrepancies in spark distribution become more apparent. Thus, erratic engine behavior at high velocities often points to a compromised distributor system. In conclusion, the distributor is an integral component of an engine’s ignition system.
Proper maintenance and timely replacements are crucial for optimal performance. If you encounter any of these symptoms, it’s advisable to consult a professional mechanic for a thorough inspection and necessary repairs. Remember, a failing distributor not only impacts engine performance but can also lead to more significant, more expensive issues down the road.
Bad Distributor Symptoms #16: Rough Idling
Rough idling can be a sign of various engine problems, and a faulty distributor is certainly among the culprits. If your car seems to rumble or shake excessively while idling, especially at a stoplight or in park, it might be due to an inconsistent spark from a malfunctioning distributor. This inconsistency can cause the engine to run unevenly, creating that characteristic roughness.
Bad Distributor Symptoms #17: Frequent Engine Cut-Offs
If your engine abruptly stops running, especially when the vehicle is in motion, it could indicate a distributor issue. This sudden engine cut-off can be dangerous, particularly when driving at higher speeds or in traffic. If the distributor fails to relay consistent sparks to the spark plugs, it can cause the engine to suddenly stop.
Bad Distributor Symptoms #18: Visible Physical Damage
Sometimes, the symptoms are clear even upon a visual inspection. If you open the hood and inspect the distributor, any noticeable cracks, burns, or physical deformities on the distributor cap or rotor can be clear indications of a problem. Even if the vehicle seems to run fine, such visible damages can be precursors to more significant issues down the line.
Bad Distributor Symptoms #19: Timing Issues
Your engine’s timing relies heavily on the distributor. If the distributor is off, the timing can be as well, leading to decreased performance, misfires, and other related symptoms. A car with timing issues due to a distributor problem might also emit more exhaust, leading to failed emissions tests.
Bad Distributor Symptoms #20: Difficulty in Cold Starts
While you mentioned cars having trouble starting in cold due to frozen distributor parts, there’s another angle to consider. A worn-out distributor can also make cold starts hard even without freezing conditions. The engine might take longer cranking times or multiple ignition turns before it roars to life.
What Causes A Distributor To Go Bad
The distributor in a car engine plays a vital role in the ignition system. It’s responsible for directing the high voltage from the ignition coil to the spark plugs in the correct firing order. Like many car components, distributors can fail for various reasons. Understanding these causes can help in early detection and prevention.
Here’s a deep dive into the common reasons for distributor failure.
Bad Distributor Causes #1: Heat and Thermal Stress
One of the primary culprits behind distributor problems is prolonged exposure to heat. Car engines, by their very nature, generate a significant amount of heat. Over time, this heat can cause distributor components to expand, contract, and ultimately weaken.
Distributors are constructed to withstand the typical heat range inside an engine bay. However, extreme conditions or inadequate cooling can lead to thermal stress. This stress can warp or damage the distributor cap and rotor, leading to ignition problems.
Regularly check the cooling system and ensure that the distributor is shielded from excessive heat. If the distributor shows signs of heat damage, consider using heat shields or insulating materials.
Heat and Thermal Stress Symptoms
- Engine Misfires: One of the most common symptoms of heat damage to a distributor is engine misfires. If the distributor cap or rotor warps due to heat, it can disrupt the spark distribution, causing the engine to misfire.
- Hard Starting: The vehicle might struggle to start, especially in hot conditions. A heat-damaged distributor can impede the ignition system, making the engine difficult to start.
- Stalling: If the distributor cannot effectively transfer the spark, the engine might stall unexpectedly, often during idling.
- Decreased Fuel Efficiency: A misfiring engine consumes more fuel. As such, a faulty distributor can indirectly lead to decreased fuel efficiency.
Causes of Heat and Thermal Stress
- Inadequate Cooling System: If the car’s cooling system isn’t functioning correctly, engine temperatures can rise beyond the standard range, leading to distributor problems.
- Defective Radiator or Fans: These are essential components that help regulate engine temperature. If they fail, the engine may overheat, affecting the distributor.
- Proximity to Hot Components: Some distributors are positioned close to other engine components that generate significant heat, leading to accelerated wear.
Diagnosing Heat and Thermal Stress
- Visual Inspection: Check the distributor cap for signs of melting, warping, or cracking. These are clear indicators of heat damage.
- Use a Timing Light: A timing light can be used to see if the spark from the distributor is consistent. Inconsistencies may suggest damage or wear.
- Check Engine Codes: Modern vehicles will often trigger an engine code if there’s a misfire or ignition issue. Using an OBD-II scanner, you can retrieve these codes to pinpoint distributor problems.
DIY Repairs for Heat and Thermal Stress
- Replace Distributor Cap and Rotor: If you notice signs of wear or damage, replace the distributor cap and rotor. These parts are relatively inexpensive and straightforward to install.
- Install Heat Shields: If the distributor is close to hot components, consider installing heat shields to protect it from excess heat.
- Address Cooling System Issues: If the vehicle is overheating, ensure the cooling system, including the radiator and fans, is working efficiently. Replace faulty components as needed.
Repair/Replacement Costs
- Distributor Cap and Rotor: These components can range from $30 to $150, depending on the vehicle’s make and model.
- Diagnostic Fee: If you take your car to a mechanic, expect to pay between $50 to $100 for a diagnostic fee.
- Labor Costs: Depending on the complexity of the job, labor can cost anywhere from $50 to $200 for distributor-related repairs.
- Cooling System Repairs: Addressing issues with the radiator or fans can range from $100 to $500, including parts and labor.
In conclusion, while heat and thermal stress are inherent in car engines, keeping a vigilant eye on the cooling system and the condition of the distributor can prevent significant issues. Regular maintenance checks can also help in early detection, ensuring that your vehicle runs smoothly and efficiently.
Bad Distributor Causes #2: Defective or Worn Out Parts
Every component has a lifespan, and distributor parts are no exception. Over time, the rotor, distributor cap, and other components can wear out. As these parts wear out, the efficiency of the ignition system drops. The car might face difficulty starting, or the engine might misfire.
Regular inspection and replacement of worn-out parts can ensure the distributor functions optimally. Remember, using high-quality replacement parts can extend the life of the distributor.
Symptoms of Defective or Worn Out Distributor Parts
- Erratic Engine Behavior: A faulty distributor can lead to unpredictable engine behavior. The engine might stutter during acceleration or experience sudden power losses.
- Engine Misfires: Worn-out or defective distributor parts can result in irregular spark distribution, leading to engine misfires.
- Reduced Power and Performance: The vehicle might lack its usual power or throttle response, making it feel sluggish.
- Check Engine Light: Modern vehicles monitor the ignition system closely. A worn-out distributor can trigger the check engine light.
Causes of Defective or Worn Out Distributor Parts
- Regular Wear and Tear: Just like any other part, the distributor components degrade over time due to the continuous movement and high temperatures.
- Low-Quality Replacement Parts: Using subpar components can accelerate wear and reduce the distributor’s overall lifespan.
- Infrequent Maintenance: Skipping regular inspections and maintenance can lead to components wearing out without timely detection.
Diagnosing Defective or Worn Out Parts
- Visual Inspection: Check for signs of wear, corrosion, or damage on the distributor cap, rotor, and other parts.
- Engine Performance Test: A noticeable decline in engine performance often indicates worn-out distributor components.
- Use an OBD-II Scanner: Retrieve engine codes to check if the distributor or ignition system is the root of the problem.
DIY Repairs for Defective or Worn Out Distributor Parts
- Replace Worn Components: If any part of the distributor looks worn or damaged, replace it. It’s often beneficial to replace the distributor cap and rotor together to ensure consistency.
- Clean the Distributor: Over time, the distributor can accumulate debris. Cleaning it can improve performance and extend the life of its parts.
- Upgrade to High-Quality Parts: When replacing any component, opt for reputable brands. They might be more expensive initially but can save money in the long run by extending the distributor’s lifespan.
Repair/Replacement Costs
- Distributor Cap and Rotor: A quality set can cost between $50 to $200, depending on the vehicle’s make and model.
- Diagnostic Fee: Should you opt for a professional diagnosis, expect fees ranging from $50 to $100.
- Labor Costs: For replacing distributor parts, labor charges can vary from $50 to $250, depending on the complexity of the task.
- High-Quality Replacement Parts: Premium components might cost 20% to 50% more than generic parts but can offer better longevity and performance.
In wrapping up, it’s essential to remember that while every component has a lifespan, proactive maintenance, regular inspections, and using high-quality replacement parts can ensure that your vehicle’s distributor remains in top-notch condition, offering smooth performance for years.
Bad Distributor Causes #3: Dirt and Contamination
Distributors are designed to work in a relatively clean environment. However, sometimes dirt, oil, or other contaminants can infiltrate. Contaminants can interfere with the electrical connections inside the distributor, leading to poor conductivity. They can also lead to premature wear of components.
Ensure that the distributor cap is securely in place. If contaminants are found, clean the distributor thoroughly and investigate the source of the contamination.
Symptoms of Dirt and Contamination in Distributors
- Inconsistent Ignition: When dirt or contaminants block electrical connections, the ignition can become erratic, causing the engine to stutter or misfire.
- Engine Hard Starts: Dirt can impede the distributor’s efficiency, leading to increased difficulty when starting the car.
- Engine Cuts Off: Excessive contamination can occasionally cause the engine to shut off unexpectedly, especially during idling.
- Reduced Engine Performance: The vehicle might seem less responsive or sluggish due to inconsistent spark distribution.
Causes of Dirt and Contamination
- Damaged Distributor Cap: A cracked or improperly seated distributor cap can allow dirt and moisture to enter.
- Leaking Engine Components: Oil or coolant leaks from nearby components can lead to contamination inside the distributor.
- Driving Conditions: Frequently driving on unpaved or dusty roads can increase the risk of dirt entering the engine bay and potentially the distributor.
Diagnosing Dirt and Contamination
- Visual Inspection: Open the distributor cap and inspect for visible dirt, oil, or any foreign particles. Look for signs of moisture or corrosion.
- Performance Analysis: If the engine behaves erratically, especially after driving on dusty roads or in muddy conditions, contamination might be the culprit.
- Conductivity Test: Use a multimeter to test the conductivity of the distributor components. Poor results could indicate the presence of contaminants.
DIY Repairs for Dirt and Contamination
- Thorough Cleaning: Use a specialized cleaner or a mixture of isopropyl alcohol and water to clean the inside of the distributor. Ensure it’s fully dry before reassembling.
- Replace the Distributor Cap: If the cap is cracked or not sealing correctly, consider replacing it to prevent future contamination.
- Address Leaks: If you spot any leaks around the distributor, address the source immediately to prevent further contamination.
Repair/Replacement Costs
- Distributor Cap: Depending on your vehicle, a new distributor cap can range from $20 to $150.
- Cleaning Supplies: Specialized electrical cleaners can cost anywhere from $5 to $20.
- Diagnostic Fee: If you seek a mechanic’s help for diagnosis, fees can range from $50 to $100.
- Labor Costs: For cleaning and minor repairs related to contamination, labor can vary between $40 to $150.
- Additional Repairs: If the contamination is due to leaks from other engine components, the repair costs can add up, depending on the source of the leak.
To summarize, while distributors are made to operate in clean environments, real-world conditions can introduce contaminants. Regular inspection, ensuring all seals are intact, and prompt cleaning can ensure the distributor remains efficient, ensuring optimal vehicle performance.
Bad Distributor Causes #4: Electrical Failures
Electrical issues, such as shorts or surges, can wreak havoc on a distributor. These can stem from other faulty components, wiring issues, or even external factors like lightning strikes. A surge can fry the electronics inside the distributor, rendering it useless. Shorts can lead to intermittent problems, which can be harder to diagnose.
If a car has recently experienced an electrical issue, inspect the distributor for damage. Investing in surge protection and quality wiring can also be a preventative measure.
Symptoms of Electrical Failures in Distributors
- Intermittent Ignition Issues: Short circuits can cause sporadic interruptions in the distributor’s functionality, leading to unpredictable engine behavior.
- No Start Condition: A severe electrical surge can damage the distributor to the point where it’s incapable of sending any spark to the engine, preventing the car from starting.
- Frequent Engine Misfires: Erratic electrical currents can cause uneven spark distribution, resulting in engine misfires.
- Flickering Dashboard Lights: If electrical issues are widespread, dashboard lights or other electronic components might flicker or malfunction.
Causes of Electrical Failures
- Faulty Wiring: Degraded or damaged wiring can lead to short circuits or improper current flow, affecting the distributor’s operation.
- External Surges: Events like lightning strikes or jump-starting a car incorrectly can send a surge through the car’s electrical system.
- Defective Components: Other faulty components in the ignition system can back feed improper currents to the distributor.
- Poor Grounding: An inadequate ground can cause erratic electrical behaviors, impacting the distributor and other electronic components.
Diagnosing Electrical Failures
- Multimeter Testing: Use a multimeter to check the distributor’s electrical connections and integrity. Abnormal readings can indicate electrical issues.
- Visual Inspection: Check for visible signs of burnt components, melted wires, or other damage inside the distributor.
- Scan for Error Codes: Modern cars have onboard diagnostics that can pinpoint electrical problems. Use an OBD-II scanner to retrieve any error codes related to the ignition or distributor system.
DIY Repairs for Electrical Failures
- Replace Damaged Wires: If you identify any damaged or frayed wires leading to the distributor, replace them with quality wiring.
- Install Surge Protectors: For vehicles frequently exposed to electrical surges, consider investing in surge protection devices.
- Ensure Proper Grounding: Check the vehicle’s grounding points and ensure they are clean and securely attached.
- Replace Burnt Components: If the electrical issue has damaged parts of the distributor, replace those components to restore functionality.
Repair/Replacement Costs
- Wiring and Connectors: Quality wiring and connectors might cost between $20 to $100, depending on the extent of the replacement.
- Distributor Components: Depending on which parts are damaged, expect to spend anywhere from $30 to $250 for quality replacements.
- Diagnostic Fee: Mechanics may charge between $50 to $100 for a thorough electrical diagnosis.
- Labor Costs: Electrical repairs, depending on their complexity, can have labor fees ranging from $40 to $200.
- Surge Protection Devices: Quality devices can cost between $50 to $150, but they provide added security against electrical anomalies.
In conclusion, while electrical failures can be daunting, understanding their impact on the distributor and taking preventative steps can safeguard the vehicle’s ignition system. Regular checks, quality components, and proper grounding are essential to maintaining a car’s electrical health.
Bad Distributor Causes #5: Faulty Installation
Sometimes, the problem is not with the distributor itself, but with how it’s installed. Incorrect installation can lead to a range of issues. A distributor that’s not correctly seated can lead to timing issues. Loose connections might result in sporadic ignition problems.
Whenever replacing or working on a distributor, ensure it’s installed as per the manufacturer’s guidelines. If unsure, consulting a mechanic or expert is always a good idea.
In essence, ensuring the optimal performance of a car’s distributor boils down to regular maintenance, using quality parts, and being vigilant to signs of wear or contamination. By understanding the common causes of distributor failure, one can extend the life of this vital component and ensure a smoother ride.
Symptoms of Faulty Installation of Distributors
- Timing Issues: If the distributor isn’t correctly aligned or seated, the engine’s timing can be off, causing inefficient combustion.
- Random Ignition Failures: Loose or improperly connected wiring can lead to random ignition hiccups or the engine not starting at all.
- Engine Misfires: Incorrect installation can lead to uneven spark distribution, causing the engine to misfire.
- Noisy Operation: A poorly seated distributor might produce unusual noises during the operation.
Causes of Faulty Installation
- Incorrect Seating: Not aligning the distributor correctly can cause it not to seat properly, affecting its operation.
- Improper Connections: Not connecting the distributor’s wires properly can interrupt its function.
- Mismatched Components: Using distributor components not designed for a specific car model can lead to installation and functionality issues.
- Skipping Steps in Installation Process: Not following the manufacturer’s guidelines step-by-step might lead to missed connections or improper setups.
Diagnosing Faulty Installation
- Visual Inspection: Check if the distributor is seated properly and there are no loose or hanging wires.
- Timing Light Test: Use a timing light to check if the engine’s timing corresponds to the manufacturer’s specifications.
- Listen for Noises: During operation, listen for unusual sounds that might indicate a misalignment or other installation issues.
DIY Repairs for Faulty Installation
- Re-seat the Distributor: Ensure the distributor is correctly aligned and seated as per the manufacturer’s guidelines.
- Check All Connections: Ensure all the wires and connectors related to the distributor are securely attached.
- Consult the Manual: Always refer to the car’s manual or the distributor’s installation guide to ensure every step is followed correctly.
- Tighten All Bolts and Fasteners: Ensure that all securing components of the distributor are tightened to the recommended specifications.
Repair/Replacement Costs
- Diagnostic Fee: If you’re unsure about the installation, a mechanic might charge $50 to $100 for a comprehensive check.
- Labor Costs: If a professional needs to reinstall or correct the distributor’s installation, expect labor costs ranging from $40 to $150.
- Replacement Parts: If parts were damaged due to faulty installation, their replacement cost can range from $20 to $200, depending on the specific component.
- Consultation: Some mechanics might charge a consultation fee if you’re seeking advice or guidance on installation, which can be around $30 to $50.
In wrapping up, the distributor’s installation is a critical aspect of its performance. While it might seem straightforward, the smallest oversight can lead to significant engine issues. Taking the time to ensure a correct installation or seeking professional guidance can save time, money, and potential headaches down the road.
Bad Distributor Causes #6: Moisture Intrusion
Moisture, particularly in humid climates, can be a sneaky enemy to a car’s distributor. When moisture enters the distributor system, it can cause the distributor cap to corrode or the rotor to rust. This not only affects the system’s electrical conductivity but also increases wear on the components.
Always ensure that the distributor cap has a snug fit, minimizing any potential entry points for moisture. Parking in a dry environment or using moisture-dispersing products can also help combat this issue.
Symptoms of Moisture Intrusion in Distributors
- Hard Starting: Moisture can affect the electrical conductivity, making it difficult for the car to start, especially in damp or cold conditions.
- Sporadic Ignition Failures: The intrusion of moisture can lead to intermittent ignition problems, causing the car to stall unexpectedly.
- Engine Misfires: With moisture affecting the spark distribution, the engine can misfire due to incomplete combustion.
- Visible Corrosion: Upon inspection, the distributor cap might show signs of greenish corrosion or the rotor might display rust.
Causes of Moisture Intrusion
- Poorly Sealed Distributor Cap: A cap that doesn’t fit snugly can allow moisture to seep in.
- Parking in Wet Conditions: Leaving the car parked in damp or rainy environments for prolonged periods increases the risk of moisture intrusion.
- Condensation: In humid climates, the difference between daytime heat and cooler nights can cause condensation inside the distributor.
- Leaks: Nearby leaks, like from coolant systems, can splatter or drip into the distributor.
Diagnosing Moisture Intrusion
- Visual Inspection: Regularly inspect the distributor cap for signs of corrosion or moisture droplets inside.
- Starting Behavior: If the car consistently has trouble starting in damp conditions, it’s a hint towards moisture problems.
- Check for Leaks: Look around the distributor for potential sources of leaks or moisture intrusion.
DIY Repairs for Moisture Intrusion
- Dry Out the Distributor: Remove the cap and use a hairdryer or cloth to dry out any moisture. Avoid high heat as it can damage the components.
- Replace Corroded Parts: If you see corrosion on the distributor cap or rust on the rotor, consider replacing them.
- Seal the Distributor Cap: Ensure the distributor cap is securely in place, and consider using sealants for added protection against moisture.
- Moisture-Dispersing Products: Apply products like WD-40, which can help displace moisture and protect against future intrusion.
Repair/Replacement Costs
- Distributor Cap: A replacement distributor cap typically costs between $20 to $60, depending on the car model.
- Rotor: If the rotor is rusted, a new one can cost anywhere from $10 to $40.
- Diagnostic Fee: To have a mechanic assess moisture intrusion or related issues, it can range from $50 to $100.
- Labor Costs: If you opt for professional service to address moisture issues, labor costs can range from $30 to $120.
- Moisture-Dispersing Products: Products that help combat moisture generally range between $5 to $15 a can.
To wrap things up, moisture intrusion might seem benign, but it can cause significant problems in the distributor system. By being proactive and regularly checking for signs of moisture, car owners can maintain the health and efficiency of their ignition system, ensuring reliability in various conditions.
Bad Distributor Causes #7: Poor Fuel Quality
Fuel quality might seem unrelated to distributor issues, but poor fuel can lead to engine knocking. This puts undue stress on many engine components, including the distributor. Over time, this added stress accelerates wear.
Stick to reputable gas stations and ensure your fuel is of the appropriate octane level for your vehicle. Regularly cleaning the fuel system can also prevent this problem.
Symptoms of Distributor Issues Due to Poor Fuel Quality
- Engine Knocking or Pinging: This is the most immediate sign. When the air-fuel mixture in the cylinders is detonating in more than one place at a time, it produces a knocking or pinging sound.
- Reduced Engine Performance: Poor fuel can decrease the engine’s efficiency, leading to sluggish acceleration or decreased power.
- Erratic Ignition: The distributor may struggle to provide a consistent spark, leading to uneven ignition and potential misfires.
- Premature Wear: Over time, the distributor components may show signs of wear far earlier than they should, due to the added stress.
Causes Behind Poor Fuel Quality Affecting Distributor
- Low-Octane Fuel: Using fuel with a lower octane rating than recommended can cause knocking.
- Contaminated Fuel: Fuel mixed with dirt, water, or other impurities can compromise its combustion efficiency.
- Inconsistent Fuel Mixture: This happens when the fuel doesn’t mix with air properly, leading to incomplete combustion.
- Ethanol Concentration: Some engines aren’t designed to handle high ethanol content, which is sometimes found in cheaper fuels.
Diagnosing Issues Related to Poor Fuel Quality
- Listen for Knocking: Regularly monitor for any unusual sounds from the engine, especially a knocking noise.
- Fuel Test: Some auto shops offer fuel testing to determine its quality.
- Check Fuel Source: Consider the reputation of your gas station. Some might be known for diluted or subpar fuel.
DIY Repairs for Issues Stemming from Poor Fuel Quality
- Fuel Additives: Use fuel additives that can help in cleaning the fuel system and improving combustion.
- Fuel System Cleaner: Regularly using a fuel system cleaner can help in preventing the accumulation of deposits that can result from poor fuel quality.
- Replace the Fuel: If you suspect bad fuel is the culprit, consider draining and replacing it with high-quality fuel from a reputable source.
- Inspect Distributor: Check for any signs of premature wear and consider replacing worn-out parts earlier than usual.
Repair/Replacement Costs
- Fuel Additives: Typically range from $5 to $20 per bottle.
- Fuel System Cleaner: This can cost between $10 to $50, depending on the brand and formula.
- Distributor Parts: If parts are prematurely worn due to stress from knocking, replacement costs can vary. Distributor caps might be $20 to $60, while rotors can be $10 to $40.
- Labor Costs: If you choose to have a mechanic inspect and address issues related to poor fuel, labor can range from $40 to $150, depending on the complexity of the issue.
- Fuel Replacement: Draining and refilling a tank can vary based on local fuel prices and the tank’s size.
In summary, while fuel quality might seem distant from distributor health, they’re interconnected. The strain poor fuel places on an engine impact all its components. Prioritizing good fuel and regular maintenance can not only boost performance but also elongate the life of critical parts like the distributor.
Bad Distributor Causes #8: Timing Chain/Belt Issues
The timing chain or belt synchronizes the engine’s operations. If it malfunctions, the distributor’s timing can be affected, leading to inefficient ignition and wear on the distributor’s components. A routine check of the timing chain or belt, especially on older vehicles, can prevent this issue. If you notice a change in engine performance, it might be time to inspect these components.
Symptoms of Distributor Issues Due to Timing Chain/Belt Problems
- Engine Misfires: An incorrectly timed distributor can lead to the spark plug firing at the wrong time, causing misfires.
- Reduced Engine Performance: The engine may feel sluggish, or you might notice decreased fuel efficiency.
- Rattling Noise: A loose timing chain or belt can produce a rattling or ticking sound, especially at idle.
- Difficulty Starting: The car might struggle to start or might not start at all due to ignition timing issues.
- Increased Emissions: Incorrect timing can result in unburned fuel, leading to higher emissions and even visible exhaust smoke.
Causes of Timing Chain/Belt Issues Affecting the Distributor
- Wear and Tear: Over time, timing belts/chains can stretch or become worn.
- Poor Maintenance: Skipping regular maintenance checks can lead to these components deteriorating without notice.
- Low-Quality Replacements: Installing subpar timing belts or chains can result in premature failures.
- Engine Overheating: Overheating can cause the belt to weaken or even snap.
Diagnosing Timing Chain/Belt Related Issues
- Visual Inspection: Check for signs of wear, cracks, or looseness on the timing belt or chain.
- Listen for Noises: A failing timing component often makes a characteristic noise, especially during startup or at low speeds.
- Engine Light: Modern cars may trigger a check engine light if there’s a timing issue. Use an OBD-II scanner for more specifics.
- Compression Test: A test can help determine if the engine’s valves are opening and closing at the correct times.
DIY Repairs for Timing Chain/Belt Related Issues
- Timing Belt Replacement: If you’re mechanically inclined, you can replace the timing belt, though it’s a complex job. Ensure you have the right tools and a detailed guide.
- Adjust Timing: If the timing is slightly off, you can adjust it according to the manufacturer’s specifications.
- Regular Maintenance: Keeping up with scheduled maintenance and checks can prevent these issues or catch them early.
Repair/Replacement Costs
- Timing Belt Replacement: Parts can range from $20 to $100, but with labor, the total might be between $300 to $600, depending on the vehicle and location.
- Timing Chain Replacement: Chains tend to be more expensive. With labor, you might be looking at $400 to $1,000.
- Diagnostic Costs: If you go to a professional for diagnosis, expect to pay between $50 to $100 for their expertise.
- OBD-II Scanner: If you want to diagnose electronically triggered issues at home, scanners range from $20 to $200+.
In conclusion, the synchronicity of the engine’s operations is crucial for its smooth functioning. The timing chain or belt plays an indispensable role in ensuring that harmony. Regular inspections, quality parts, and prompt interventions can save drivers from costly repairs and performance issues down the road.
Bad Distributor Causes #9: Vibration and External Damage
Engines naturally vibrate during operation. However, excessive vibration from external sources, like rough terrains or an accident, can impact the distributor. The vibrations can lead to misalignments or even cracks in the distributor cap.
Ensure that the distributor is properly mounted and that external factors aren’t causing undue strain on the system.
Symptoms of Distributor Issues Due to Vibration and External Damage
- Erratic Engine Behavior: The engine might sputter, misfire, or stall unexpectedly due to disrupted spark distribution.
- Hard Starting: The car could struggle to start or might not start at all if the distributor is misaligned or damaged.
- Check Engine Light: Vibrations causing distributor issues can sometimes trigger the check engine light.
- Visible Damage: On inspection, you might find cracks, dents, or other signs of physical damage on the distributor cap or its components.
- Unusual Noises: A damaged distributor or misalignment might create unusual noises during operation.
Causes of Vibration-Induced Distributor Issues
- Engine Mount Issues: Worn or broken engine mounts can amplify vibrations.
- External Impacts: Accidents, hitting potholes, or off-roading can lead to increased vibrations.
- Faulty Installation: If the distributor isn’t mounted securely, even regular engine vibrations can cause issues.
- Aging Distributor Components: Older parts might be more susceptible to damage from vibrations.
Diagnosing Vibration and External Damage Related Issues
- Visual Inspection: A close look can reveal cracks, misalignments, or other physical damage.
- Drive Test: Driving the car can help identify unusual engine behaviors indicative of distributor issues.
- Engine Light Diagnostics: If the check engine light is on, an OBD-II scanner can provide insights into the potential problems.
DIY Repairs for Vibration and External Damage Issues
- Distributor Cap Replacement: If the cap is cracked or damaged, replace it with a new one. Ensure it fits snugly and securely.
- Realigning the Distributor: If it’s misaligned, correct its position as per the manufacturer’s guidelines.
- Check Engine Mounts: If excessive vibration is the issue, inspect and replace worn engine mounts.
- Insulating the Distributor: Consider adding padding or insulation to reduce the impact of vibrations.
Repair/Replacement Costs
- Distributor Cap Replacement: The part can cost between $20 to $80, with labor adding an extra $50 to $100.
- Engine Mount Replacement: Depending on the vehicle, engine mounts can range from $50 to $300. With labor, the total might range between $250 to $500.
- Diagnostic Costs: Professional diagnostic fees can vary between $50 to $100.
- Padding/Insulation: Specialty insulating products can range from $10 to $50, depending on the brand and type.
In summary, while engines are built to handle regular vibrations, external factors can exacerbate wear and tear, especially on the distributor. Regularly inspecting the distributor and its mounting, coupled with careful driving habits, can minimize the risk of vibration-related distributor issues.
Bad Distributor Causes #10: Manufacturing Defects
Though rare, some distributors might have defects right from the factory. These defects can manifest as inefficiencies or complete failures. They can be due to poor quality control, materials, or even design flaws.
Always buy distributors from reputable brands and suppliers. If you encounter consistent issues with a new distributor, consider checking if there are any recalls or known defects for that model.
Symptoms of Distributor Issues Due to Manufacturing Defects
- Immediate Issues: A brand-new distributor causing problems right after installation might be a sign of a manufacturing defect.
- Inconsistent Performance: The engine might run well one moment and poorly the next, indicating the erratic behavior of the distributor.
- Premature Failures: Distributors typically have a long lifespan, so an early failure could be due to defects in the product.
- Unexplained Malfunctions: If other potential causes are ruled out, a factory defect might be the culprit.
Causes of Manufacturing-Induced Distributor Issues
- Quality Control Lapses: Inadequate inspections can lead to flawed products passing through to consumers.
- Inferior Materials: The use of subpar materials can result in a less durable distributor.
- Design Oversights: Occasionally, design errors may lead to functional inefficiencies in the distributor.
Diagnosing Manufacturing Defect Related Issues
- Professional Inspection: A mechanic might identify issues that aren’t typical wear and tear for a relatively new distributor.
- Warranty Claims: If the distributor is still under warranty, the manufacturer might accept returns for inspection and replacement.
- Online Research: Check forums or customer reviews to see if others have experienced similar issues with the same model.
DIY Repairs for Manufacturing Defect Issues
- Replacement: If a defect is suspected in a new distributor, the best option is typically to replace it. Ensure the replacement is from a trusted brand or source.
- Warranty Claims: Always utilize the product’s warranty. Most reputable manufacturers will offer a replacement for defective items.
- Re-installation: Occasionally, a perceived defect might be due to improper installation. Double-checking the installation process can sometimes solve the problem.
Repair/Replacement Costs
- Replacement Distributor: Costs can vary based on the vehicle make and model, ranging from $50 to $300 or more. Buying from well-known brands might be pricier, but the quality assurance can be worth it.
- Installation Costs: If you choose to have a professional install the distributor, labor costs might range from $70 to $200, depending on the complexity.
- Warranty Returns: If the product is under warranty, the replacement should be free. However, shipping or labor fees might still apply.
- Diagnostic Costs: If you enlist a mechanic to diagnose the issue, expect fees ranging from $50 to $100.
In a nutshell, while manufacturing defects are uncommon, they can still pose challenges for car owners. Prioritizing purchases from reputable sources and being proactive about warranties can mitigate the headaches that come with a faulty distributor. Always stay informed about recalls or known issues, as manufacturers are obligated to address these for the benefit of their customers.
Bad Distributor Causes #11: Insufficient Lubrication
The distributor shaft requires lubrication to operate smoothly. Without it, friction increases, leading to excessive wear and potentially causing the distributor to seize up. Make sure to lubricate the distributor as per the manufacturer’s guidelines. Utilize high-quality lubricants suitable for your car’s specifications.
Symptoms of Distributor Issues Due to Insufficient Lubrication
- Noisy Operation: A distributor lacking lubrication may produce squealing or grinding noises.
- Hard Starting: The engine might face difficulty during startup due to increased resistance in the distributor’s rotation.
- Decreased Engine Efficiency: The car may exhibit reduced performance, and you might notice a drop in fuel efficiency.
- Overheating of Distributor Components: Excessive friction can lead to overheating, which further damages the distributor.
Causes of Lubrication-Related Distributor Issues
- Skipped Maintenance: Regular maintenance schedules might have been overlooked, leading to missed lubrication intervals.
- Use of Incorrect Lubricants: Not all lubricants are equal. Using the wrong type can be as detrimental as not using any at all.
- Environmental Contaminants: Dust and debris can make their way into the distributor, absorbing the lubricant or causing it to degrade faster.
Diagnosing Lubrication-Related Issues
- Visual Inspection: By opening the distributor cap, one can inspect the rotor and shaft for signs of excessive wear or heating.
- Listen for Noises: A keen ear can detect the unusual noises a poorly lubricated distributor might make.
- Regular Maintenance Checks: Staying on top of scheduled maintenance can preemptively spot lubrication issues.
DIY Repairs for Lubrication Issues
- Proper Lubrication: Clean the distributor components and apply the correct lubricant as specified in your car’s manual.
- Distributor Cleaning: If contaminants are suspected, clean the distributor components to ensure a smoother surface for lubrication.
- Replace Worn Components: Excessive wear due to poor lubrication might necessitate the replacement of certain parts like the distributor shaft or rotor.
Repair/Replacement Costs
- Lubricant Cost: High-quality lubricants can range from $10 to $50, depending on the brand and quantity.
- Component Replacement: If the rotor or shaft requires replacement due to wear, costs might range from $30 to $200 based on the specific parts and vehicle model.
- Professional Service: If you opt to have a mechanic lubricate the distributor or replace parts, labor fees might range from $50 to $150, contingent on the depth of the service required.
- Diagnostics: A comprehensive diagnostic to determine lubrication issues may cost between $40 and $90.
To wrap it up, ensuring adequate lubrication is paramount for the distributor’s longevity. This relatively simple maintenance task can stave off significant future expenses and car troubles. Committing to regular check-ups and using the right lubricants will safeguard your distributor’s health and, by extension, your car’s performance.
Bad Distributor Causes #12: Age and Natural Deterioration
Just like any other component, the distributor and its parts can naturally degrade over time, even if the car isn’t driven frequently. The materials, particularly plastic and rubber components, can become brittle or lose their integrity. Age-related deterioration might be slow, but it’s inevitable.
For cars that aren’t driven often, or for classic cars, consider checking the distributor for signs of age-related wear. Regular checks can help identify and rectify problems before they escalate.
Symptoms of Age-Related Distributor Issues
- Erratic Engine Behavior: A deteriorating distributor can cause the engine to behave unpredictably, such as random misfires or rough idling.
- Difficulty in Starting: Age can cause the distributor’s components to lose efficiency, leading to hard starts.
- Visual Deterioration: Cracks or discoloration may appear on the distributor cap or other components.
- Frequent Ignition Problems: A failing distributor might cause the engine to stall unexpectedly or show hesitation during acceleration.
Causes of Age-Related Distributor Deterioration
- Material Breakdown: The distributor’s materials, especially plastics or rubbers, may degrade due to environmental factors like UV rays or temperature fluctuations.
- Infrequent Use: Cars that sit idle for extended periods might face issues due to stagnant parts. Lack of regular operation can exacerbate age-related wear.
- Oxidation: Metal components can oxidize over time, affecting their function.
Diagnosing Age-Related Distributor Issues
- Physical Inspection: A close look at the distributor might reveal cracks, warping, or other visual signs of wear.
- Performance Assessment: A car that’s displaying ignition problems or erratic behavior may hint at an aging distributor.
- Consult Historical Data: Knowing the last time the distributor was checked or replaced can provide insights into its age and potential wear.
DIY Repairs for Age-Related Issues
- Component Replacement: Consider replacing visibly worn parts, like the distributor cap, rotor, or even the entire distributor if necessary.
- Regular Maintenance: Even if the car isn’t driven frequently, ensure it undergoes regular maintenance checks.
- Proper Storage: For cars that are stored for long durations, ensure they’re kept in controlled conditions to minimize age acceleration.
Repair/Replacement Costs
- Distributor Cap: A replacement distributor cap can range from $20 to $80, depending on the brand and vehicle model.
- Distributor Rotor: Rotors usually cost between $10 and $40.
- Complete Distributor: Replacing the entire distributor might set you back anywhere from $50 to $300 based on the model and make of your vehicle.
- Labor Fees: If opting for professional installation or maintenance, expect labor costs to range from $70 to $200.
- Diagnostics: A professional assessment of age-related distributor issues might come at a cost of $40 to $90.
To conclude, age might be an unavoidable factor, but its effects on a distributor can be mitigated. Regular maintenance, proper storage, and timely interventions can help ensure that even an older distributor performs effectively. If you cherish an older vehicle or a classic, giving its distributor the attention it needs can prolong its life and maintain its vigor.
Bad Distributor Causes #13: Improper Maintenance Techniques
Sometimes, it’s not about whether maintenance was done, but how it was done. Using improper cleaning agents, excessive force during cleaning or installation, or even overlooking certain maintenance steps can lead to issues. Always ensure you follow recommended maintenance guidelines and techniques. When in doubt, seek guidance from experts or refer to your car’s manual.
Symptoms of Improper Maintenance Techniques
- Reduced Engine Performance: You might notice a decrease in the car’s overall performance, including misfires, reduced mileage, or rough idling.
- Frequent Ignition Issues: Problems such as hard starts or engine stalling can emerge from improperly maintained distributor components.
- Visible Physical Damage: Components like the distributor cap might show scratches, warping, or even breakages from rough handling.
- Unusual Noises: A poorly installed distributor or its components may result in unusual sounds during engine operation.
Causes of Distributor Issues from Improper Maintenance
- Using Incorrect Cleaning Agents: Some cleaning agents can corrode or degrade the materials of the distributor.
- Overlooking Maintenance Steps: Skipping vital maintenance processes can lead to undetected wear and tear.
- Excessive Force: Using too much force during cleaning or installation can damage delicate parts of the distributor.
Diagnosing Issues Stemming from Improper Maintenance
- Physical Inspection: Check the distributor for signs of physical damage or wear that seems unnatural or premature.
- Performance Checks: Monitor the engine’s behavior. If it shows symptoms soon after a maintenance procedure, it could be tied to the recent work.
- Maintenance Review: Reflect on the recent maintenance processes and check against the recommended procedures to identify any discrepancies.
DIY Repairs for Maintenance-Related Issues
- Re-examine Maintenance Techniques: Consult the car’s manual or online resources to ensure all steps are followed correctly.
- Component Replacement: If certain parts are damaged due to improper maintenance, consider replacing them.
- Consultation: For those uncertain about their maintenance skills, it might be worthwhile to consult with a mechanic or attend workshops on proper car maintenance.
Repair/Replacement Costs
- Distributor Cap: If the cap is damaged, replacements can cost between $20 and $80.
- Distributor Rotor: A new rotor can be priced between $10 and $40.
- Complete Distributor: If the entire unit needs replacement, expect prices ranging from $50 to $300 based on the car’s specifics.
- Labor Fees: Should you opt for professional intervention, labor costs can be anywhere from $70 to $200.
- Diagnostics: A professional evaluation for distributor issues due to maintenance can cost between $40 and $90.
In wrapping up, while maintaining your car is essential, doing it correctly is equally crucial. Adhering to the right techniques and guidelines ensures that each component, including the distributor, functions efficiently and has an extended lifespan. Don’t hesitate to seek guidance when unsure; it’s always better to be safe than sorry.
Bad Distributor Causes #14: External Environmental Factors
Factors such as extreme cold, exposure to salt (in coastal areas or from road salt in snowy areas), or even the presence of pests can have an impact on the distributor. For instance, rodents might chew on wires connected to the distributor.
It’s essential to be aware of the unique challenges posed by your local environment. Taking preventative measures like parking indoors during extreme weather or checking for signs of pests can help mitigate these issues.
Symptoms of Issues from External Environmental Factors
- Unexplained Electrical Issues: Flickering lights, random misfires, or sporadic loss of power can be a sign of chewed wires or corrosion due to salt.
- Difficulty Starting in Cold: Extreme cold can affect the distributor’s functionality, leading to problems when trying to start the car.
- Visible Damage: There might be visible corrosion on the distributor cap, especially if you’re in coastal or snowy areas. Also, signs of chewed wires or nesting materials can indicate pest-related problems.
Causes of Distributor Damage from Environmental Factors
- Temperature Extremes: Both extreme cold and excessive heat can affect the distributor and its components.
- Salt Exposure: Salt, whether from the coast or road treatments in winter, can cause corrosion on exposed parts.
- Rodents and Pests: Small creatures might find the engine bay a cozy place to nest, leading them to chew on wires and other components.
Diagnosing Environmental Impact on Distributors
- Visual Inspection: Regularly check for visible signs of corrosion, especially after winter months or if living in coastal regions.
- Check Wiring: Inspect all wires connected to the distributor for any signs of damage or tampering by pests.
- Cold Start Observations: If your car has trouble starting in cold conditions, this can hint at environmental factor-induced issues.
DIY Repairs for Environment-Related Issues
- Anti-Corrosion Sprays: Utilize these sprays on the distributor cap and other components to ward off rust and corrosion.
- Wire Insulation: If you discover chewed wires, consider replacing them and using protective sheathing to deter future chewing by pests.
- Pest Deterrents: Consider natural repellents or ultrasonic pest repellents to keep critters away from your vehicle.
Repair/Replacement Costs
- Distributor Cap: A corroded or damaged cap might need replacement, which can cost between $20 and $80.
- Wiring: If wires are damaged, replacement costs can vary widely based on the extent of damage, ranging from $50 to $300.
- Labor Fees: If you require professional help, labor fees can be anywhere from $70 to $200.
- Diagnostics: A thorough check to ascertain the extent of environmental damage can cost between $40 and $90.
Being vigilant about the effects of your local environment on your vehicle can save you from unexpected repair costs and prolong the life of your distributor. Regular checks, especially after severe weather conditions or seasons known for pest activity, can make all the difference. Distributors, like any other part of a car, have their set of vulnerabilities.
While we’ve covered a comprehensive list of causes for distributor failures, the key takeaway remains the same: regular checks, maintenance, and prompt action can prevent most distributor problems. Staying proactive not only ensures the longevity of the distributor but also contributes to the overall health and performance of your vehicle.
Testing Distributor
If your car shows some or any of the bad distributor symptoms above, it can be a problem with your distributor. However, the symptoms above, such as engine misfires and check engine lights coming on, can be caused by a host of other problems. Engine and ignition system problems can also exhibit similar symptoms.
So, to be more certain about the exact issue your car is having, you’ll have to diagnose and test your distributor. Bad distributor symptoms can quickly escalate to an engine problem if left unaddressed. To avoid future engine problems, the distributor should be tested if the car shows any symptoms of a faulty one.
Bad Distributor Symptoms, Diagnosis #1: Tools You Will Need
- A Ratchet
- A Ratcheting Socket
- A Magnetic Screwdriver
- Spark Plug
- Light Or Spark Tester
- Multimeter Or Volt Meter
- A Flashlight
Bad Distributor Symptoms, Diagnosis #2: Check The Distributor Cap
The distributor cap is the most likely culprit for most distributor problems. Hence, it should be the first place when you suspect you have bad distributor symptoms. As we mentioned earlier in this article, the distributor caps are responsible for making the sparks. Therefore, a working distributor cap should be producing sparks that arc correctly.
The surface of the cap should be free from any dirt or grease. Here is a video on how the sparks arc when you crank your engine.
Then proceed to take the distributor cap off using your racket and socket. This should help you closely examine it for any signs of damage. If you find any signs of rust, erosion, or corrosion, it may be the cause of your distributor problems. Check the entire cap, including the cap rotor, for any signs of carbon traces or burns.
If there are carbon traces in the distributor cap, this could be the problem. Carbon traces misfire a spark between the plugs and may lead to the distributor working improperly. The misfired spark usually ends up as a failed electric connection.
Bad Distributor Symptoms, Diagnosis #3: Check The Contact Points
If the distributor caps are in great condition, the contact points are next to check for faults. However, you should only inspect the contact points after checking the condenser. If the condenser is damaged or opened, it could mean a broken wire lead. This causes arcing that can lead to severe damage to the engine.
After confirming the condenser is working well, proceed to check the contact points. Damaged contacts can lead to multiple ignition problems. Look for any signs of degradation, corrosion, or any other damage. If they appear burned, consider replacing them. Watch this video on how to test the condenser and contact points of a distributor.
Bad Distributor Symptoms, Diagnosis #4: Test The Arcing
For this part, you will have to test the spark plug wires. You can use a spark tester to check the arc of your distributor. This can be achieved by placing the spark tester in the metal part of the plug wire and fire the ignition. If the arc is firing, the tester will display a spark sign, and therefore that is not the problem.
If the spark tester does not detect any spark, use a test light to test the coil. Connect the test light to the side of the coil and fire the ignition. If it produces any light flashes, then the coil is not working properly. If you don’t get any flashes or sparks, the problem could be in the electrical wiring of your ignition system.
When the spark tester powers with the coil on positive, it means you have a faulty coil. If it powers on both terminals, it indicates a problem with the contact points. However, if both the negative and positive sides work, it means you’ll have to inspect the ignition wiring further.
Fixing A Bad Distributor
Now that you have established that you are dealing with a faulty distributor, what can be done to prevent further damage to the engine? Your next course of action will be determined by the kind of distributor problem you are experiencing. Here are some of the fixes you can apply to a bad distributor.
Bad Distributor Symptoms, Fixes #1: Cracked Distributor Cap
A cracked distributor cap should be replaced immediately to reduce rough idling. To prevent cracking, you should regularly inspect the distributor cap for any signs of faults. Whenever possible, avoid parking your car outside during low-temperature seasons. Try and protect your car from freezing conditions as best as you can.
Bad Distributor Symptoms, Fixes #2: Corroded Or Dirty Distributor Cap
Water vapor can concentrate in the distributor cap and cause corrosion to the distributor cap terminals. This water vapor comes in through the distributor shaft from the crankcase. The water vapor condenses into liquid when the engine cools down. Water reacts with the metallic parts of the distributor contacts and forms corrosion.
The battery is another major source of moisture in the distributor. When charged excessively by the alternator, the battery produces acid that concentrates inside the distributor. If the plug wires are porous, moisture trapped in their insulation casing may end up inside the distributor.
Apart from moisture, the distributor cap is also prone to collecting grime and dirt. Grime and dirt build-ups can easily be resolved using a multi-purpose cleaner like WD40. If you detect a clogged-up or corroded distributor cap, clean it up to restore its functionality. Replace the cap gasket if you notice the distributor cap is loose.
“engine compartment, distributor side” by Jim of JimOnLight is licensed under CC BY-NC-ND 2.0 ![]()
![]()
![]()
![]() .
.
Here are steps you should take to clean corroded or dirty distributor caps
1) Remove The Spark Plug Cables
If the cables are not labeled, label them so that you can put them back in the correct order. After labeling them, gently pull them out from the distributor cap terminals.
2) Remove The Cap
Use a screwdriver to unscrew the cap and gently pull it up. The distributor cap is usually fastened to the distributor with two screws on each side.
3) Clean The Contacts
Now that you have exposed the distributor metal contacts use a soft bristle brush and some contact cleaner to clean. The brush should be soft and abrasive enough to remove any oxidation layer or carbon buildup on the metal terminals. Don’t forget to spray some WD40 on the internal metal contacts.
4) Dry It Out
If you have access to a source of compressed air, use it to dry out the cleaned cap. Compressed air will help dry it out quickly and get out any left debris. However, you can also use a clean rug to rub the distributor cap dry.
5) Put It Back Together
Now apply the reverse of the whole process. Put the cap back into place and fasten the screws on the sides. If the gasket is worn out, it may allow moisture into the cap and cause more problems. Replace it if need be. For further protection, apply a light silicone seal around the cap base. Connect the spark plug wires in the right order as labeled. Crank up your engine to see if the fix applied.
Distributor Cap Replacement
If you have applied the above fixes and still experience distributor problems, it’s best to consider replacing your distributor cap and rotor. You can expect to pay anywhere from $60 to $130, depending on where you get the services. This total cost includes labor costs and purchasing both parts.
Most car enthusiasts or anyone with decent car knowledge can save money by doing the replacement themselves. This does not require any sophisticated tools. All you need is a ratchet, ratchet socket, screwdriver, and a good service manual to walk you through the whole process.
The following video contains easy DIY steps on how to replace the distributor. Just make sure to apply the necessary safety precautions like disconnecting the car battery lest you zap yourself.
How To Replace A Distributor
Car distributors play a pivotal role in the engine’s ignition system. If yours has shown signs of failure, timely replacement ensures your vehicle operates optimally. Follow this guide to smoothly replace a faulty distributor.
First off, here are some tools that you’ll need:
- A replacement distributor (new or rebuilt)
- Flathead screwdriver
- Socket wrench set
- Distributor point and condenser
- Point gap tool
- Timing light (optional but recommended)
- Marker or paint for marking purposes
Step 1. Preparing the Engine:
Getting to Top Dead Center (TDC): Begin by positioning the engine’s timing mark on the crank pulley to its TDC mark. If unfamiliar with the location, consult your vehicle’s service manual. To aid in visibility, especially if your engine is dirty, you can use a marker or paint to highlight the TDC mark.
Step 2. Removing the Old Distributor:
Initial Checks: Before you dive in, compare your old distributor with the replacement. They should be identical in length, gear tooth count, and overall design. If not, halt the process and acquire the correct distributor.
Unfastening: Locate the hold-down clamps or bolts. Using a flathead screwdriver or the appropriate socket, loosen and remove them. With those unfastened, carefully lift out the old distributor.
Step 3. Preparing the New Distributor:
Setting the Point Gap: On the distributor’s top, replace the point and condenser. The point gap tool will aid in setting the accurate firing gap. Secure the point on a stable surface or in a vise for precise adjustment. Once set, insert the point into the distributor.
Step 4. Installing the New Distributor:
Placement: Guide the replacement distributor into the previously emptied slot. Gently lower it, ensuring the distributor gear meshes with the camshaft gear.
Alignment: Once seated, the distributor might require slight rotation to align with the oil pump drive shaft. This step is crucial; remember the TDC mark you noted earlier? That’s your guide. Rotate the distributor, either by hand or using a tool like a flathead screwdriver, until it aligns perfectly.
Securing: With the distributor aligned, reattach the hold-down clamps or bolts, ensuring it’s snug but not overly tightened.
Step 5. Testing the Installation:
Reconnect and Start: With the new distributor in place, reattach the distributor cap. Now, ignite the engine. Listen closely to the engine’s rhythm. A smooth, hesitation-free start indicates a successful replacement.
Fine-tuning (Optional): For those seeking precision, consider using a timing light to ensure your ignition timing is spot-on. This ensures optimal engine performance and efficiency.
Step 6. Wrapping Up:
Final Checks: Before declaring success, give your work a thorough review. Ensure all components are secure and in their rightful places. A quick visual inspection can prevent potential issues down the road.
Drive Test: For the ultimate test, take your vehicle for a spin. Pay attention to its acceleration and overall performance. Smooth operations confirm that you’ve nailed the replacement.
Replacing a car distributor, though a bit intricate, is manageable with the right tools and a systematic approach. Now, with a newly installed distributor, your car should be back to its prime performance. Remember, as with all car repairs, when in doubt, consult a professional mechanic or your vehicle’s service manual.
How Long Does A Distributor Last
The distributor rotor and cap are highly prone to wear and tear due to the high voltage they are regularly subjected to. Each time you start your engine, high voltage flows through your distributor. They are therefore bound to wear out with time. The ignition system should also be inspected thoroughly after replacing the distributor parts.
To catch your distributor failing, ensure the ignition system is thoroughly inspected during routine maintenance. However, where you park your vehicle during winter will determine the lifespan of your distributor cap. The distributor is also likely to fail if you keep driving your car through deep puddles. This increases the chances of getting moisture into the distributor cap.
Routine servicing is recommended for most vehicles after every 25000 miles. Regardless of the current condition of the distributor cap and rotor, most service shops will often replace the two parts. If your car is not used often, it is advisable to replace the cap and rotor every two years if they don’t show any bad distributor symptoms.
Bad Distributor Symptoms Essential Knowledge
- The distributor is a key component of a vehicle’s ignition system that distributes electrical current to the spark plugs in the correct firing order.
- A bad distributor can cause a range of issues, including rough idling, stalling, and decreased engine performance.
- One common symptom of a bad distributor is backfiring or misfiring, which occurs when the spark plugs fire out of order or at the wrong time.
- Another symptom is difficulty starting the vehicle, as the distributor may not be distributing enough electrical current to the spark plugs.
- A bad distributor can also cause a decrease in fuel efficiency, as the engine may not be running as smoothly as it should be.
- Overheating can also occur, as a malfunctioning distributor can cause the engine to work harder than it needs to.
- A worn or damaged distributor cap can also lead to a bad distributor, as it can allow moisture or debris to enter the system and cause electrical problems.
- An old or dirty rotor can also cause issues with the distributor, as it can prevent electrical current from flowing smoothly to the spark plugs.
- A professional mechanic can diagnose a bad distributor by performing a visual inspection, as well as testing the electrical current and other components of the ignition system.
- Replacing a bad distributor can be a complex and time-consuming process, and it is important to use high-quality replacement parts and ensure proper installation to avoid further issues.
Bad Distributor Symptoms: In Conclusion…
The distributor is an integral part of the ignition system. It plays a critical role in the workability of your vehicle. For sure, a bad distributor is not something you would want in your car. A faulty distributor renders the whole car unusable and highly inefficient. Therefore, it is prudent to know how to spot bad distributor symptoms before they escalate to a faulty engine.
However, if it does happen and your car’s distributor fails, it is not the end of the road. Fortunately, you can easily fix or replace a bad distributor with the help of a few simple tools. Some distributor problems may, however, require the intervention of a seasoned mechanic.
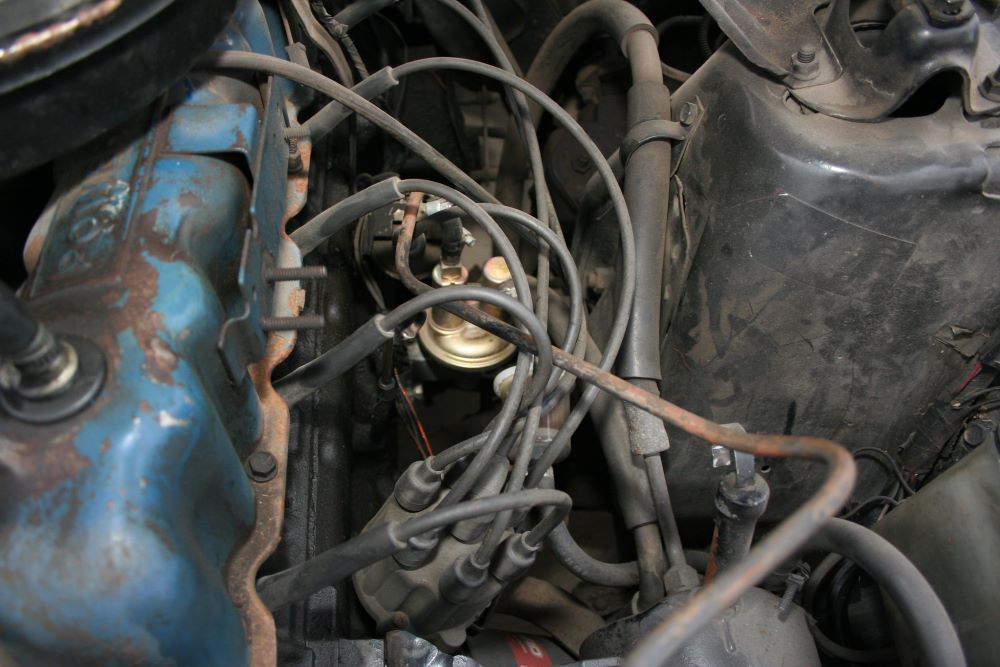
“engine compartment, distributor side” by Jim of JimOnLight is licensed under CC BY-NC-ND 2.0 ![]()
![]()
![]()
![]() .
.
Bad Distributor Symptoms: Frequently Asked Questions (FAQs)
Here are some popular frequently asked questions (and their answers) about the bad distributor symptoms…
What Does a Distributor Do in a Car
A distributor in a car plays a vital role in the ignition system. It directs the high-voltage electrical current from the ignition coil to the spark plugs in a specific firing order. This ensures that the air-fuel mixture in the cylinders ignites correctly, which helps the engine run smoothly and efficiently.
How Does a Distributor Work
A distributor works through a rotating arm, known as a rotor. This rotor spins inside the distributor cap. As the rotor turns, it passes close to multiple contacts, one for each engine cylinder. When the rotor passes by a contact, it sends an electrical current to the spark plug connected to that contact. This causes the spark plug to ignite the air-fuel mixture in the cylinder.
How to Test Distributor
To test a distributor, start by examining it visually for cracks or damage. Next, check the distributor cap and rotor for signs of wear or corrosion. Using an ohmmeter, you can test the distributor’s primary and secondary resistance. If readings are outside the specified range, the distributor might be faulty. Finally, you can start the engine and point a timing light at the distributor to check its performance. If it’s not distributing the spark correctly, it might need adjustment or replacement.
How Often Should You Change Spark Plugs and Wires
It’s advisable to change spark plugs every 30,000 to 100,000 miles, depending on the type and vehicle recommendations. Spark plug wires, on the other hand, typically last around 60,000 to 70,000 miles. However, always refer to your vehicle’s owner’s manual for specific recommendations.
How to Tell If Distributor Timing Is Off
If the distributor timing is off, you might notice a few signs. Your car could experience rough idling, poor fuel economy, and reduced power. It might even backfire or have trouble starting. Another method to check is by using a timing light. If the marks you see with the timing light don’t align with the manufacturer’s specifications, the timing is likely off.
What Is a Distributor Cap
A distributor cap is a component of the ignition system, covering the distributor and its internal rotor. It’s typically made of hard plastic and has several posts, each corresponding to a cylinder of the engine.
What Does a Distributor Cap Do
The distributor cap’s main job is to direct the electrical current from the rotor to the spark plugs. As the rotor turns inside the cap, it sends an electrical current to each contact on the distributor cap in a specific sequence. This ensures that each spark plug fires at the right time, allowing the engine to run efficiently.
What Does a Bad Distributor Rotor Look Like
A bad distributor rotor often shows visible signs of wear or damage. You might see burn marks, corrosion, or carbon buildup on the metal tip. The surface can also appear worn out, pitted, or grooved. Any noticeable cracks or chips in the rotor can also indicate it’s in bad shape.
What Does a Bad Distributor Cap Look Like
A faulty distributor cap usually has visible defects. Inside, you might find carbon tracks, which look like dark lines or streaks, indicating electrical arcing. Other signs include cracks, corrosion on the terminals, and burn marks. Moisture buildup or signs of melting on the cap can also suggest issues.
How to Tell If a Distributor Is Bad
When a distributor is failing, your vehicle might show several symptoms. These include hard starting, misfires, stalling, a noticeable drop in engine performance, or even a no-start condition. Additionally, you might hear a whining or grinding noise from the distributor. A visual inspection might reveal physical damage to the distributor components.
How to Test for a Bad Distributor Cap
To test for a bad distributor cap, start with a visual inspection, looking for cracks, carbon tracks, and corrosion. If you spot moisture inside, it’s a bad sign. Next, try starting the car in a dark environment. If you see sparks jumping from the cap, it’s faulty. Using an ohmmeter, you can also check for continuity between the center post and the individual terminals; a lack of continuity suggests a bad cap.
Can a Bad Distributor Cause Loss of Power
Yes, a bad distributor can definitely lead to a loss of power. If the distributor isn’t functioning correctly, it can cause misfires, incorrect spark timing, or even prevent some cylinders from firing at all. This will lead to reduced engine efficiency, resulting in noticeable power loss.
What Happens If You Install a Distributor Wrong
Installing a distributor incorrectly can lead to several issues. The most immediate concern is that the engine may not start. If it does start, it might misfire, backfire, or run roughly. Your timing will be off, leading to poor performance, decreased fuel efficiency, and potential engine damage over time.
How to Check Spark from Coil to Distributor
To check the spark from the coil to the distributor, follow these steps: 1) Turn off the engine and disconnect the coil wire from the distributor cap. 2) Hold the end of the wire close to a metal part of the engine using insulated pliers. 3) Have someone crank the engine while you watch for a spark. 4) If a strong blue spark jumps from the wire to the metal, the coil is working. If not, there might be an issue with the coil or the ignition system. Always take precautions when working with the ignition system, as it involves high voltage.
How to Clean a Distributor Cap
Cleaning a distributor cap can help improve its function and prolong its life. Start by removing the distributor cap from the engine. Use a cloth or brush to wipe away any dirt, dust, or debris. For stubborn grime, a mixture of water and mild detergent can help. After cleaning, ensure the cap is completely dry before reinstalling. Remember to also inspect the cap for cracks or damage while cleaning.
Where Is the Distributor Cap
The distributor cap is located in the ignition system of the car. In most vehicles, you can find it on or near the top of the engine, usually at one end of the engine block. The cap is a round or cylindrical component with multiple wires connected to it, leading to each of the spark plugs.
What Does a Bad Distributor Sound Like
A failing distributor might produce a grinding, whining, or high-pitched squealing noise. These sounds can result from worn-out bearings or internal components rubbing against each other. Any unusual noises coming from the area of the distributor should be investigated promptly.
How to Replace Distributor Cap
To replace a distributor cap: 1) Turn off the engine and disconnect the battery. 2) Label the spark plug wires to ensure you reconnect them in the correct order. 3) Remove the wires from the old distributor cap. 4) Unfasten the screws or clips securing the cap and lift it off. 5) Position the new cap in place and secure it using the screws or clips. 6) Reattach the spark plug wires in the correct order. 7) Reconnect the battery and start the engine to ensure everything functions correctly.
How to Connect Spark Plug Wires to a Distributor Cap
When connecting spark plug wires to a distributor cap: 1) Start by knowing the firing order of your engine. This information is typically found in the vehicle’s service manual. 2) Locate the number one cylinder on your engine and its corresponding terminal on the distributor cap. 3) Attach the spark plug wire from the number one cylinder to the distributor’s appropriate terminal. 4) Following the firing order, connect the rest of the wires. Ensure the wires run cleanly without crossing over each other, which can cause misfires.
Can Timing Cause Misfire
Yes, incorrect timing can indeed cause misfires. If the distributor’s timing is off, it can cause the spark plugs to fire at the wrong time. This incorrect timing can lead to incomplete combustion, resulting in misfires and poor engine performance.
How to Change Distributor Cap and Rotor Chevy 350
Changing the distributor cap and rotor on a Chevy 350: 1) Disconnect the battery to ensure safety. 2) Label each spark plug wire with its corresponding cylinder number. 3) Gently remove the spark plug wires from the distributor cap. 4) Unfasten the distributor cap clips or screws and remove the cap. 5) Remove the rotor, which might require unscrewing a retaining screw or simply pulling it off the distributor shaft. 6) Install the new rotor, ensuring it’s firmly seated. 7) Place the new distributor cap on and fasten it. 8) Reconnect the spark plug wires to the cap in the correct order, following the Chevy 350’s firing order. 9) Reconnect the battery, start the engine, and check for proper function.
Can a Bad Distributor Cause No Spark
Yes, a malfunctioning distributor can lead to no spark. If any component inside the distributor – like the cap, rotor, or points – is faulty, it can disrupt the electrical flow, preventing the spark plugs from firing.
Will Bad Spark Plugs Cause Car to Stall
Yes, bad spark plugs can cause a car to stall. Worn out or fouled spark plugs might not ignite the air-fuel mixture effectively, leading to an irregular combustion process, which can make the engine run roughly or stall.
How Much Is a Distributor Cap
The cost of a distributor cap can vary based on the make, model, and year of the vehicle, as well as the brand and where you purchase it. On average, distributor caps can range from $10 to $50, but for some high-end or specialty vehicles, it might be higher. It’s best to check with local auto parts suppliers or online retailers for specific pricing for your vehicle.
Do Modern Cars Have Distributors
No, most modern cars do not have distributors. Instead, they use coil-on-plug or coil pack systems in conjunction with electronic ignition systems. These systems provide better fuel efficiency, power, and reduced emissions. Distributors were prevalent in older vehicles, mainly before the late 1990s and early 2000s.
Will Bad Coil Pack Prevent Car from Starting
Yes, a bad coil pack can prevent a car from starting. If the coil pack isn’t functioning properly, it won’t generate the necessary spark to ignite the air-fuel mixture in the engine’s cylinders. This lack of spark can result in a no-start condition or cause the engine to run poorly if only one or some of the coils are malfunctioning.