

Are you annoyed by the weird knocking sounds while you’re driving? Let’s be real, that is not a pleasant sound to hear by any means and it really grinds our gears. You may not know but all this unpleasantness is caused by a couple of very small ball bearings on a car in a broken CV joint. Well, worry not as in the next few pages, we’ll be solving that itch on the back of your head.
In this article, we will be focusing on how a CV joint tends to break. After all, not all mechanical parts are supposed to last a lifetime, are they? Luckily for you, we’ll also be discussing some other CV joint-related technicalities that will help us in our journey to understand (and rid of) this nuisance.
- CV Joint
- CV Joint Function
- Tripod Joints
- U Joint
- Broken CV Joint Causes
- Bad CV Joint Symptoms
- CV Joint Replacement
- CV Joint Replacement Cost
- Frequently Asked Questions
CV Joint
In a typical FWD car, one would assume that the front wheels are directly connected to the driveshaft through an axle (transaxle). The axle then transfers the engine power (and torque) to the wheels. Yes, part of this statement is true. If you’d see a live example of a front CV axle, you’ll see two (main) joints throughout that axle. In this article, we’ll be discussing these two joints. The inner and outer CV joints of a vehicle.
Have you wondered why an FWD car’s front wheels are always getting the same engine power and torque no matter what position or the angle they’re at? Well, it’s because of a CV (Constant Velocity) joint located at either end of the axle that connects a car’s front wheels with the driveshaft.
These joints help the front wheels accommodate steering, but more importantly, deliver power at different (wheel) angles.
CV joints are most associated with FWD cars which is where you’d often see them. Meanwhile, in the case of an RWD car with rear independent suspensions, CV joints can be located in their rear axles. This addresses the question of what. Now, onto more important questions. How?
CV Joint Function
As we learned, a (front) transaxle isn’t complete without joints. Typically, in FWD cars, there are two joints on a transaxle. The joint that connects the driveshaft to the transmission is known as the inner CV joint. Whereas, the joint linking the driveshaft to the wheels is known as the outer CV joint.
Upon closer inspection, you’d see a mechanism assembly inside the ‘CV Boot’. The assembly is made up of a CV joint cage which contains 6 small sphere-type ball bearings. Covered in grease, these ball bearings slide (and rotate) inside their ‘grooves’ which is another part of that bearing.
By doing so, these bearings offer more angle articulation to the wheels no matter what angle these wheels are in or how unequal the road is hence the term ‘Constant Velocity’. The sole purpose of the CV joint is to pass on the same ratio of engine torque to the wheels despite the road surface.
The same is the case with 4WD, RWD, and AWD drivetrain cars/trucks. Whichever wheel is getting power, has to have a CV joint. That said, CV joints can also be found in some modern RWD cars that have independent rear suspension. Basically, without these joints, your wheels have no power, and your car is rendered useless.

The above paragraphs explain the function and description of a traditional Rzeppa joint. Also, this type of joint has been in use for over nine decades. Basically, a century. And, it is still being used in many cars. That said, there are other types of joints other than a Rzeppa joint such as tripod joints, and Double Cardan joints, each playing different important roles.
Tripod Joint
Tripod joints, as the name suggests, use three cylindrical barrels on the sides of a round bearing. Needles help in keeping these cylindrical barrels connected to the mainframe (or the spider). Unlike the Rzeppa joints, tripod joints do not use ball bearings car hence making them less complicated and cheaper to make.
The back and forth movement in these rollers offers some angle articulation to the axle. Also, the shaft-connected is able to plunge, to some extent, so that the engine movement (caused by excessive torque) does not instantly break the bearings. Because a tripod joint does not use a ball-bearing system, its mechanics are less complicated, thus making them much more cost-effective.
U Joint
Simply put, a U joint acts as a link between the rear differential and the driveshaft of the vehicle. By doing so, it helps transfer torque from the front to the rear. It works the opposite way in the case of mid-mounted/ rear-mounted engines.
A cross is used to link both axles. A fork at either end of the axles allows that cross to slide right in. That way, both these axles become a single unit. This may sound like a complicated procedure but once you see it in action you’d be amazed to know how simple it really is.
Moreover, the simplistic design makes it convenient to replace. The major problem with a CV joint is its ball bearings. Once they go bad, you are left with no choice but to replace the whole CV joint unit. Unlike, the CV joint, a U joint discards the use of ball-bearings hence making them easier to replace or even work with. More importantly, they are cheaper than (Rzeppa) CV joints.
U joints are common in RWD, AWD, and 4WD cars that need the power to be sent to the rear wheels. Therefore, it eliminates the possibility of existing in FWD cars.
CV Boot
A CV boot is the rubber coating that protects the ball-bearing assembly from any outside physical matter such as dust and water. It uses a special type of grease/lubricant, known as molybdenum disulfide, to create a slippery-smooth surface. The grease allows the ball-bearings to move freely against their grooves.
Also, without this lubricant, the only noise you’d be hearing would be of these steel parts grinding against each other.
What the CV boot does is that it prevents the grease from leaking out as well as preventing dust particles to enter the assembly. Some CV boots are made to last whereas others can be sensitive and can lead to a broken CV joint.
Yes, all rubbers being rubbers, CV boots can also break. In fact, a broken CV boot is one of the (several) ways to determine a broken CV joint as we will explain later.
Broken CV Joint Causes
We know, like all parts and components, CV joints are bound to fail. Even though CV joints are made to last, they can fall apart. Improper and abusive use of any machinery can have serious consequences in the form of long, hefty bills at the workshop. Let’s see some of the reasons behind a broken CV joint.
1. Broken CV Boot/ CV Boot Unclamped
This is the easiest, and most common way, of diagnosing or causing a CV joint to fail. The sole purpose of installing a CV gaiter (Boot) around the CV joint was to prevent dust particles from entering the CV joint mechanism. And as we said, rubbers are rubbers, and they can break one way or another.
Eventually, when the rubber breaks, not only does the lubricant leak out but it paves way for water and dust to enter the joint’s assembly. As a result, the lack of lubricant present in the joint causes the ball bearings to grind against its grooves or its inner race. This grinding comes in the form of clicking (or knocking) noise from the wheels. Also, this is one of the symptoms that we will read later.
2. Normal Wear And Tear
A ball-bearing joint never rests and remains in constant motion. Therefore, with the passage of time, these joints can wear out. Too much grinding against the grooves will eventually break a CV joint until you start hearing a clanking noise coming from the wheels.
Also, over time cracks may start appearing on the CV boot causing the lubricant to leak all over the place. It is recommended to change the CV joint (or axle) upon reaching a certain mileage (70,000 – 130,000 miles).
3. Unnecessary Load And Rough Usage
Putting unnecessary and excessive weight on ANY joint can sharply decrease its life. The same is the case with the CV joint. A CV joint can withstand only enough weight so overloading a vehicle can cause friction among the ball-bearings and eventually, break them.
Also, a car that has had a rough life for instance a beaten-up suspension is more likely to have a broken CV joint. Factors such as driving too fast over uneven surfaces or potholes can, and will, cause permanent harm to a vehicle’s suspension system (and the CV joint).
Bad CV Joint Symptoms
We read how important a role the CV joint plays in the proper functioning of the car. Failure in addressing the symptoms of a broken CV joint can cost you, and your car, in the long run. Here are some signs that you can look out for a broken CV joint and get it replaced before it invites other problems to your doorstep:
1. Clicking Or Knocking Noises
There’s no better way to explain a broken CV joint than with clicking noises coming from the wheels. As soon as you hear any sort of clicking sound as you turn the vehicle on either side, you immediately know that the CV joint has broken.
One of the ways you can check for these clicking sounds is to jack up the car and jerk the wheels. Upon rocking the wheels back and forth you can confirm the knocking sounds. This way you’ll be able to determine if the CV joint is the actual cause of the clicking sounds or not.
2. Grease Leaking
The most common way to determine whether a CV joint is working is not is to check for any grease leakage around the tires or the CV boot itself. This accounts for a broken/ torn CV boot which renders the CV joint completely useless.
The grease that plays an important part in the ball-bearing mechanisms is no longer there which is why the joint cannot function properly. As a result, you hear clicking noises. This indicates friction in the ball-bearing joints. This is your cue to replace the CV joint immediately before it causes any further problems.
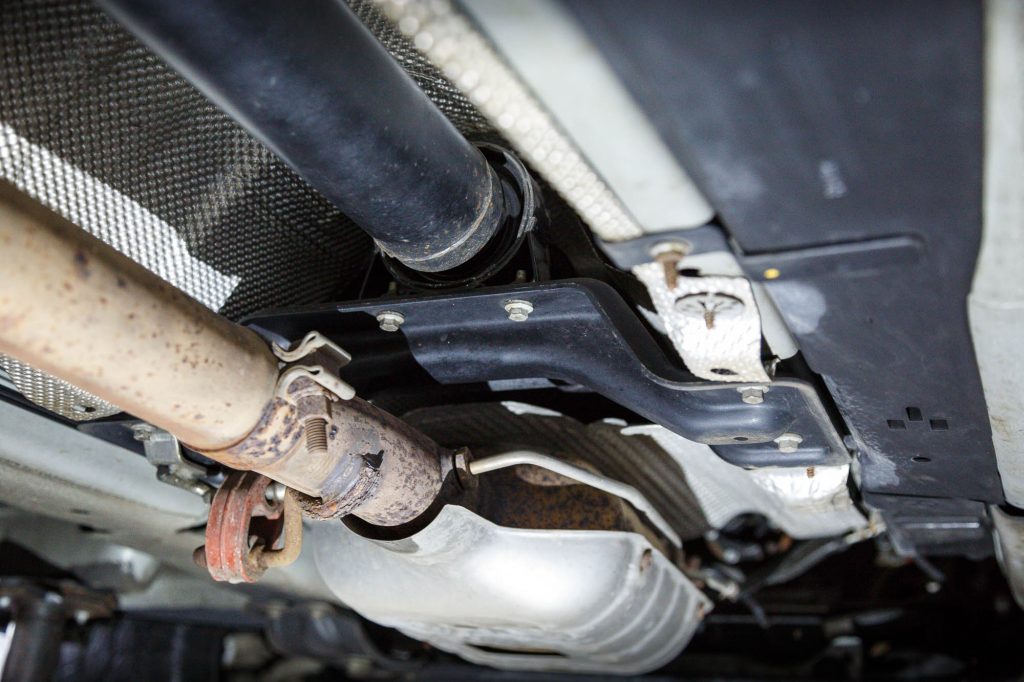
The best and most appropriate way to look out for leaking grease is to assess the car from underneath. Locate the CV boots which you can find right alongside the (front) wheels. You can easily spot any cracks in the rubber and source the grease leakage.
3. Car Shakes Upon Acceleration
Failure of inner CV joints amounts limits the axle’s smooth plunging. As you accelerate the engine passes the torque to the suspension through the CV axle. When the inner CV joints break, the wheels are unable to get that engine torque. As a result, the inner CV joints go through sudden jolts and movements in the form of shaking and (excessive) vibrations.
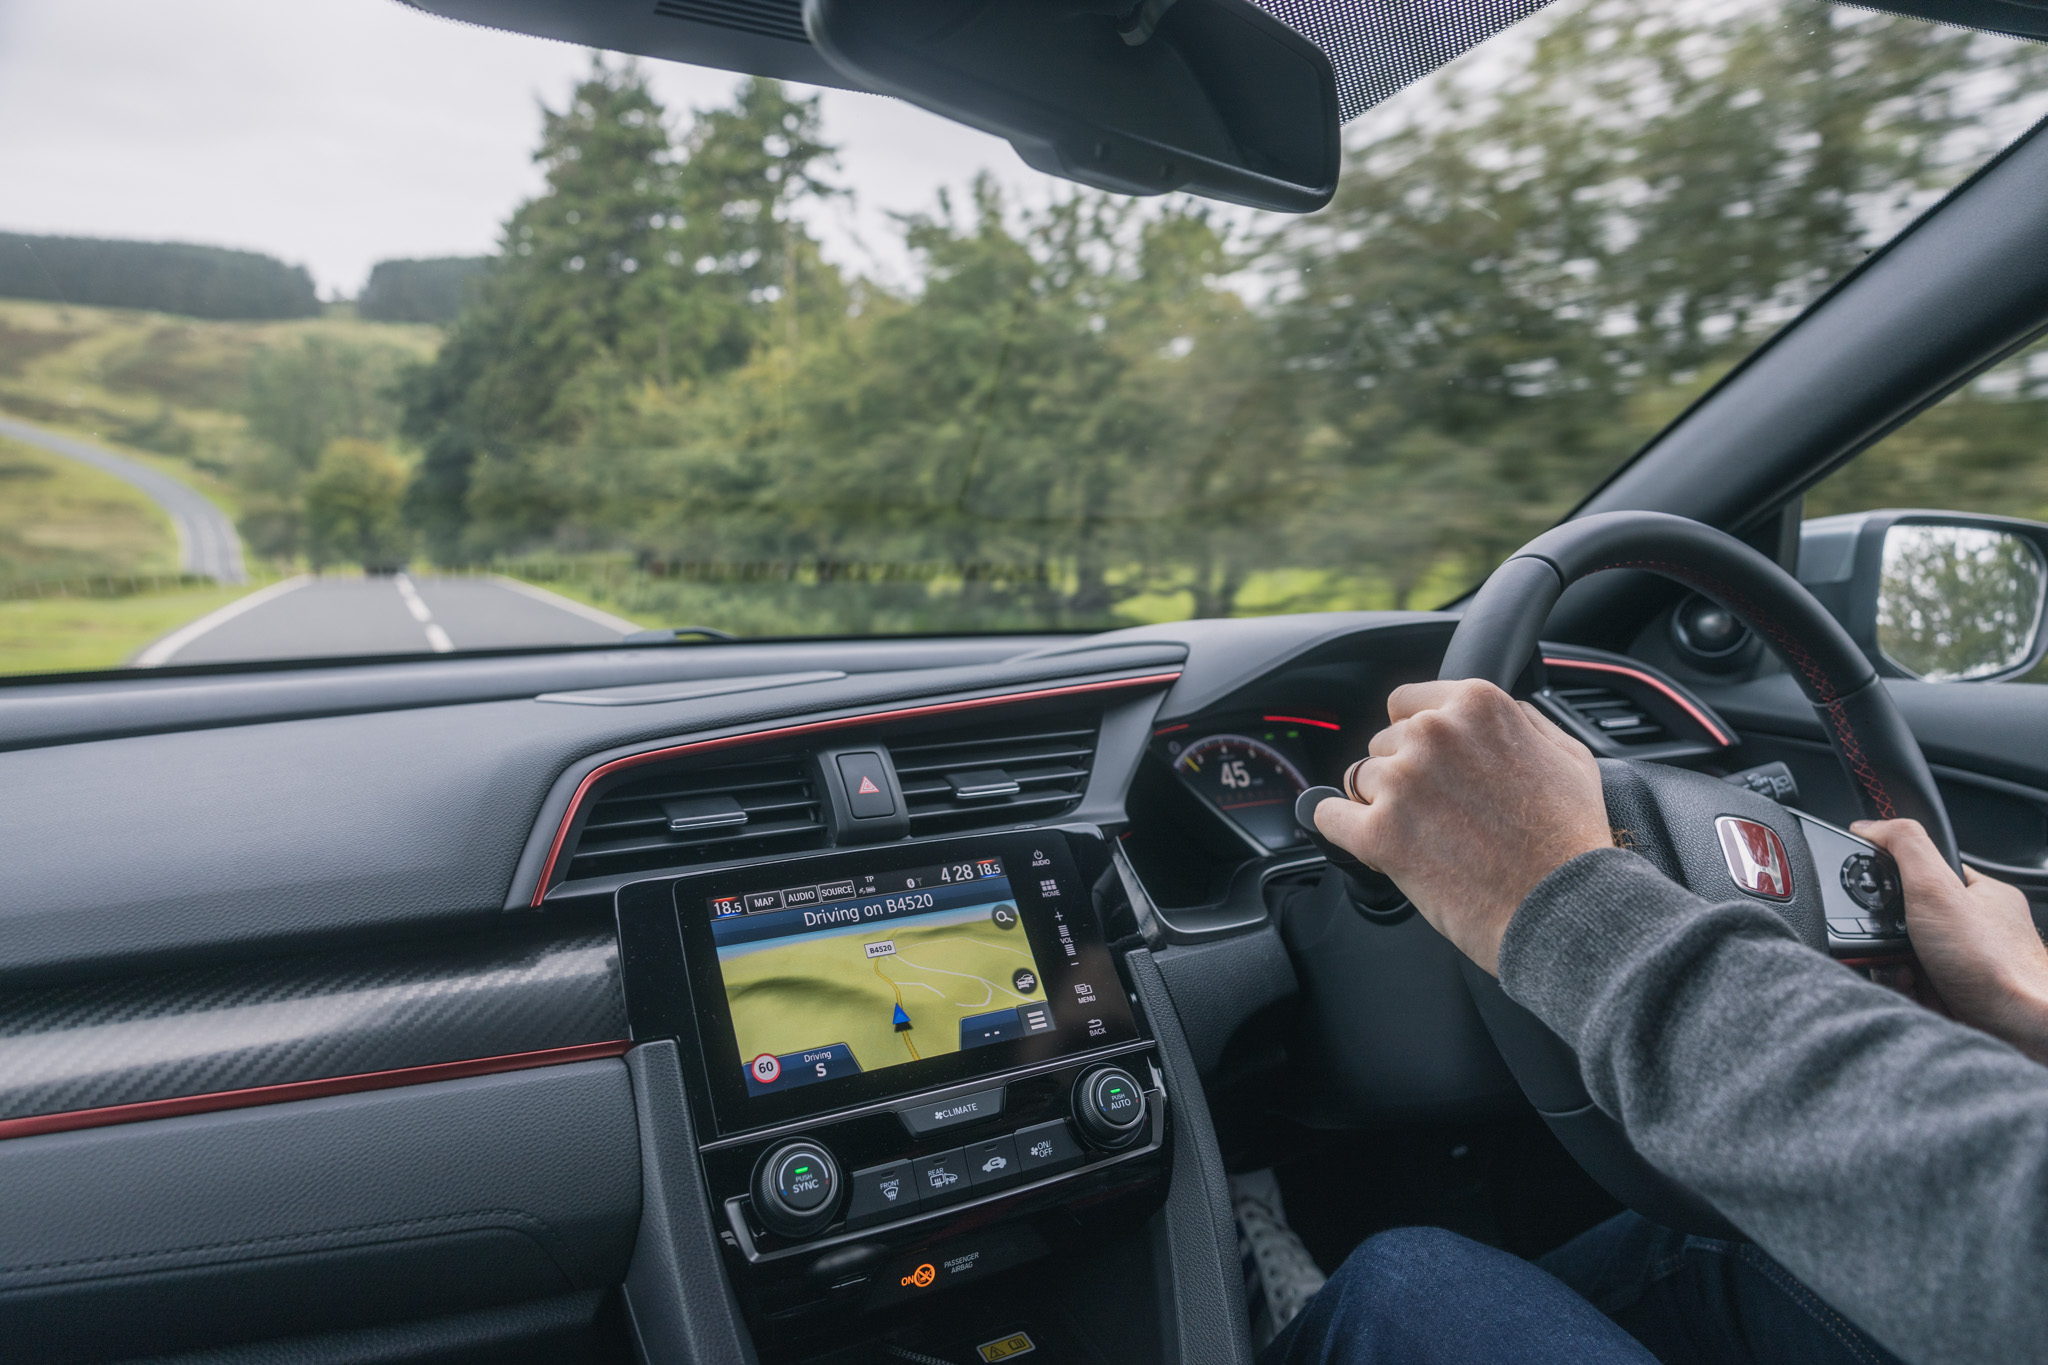
This creates a wobbling effect on the suspension which is why you’d feel the car shaking underneath you. Moreover, because the engine torque and suspension go hand in hand, the steering may create a tugging effect, or more importantly, it may vibrate. You can especially feel the car shaking on uneven road surfaces at speed.
This is something you should look out for as it can be the cause of a serious road accident or mishap. You won’t have complete control over your steering and your car would seem to want to go in either direction. This is the last thing you’d want at higher speeds.
So, if your car is shaking upon acceleration, chances are that the inner CV joints (or axle) have worn out.
4. Usage Over Time
CV joints get older with time. Even if a car is carefully driven throughout its life, the CV joint is bound to fail. Likewise, the bearing-ball mechanism is not something that rests. It’s constant in motion and factors such as ‘making sharp turns’, can make the ball-bearings work extra hard. And with that comes wear and tear.
The rubber found in the CV boot would eventually develop cracks, thus leaking the joint’s lubricant. And by now you would have known what exactly happens after a CV boot breaks.
Depending on the model of your car, CV joints need to be replaced after passing a certain mileage. For instance, some older cars tend to have weaker CV boots and break relatively quicker. Whereas, most modern cars’ CV boots can last more than 150,000 miles.
So, if your car has passed the mileage mark, chances are that your CV joint has gone through excessive wear.
CV Joint Replacement
Say that you have spotted some, if not all, of the above-described symptoms in one of your CV joints. You’d be figuring out the best and cheapest way to replace these joints. Should I just go to the workshop and spend an extra couple hundred bucks including parts and labor? Or, should I fix it at home and save some cash?
Well, the answer to both these questions depends on your willingness to replace the CV joint by yourself. If you don’t want to get your hands dirty and would instead spend extra hundred bucks at the mechanic’s, then there’s no better option than going to a workshop. There are specialists who know how to do their jobs and will do it the safest way,
However, if you are looking to learn more about your car, and how it works, then replacing a CV joint by yourself should be a great start. It can be a particularly interesting and fun task given you do each step just as described. For those looking to replace a CV joint by themselves, follow these steps to replace a CV joint the safe way:
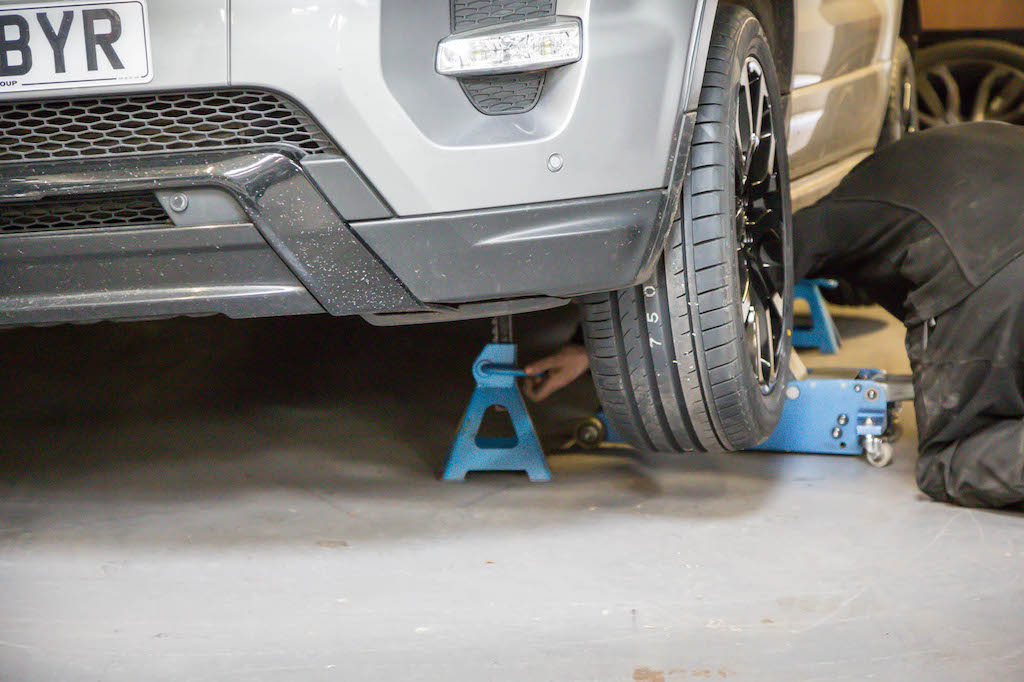
First Step: Jacking Up the Car And Removing The Wheel(s)
Firstly, jack up the car and support the vehicle’s weight on a couple of stands. Next, uncouple the wheel nuts from the assembly which would give you access to the CV joint and CV boot.
Second Step: Removing Cotter Pins From Wheel Assembly
Next, remove the cotter pins attached to the end of the tie rod to detach the rotors from the tie rod. Then, remove the cotter pins (and nuts) coupling the strut from the rotors. With the help of a tug, the assembly easily decouples. Now, that you have the assembly out of the way, you can begin removing the CV axle.
Third Step: Removing The CV Axle
Your next job is to decouple the inner CV joint which can be found linked to the vehicle’s transmission. Ply out the joint using hammer and (some) force. The CV axle should come right off the transmission. Upon uncoupling the CV axle, expect some grease to leak out of the joint which is why you should have an oil pan at your disposal.
You might be wondering why we are replacing the complete CV axle unit instead of just the CV joint. It’s because many recommend replacing the CV axle as a whole unit instead of just replacing the CV joint’s individual parts. This is mostly because of the CV boot which comes fixed in its place. Replacing a torn boot will always backfire as it is not in the same factory setting as before.
Also, in some cases, replacing the whole CV axle unit is cheaper (and less risky) than replacing a CV joint’s ball-bearing assembly by itself.
Fourth Step: Installing The CV Axle
With a hammer (and some force, of course) push the new CV axle back in its place. Do so until you hear a clicking noise that confirms that the axle is in place. After this, you basically have to repeat back the steps. Put the bolts (and cotter pins) back in place to couple the strut and the rotor(s). Slide the tie rod back to its place. Next, install the wheel(s) back in place and you’re good to go.
There. I just saved you a couple of hundred bucks and long waiting lines at the workshop.
CV Joint Replacement Cost
A CV joint replacement cost can vary depending on the model of your car. For instance, a Honda Civic CV joint replacement cost will cost you around $1,150 including labor which cost around $170. Now, the cost can vary between the trim levels so the higher the trim level you have, the higher the CV joint replacement cost you should expect.
However, not all mechanics quote the same price. Some quote higher while some quote more competitive prices. So, if you’re in the market for a new CV joint, make sure to visit different mechanics to get a general idea. Having more options is always better. This will help you bargain and figure out the best price.
That said, some older vehicles from the 2000s have a cheaper CV joint replacement cost. Their cost will set you back by about $500 including labor. That said, you always have the option to replace a CV axle (or joint) as described in the procedures above. Similarly, you have a number of YouTube videos at your disposal. Depending on what you’re looking for, you can bring down the cost (mostly labor cost).
Frequently Asked Questions (FAQs)
What Does A Broken CV Joint Sound Like
A broken CV joint tends to create clicking (or clacking) noises especially when turning. This clicking sound is the result of the ball-bearing mechanisms grinding against its grooves. Typically, this happens when the CV boot rubber develops cracks and causes the lubricant within it to seep out. If you hear these sounds, it is probably time for a new CV joint replacement.
Can You Drive With A Broken CV Joint
Yes, you can drive with a broken CV joint. However, it is not recommended as it can make things even worse. As soon as you hear clicking, clacking, and knocking sounds, that’s your cue to replace the CV joint. Failure in doing so can lead to bigger problems in the long run. CV axles are responsible for sending power to your wheels. A malfunctioning or broken CV joint will have difficulty sending power to the wheels. So not only are the driving dynamics affected, but the vehicle can stop working at any time on the road, which is quite dangerous.
How Much To Fix Broken CV Joint
The cost of fixing a broken CV joint depends mostly on the model of your car, and how complicated it is. Similarly, different mechanics quote different prices so you may want to check prices at different workshops. Some mechanics charge on an hourly basis while some include labor costs. To give a general idea, if you’re looking to replace a broken CV joint at a workshop expect a cost of around $600 – $800 including labor. However, if you’d rather fix a broken CV joint at home, you should be looking at a cost of about $500 – $600 as you’d only be requiring parts.